
Every Easter, I start saving onion peels weeks in advance - just tossing them into a bag in the freezer as I cook. By the time Easter rolls around, I've got enough to fill the whole pot. These naturally dyed Easter eggs are made the old-school way, with nothing but onion peels, beetroot, tights, and a little trick with smoked ham that makes all the difference.
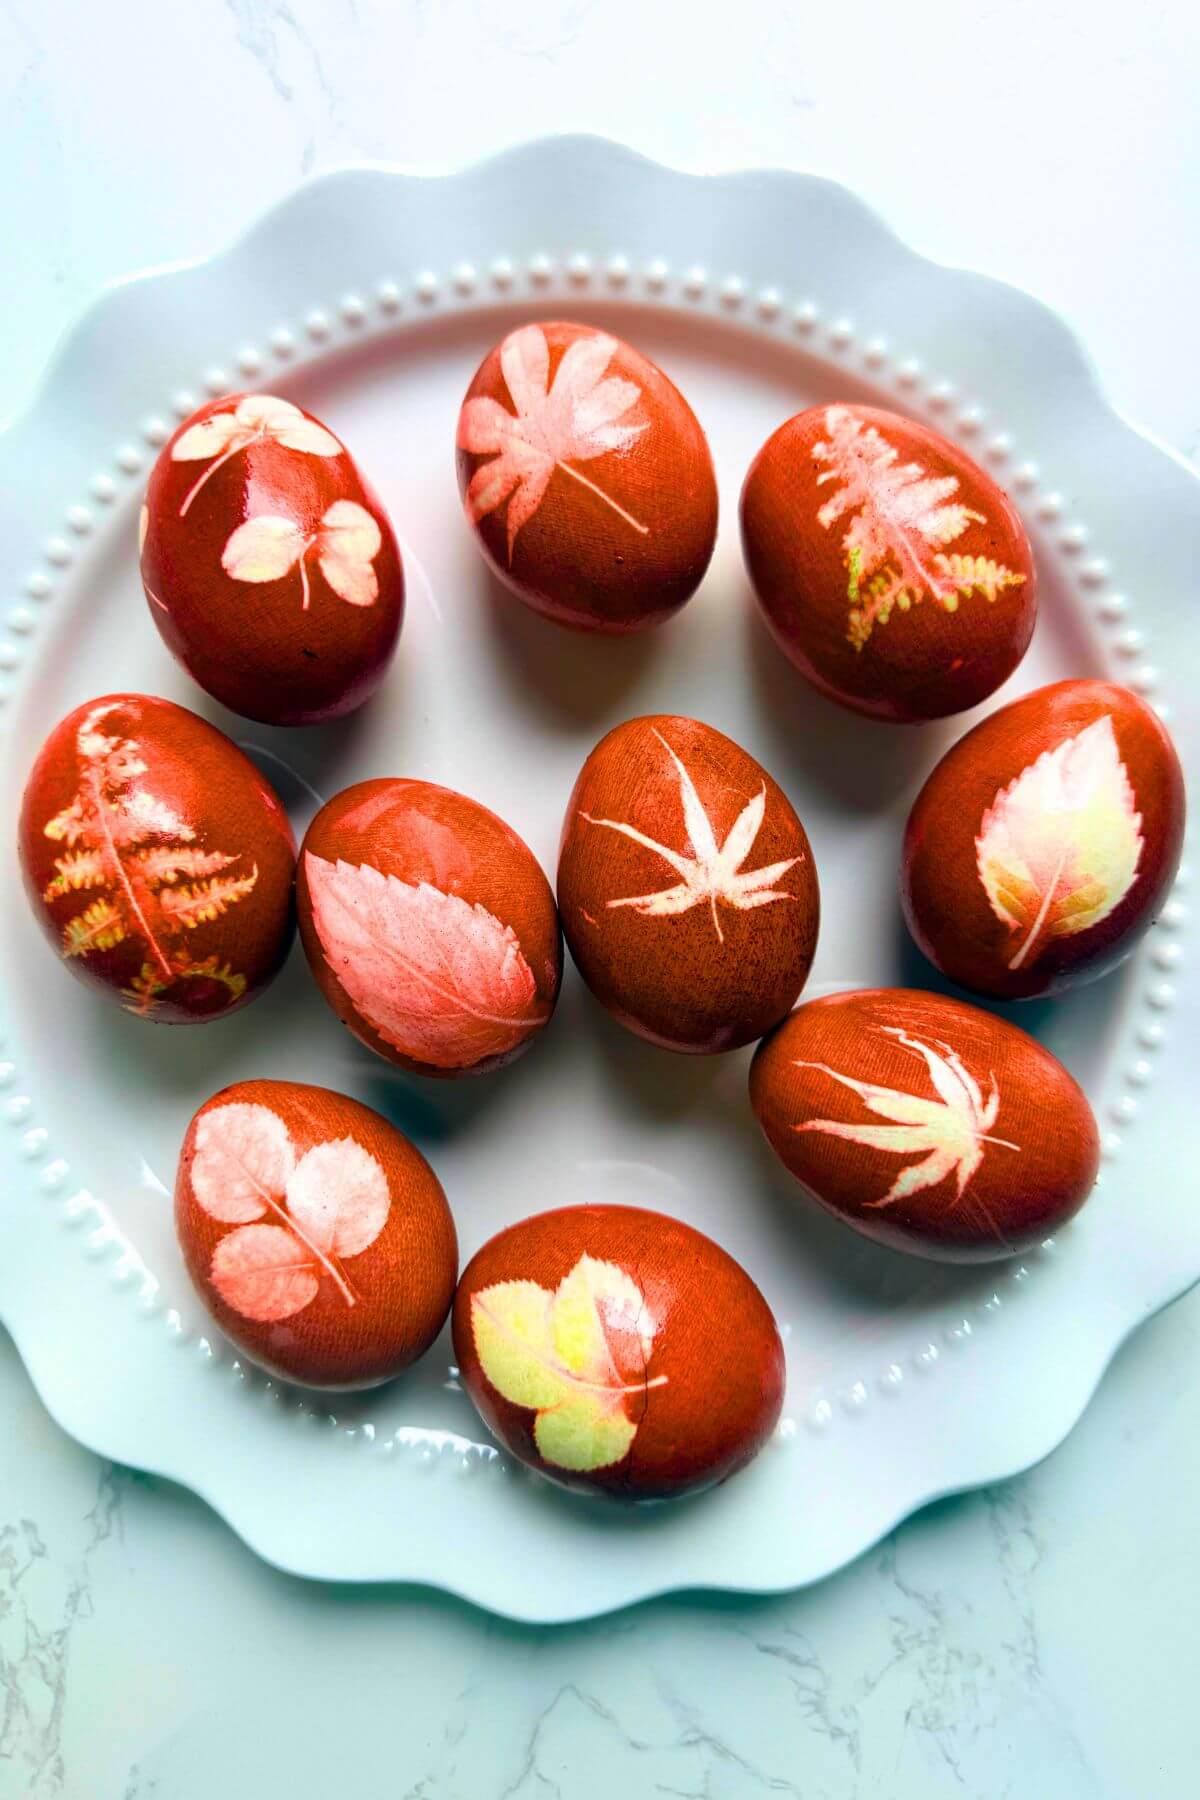
You can keep it simple and dye them a solid, deep red - the classic, traditional way - or press a leaf or flower against the shell before wrapping to create a beautiful natural print. Either way, the whole thing takes about 35 minutes of active work, and the eggs do the rest overnight.
📷 Recipe Snapshot
Quick Look: Naturally Dyed Easter Eggs (Romanian Style)
⏱ Ready in about 35 minutes + soak time
🥚 Eggs + onion peels + beetroot + vinegar
🎨 Deep red color with natural leaf prints
👩🍳 Simple method, fun to make with kids
🧺 Great for Easter tables, baskets, or gifting
💡 Pro Tip: Let the eggs sit overnight for a deeper color, and press the leaves tightly so the pattern comes out clean.
Jump to:
- 📷 Recipe Snapshot
- 🥚 The Romanian Easter Egg Tradition
- 💗 Why You'll Love This Recipe
- 🥘 Ingredients
- ♻️ Substitutes & Variations
- 🎨 Natural Egg Dye Color Guide
- 👩🍳 How To Make Naturally Dyed Easter Eggs
- 💭 Expert Tips
- 🥗 Serving Suggestions
- ❓ Naturally Dyed Easter Eggs FAQs
- More Recipes You'll Love
- 📖 Recipe
- 💬 Comments
🥚 The Romanian Easter Egg Tradition
In Romania, naturally dyed red Easter eggs carry meaning far beyond the table. Red is the color of Christ's resurrection, and dyeing eggs red is one of the most sacred Easter rituals in Romanian culture - done every year without exception in most households.
The Easter egg dyeing tradition in Romania starts days before - eggs are dyed on Holy Thursday or Holy Saturday depending on the family. On Easter morning, before eating, families then gather for the egg-cracking game. Two people each hold a hard-boiled egg and tap them together - one person says "Hristos a Înviat" (Christ is Risen) and the other responds "Adevărat a Înviat" (Truly He is Risen). The person whose egg stays uncracked is believed to have good health and good luck for the whole year. It sounds simple, but things get very competitive very fast.
The first egg dyed is traditionally kept and never eaten - it's displayed in the home throughout the year as a symbol of protection and blessing.
If you want to explore more traditional Romanian Easter dishes, check out my full guide to traditional Romanian Easter recipes.
💗 Why You'll Love This Recipe
- Zero chemicals. Everything in this pot is food-safe - onion peels, beetroot, vinegar, and water. That's it.
- No special supplies needed. A pair of light beige tights, some leaves from outside, and you're set.
- The results speak for themselves. Deep burgundy-red eggs with leaf shapes pressed right into the shell - they look like something you'd find at a farmers market, not your kitchen.
- It's a tradition worth keeping. Making these with your kids feels special in a way that store-bought dye kits never will.
- The smoked ham trick works better than oil. A quick rub with a slice of smoked ham gives the eggs a natural, subtle shine - this is the traditional Romanian way and it works beautifully.
🥘 Ingredients
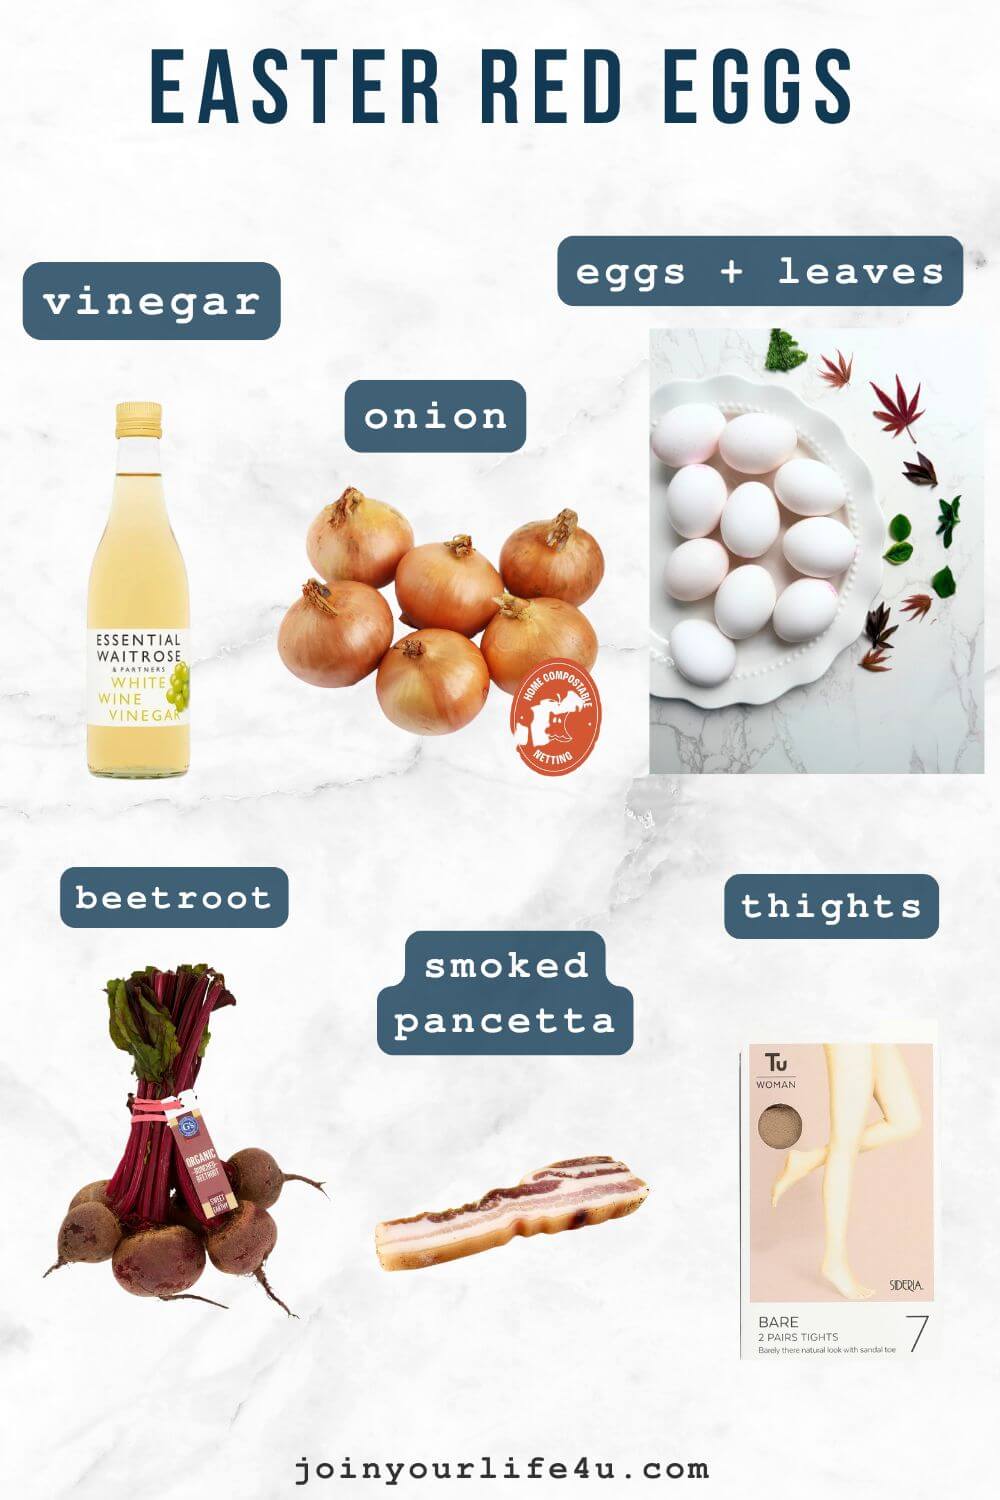
*See the recipe card for full information on ingredients and quantities.
- Eggs - white eggs give the boldest, most vivid red. Brown eggs give a softer, earthier tone.
- Onion peels - the main natural dye. Red onion peels for deep reddish-brown, yellow for warm golden-brown. Save them in the freezer for weeks before Easter.
- Beetroot (beets)- adds depth and pushes the color toward true burgundy-red. Use fresh or pre-cooked.
- White vinegar - fixes the color so it doesn't fade. Don't skip this. Regular white distilled vinegar from any US grocery store works perfectly here.
- Nylon tights - Light beige or nude tights give the cleanest result - the thin fabric lets the dye penetrate evenly. Dark tights will work but may slightly affect the final color tone. This is what holds the leaf against the shell and creates the print. In the US, look for nude nylon pantyhose at any drugstore - Walgreens, CVS, or Target all carry them.
- Leaves - any flat, thin leaf works. Parsley, mint, basil, fern, Japanese maple or clover. The flatter the leaf, the cleaner the print.
- Smoked ham - just one or two slices, used at the end to rub on the dried eggs for a natural shine. The traditional Romanian method.
♻️ Substitutes & Variations
- Beetroot alternatives: Red cabbage gives a cool blue-purple tone. Turmeric creates a golden yellow egg. Spinach produces a soft, muted green.
- Leaf choices: Try fern fronds for an intricate, feathery pattern. Fresh flowers work too - just make sure they're flat enough to press cleanly against the shell.
- No smoked ham? A tiny bit of vegetable oil rubbed on with a paper towel works as a substitute. The ham is the traditional Romanian method, but oil is a perfectly fine swap.
- Wax resist technique: Before wrapping, use a clear wax crayon to write a name or draw a small design on the egg. The wax resists the dye and leaves a white mark beneath the color.
- Deeper color: Double the beetroot, or add a black tea bag to the dye bath for a darker, more complex tone.
🎨 Natural Egg Dye Color Guide
Here's a quick guide to dying eggs red naturally and beyond - including how to colour eggs red the traditional way with nothing but pantry staples:
| Natural Ingredient | Color Result on White Eggs |
|---|---|
| Red onion peels | Deep reddish-brown |
| Red onion peels + beetroot | Rich burgundy-red |
| Beetroot alone | Soft pink to deep magenta |
| Yellow onion peels | Warm golden-brown |
| Red cabbage | Cool blue-purple |
| Turmeric | Bright golden yellow |
| Spinach | Soft muted green |
| Black tea | Tan to light brown |
The longer the eggs soak, the deeper and richer every color gets. Overnight always wins.
👩🍳 How To Make Naturally Dyed Easter Eggs
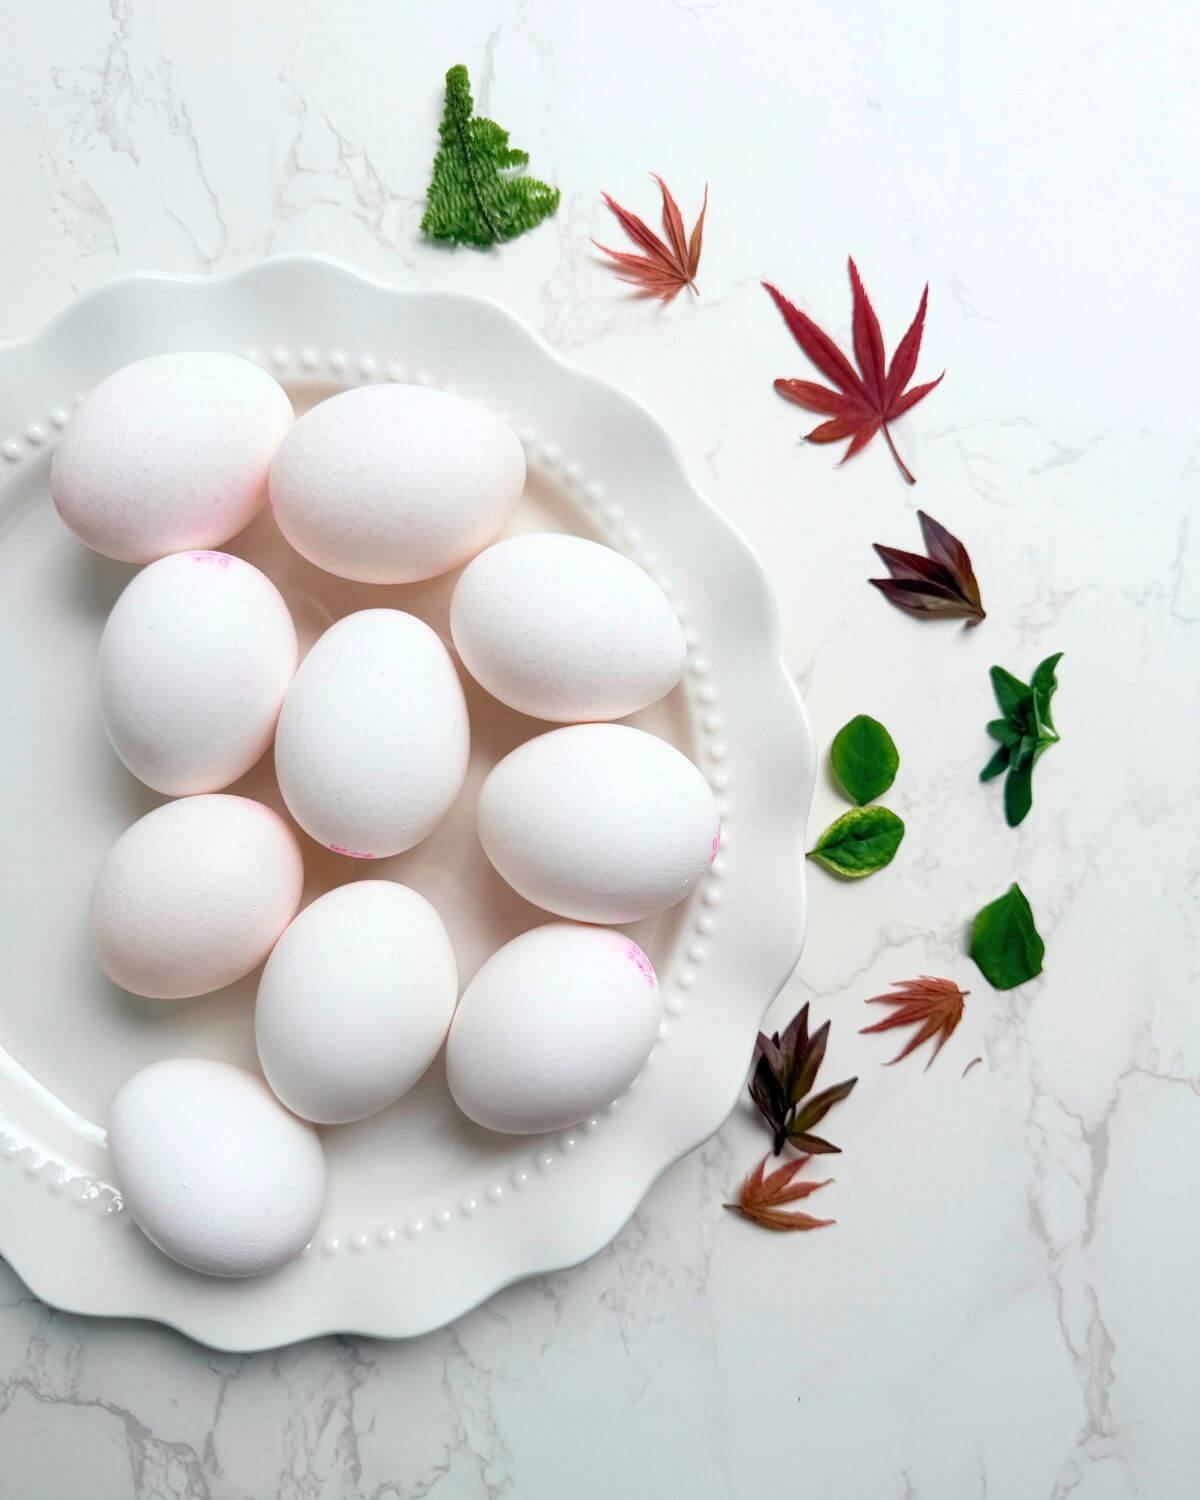
Step 1: Wash and prep. Wash each egg with dish soap under warm water and dry well. Soak your leaves in warm water for a few minutes until softened.
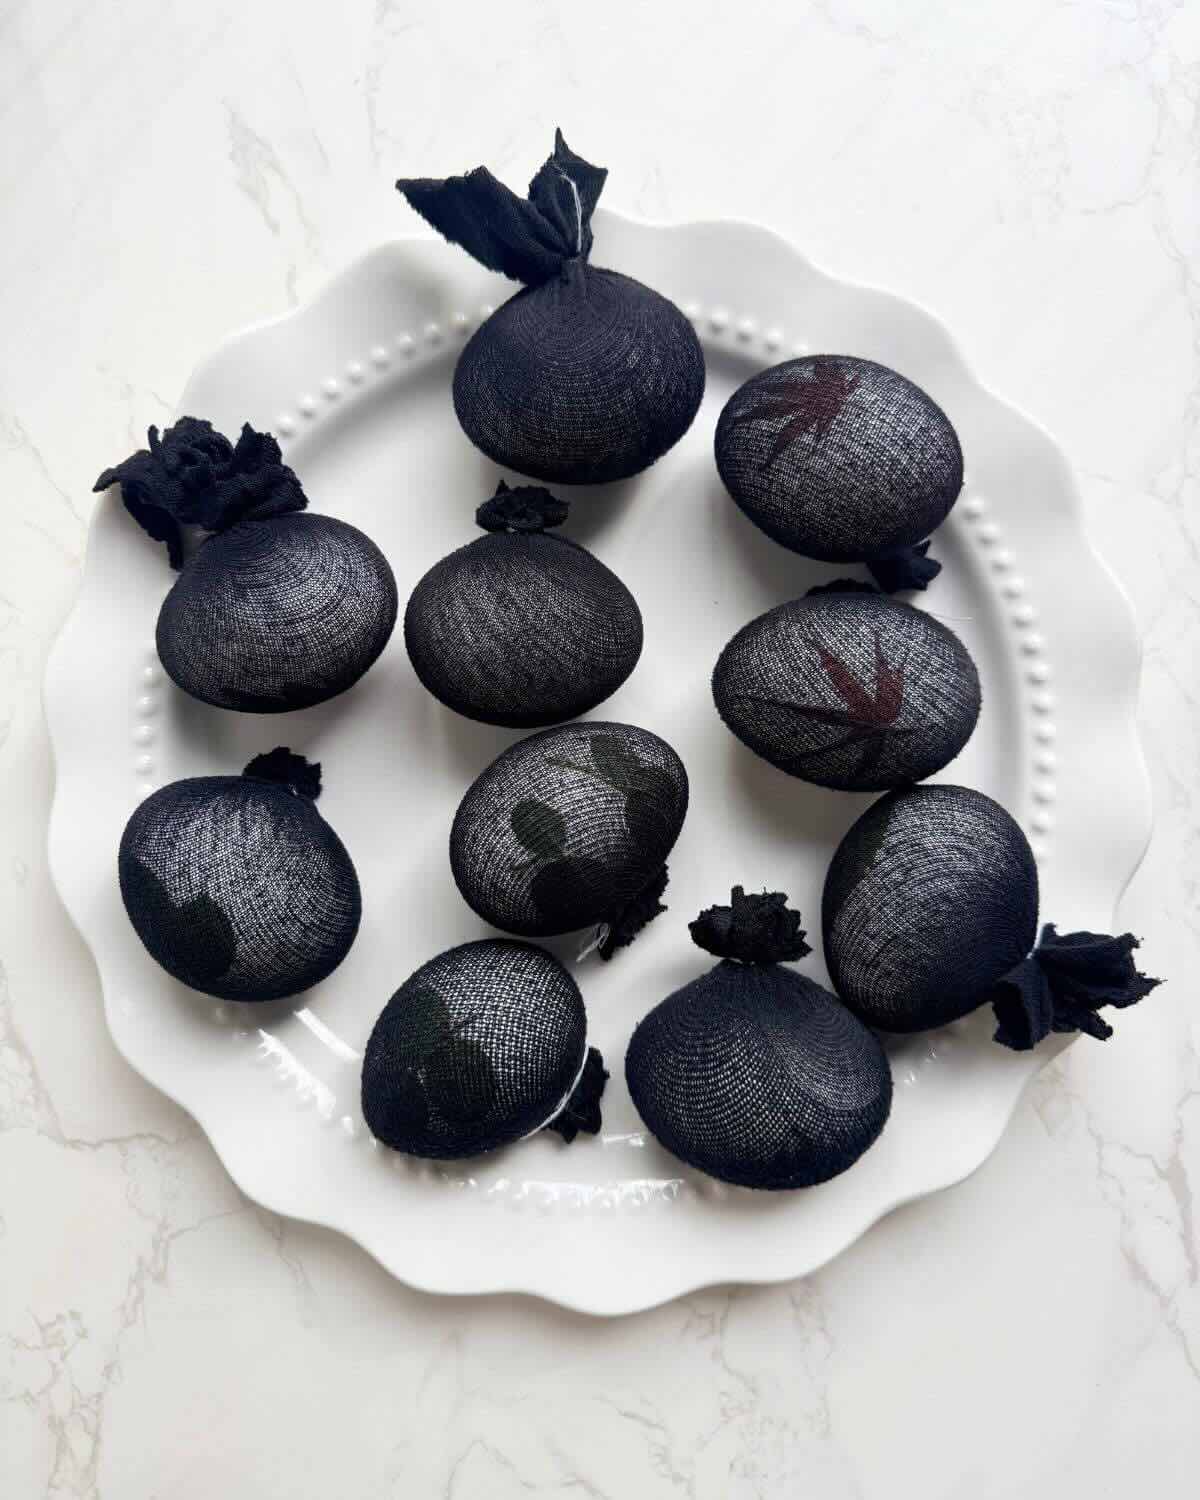
Step 2 - Wrap the eggs. Press a leaf flat against each egg, wrap tightly in a cut piece of tights, and tie a knot at the top - just like tying a balloon.
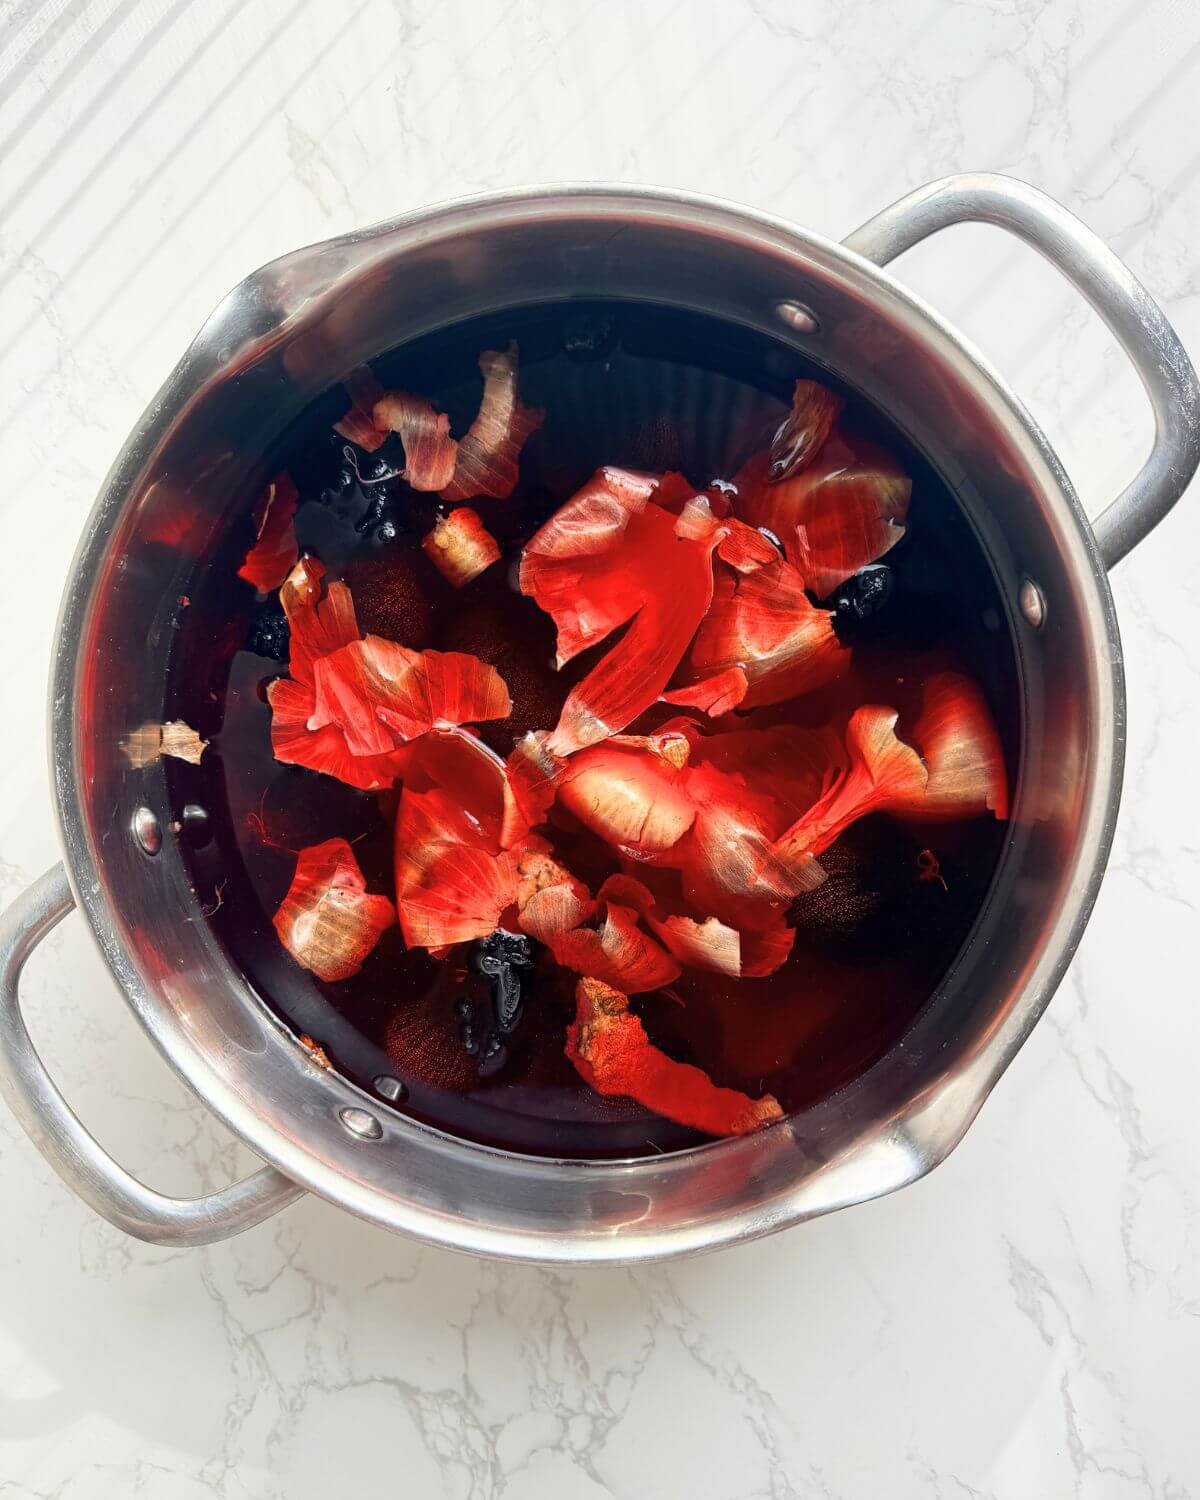
Step 3 - Simmer and soak. Layer half the onion peels in the pot, add the wrapped eggs leaf-side down, then the beetroot, water, vinegar, and the rest of the onion peels. Gently simmer for 15 to 20 minutes - no hard boiling. Remove from the heat, let cool, then refrigerate.
If you have the time, leave them overnight - up to 20 hours gives the deepest color. Short on time? Even 1 to 2 hours will give you a beautiful result, just a softer, lighter tone.

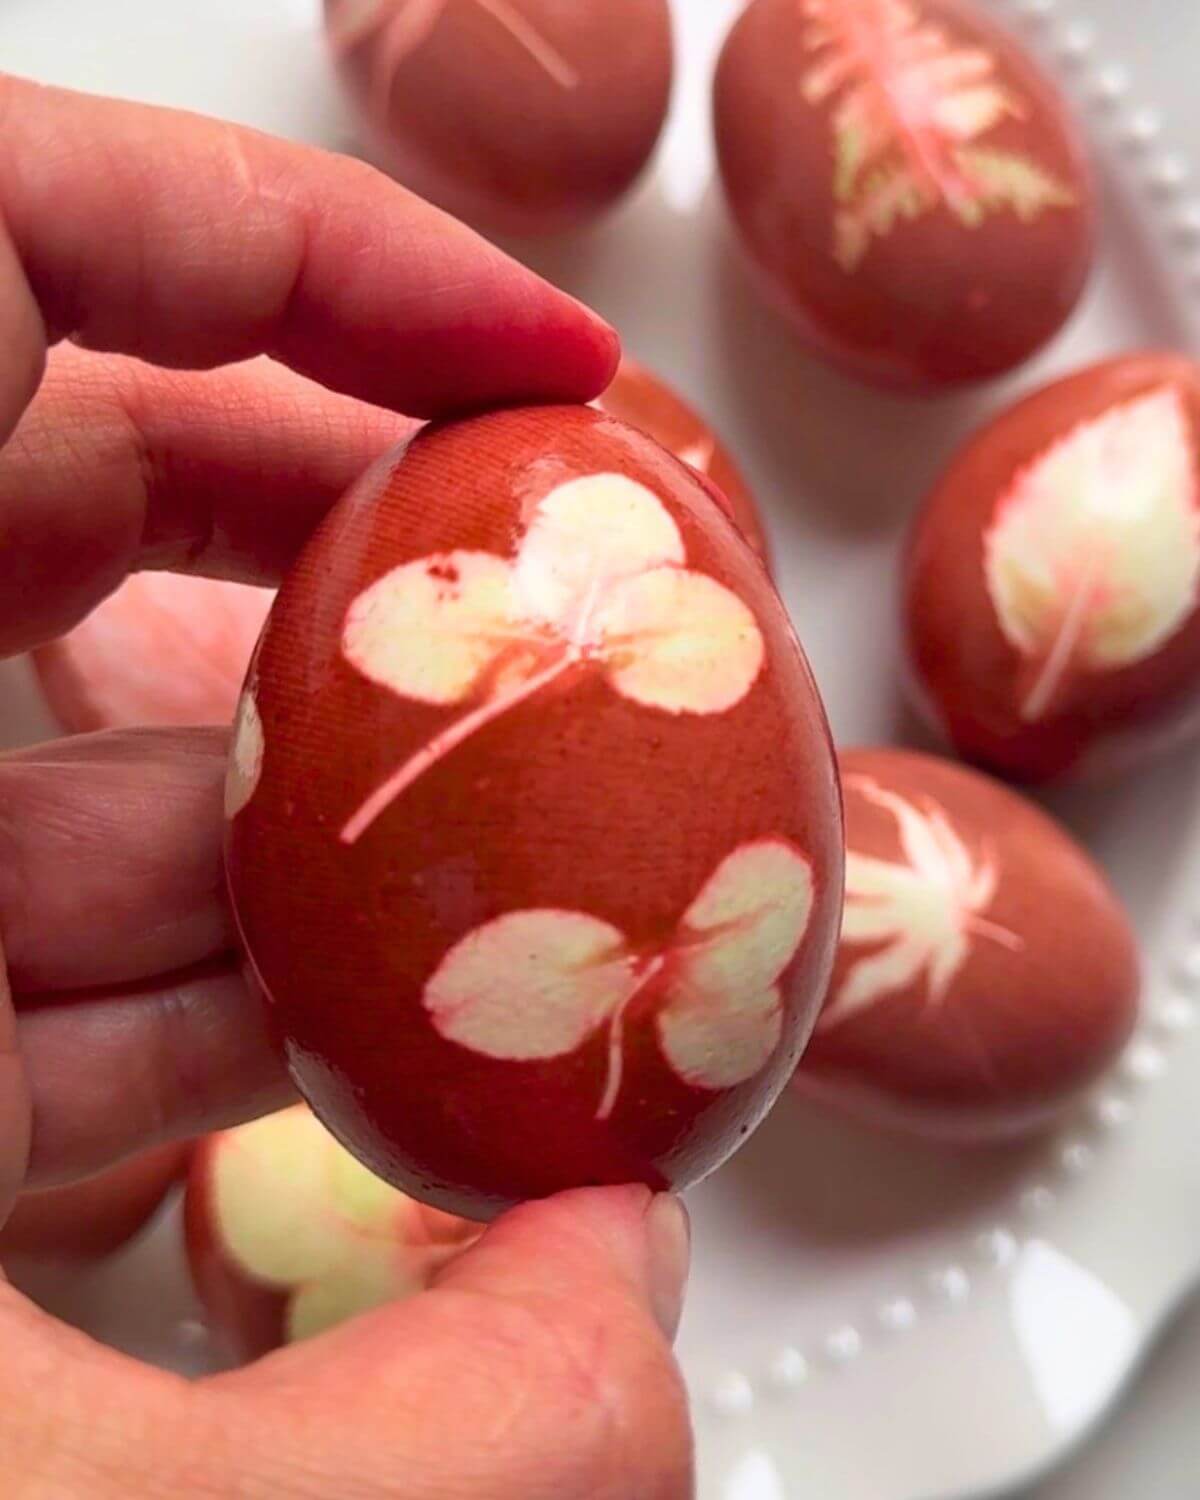
Step 4 - Unwrap and shine. Cut the knot, remove the tights and leaf, and dry on a paper towel. Once dry, rub each egg with a slice of smoked ham for a natural shine.
*See the recipe card for detailed instructions.
💭 Expert Tips
- Save your onion peels in a zip-lock bag in the freezer as you cook throughout the year. By Easter, you'll have a full pot's worth without peeling 20 onions the day before.
- Use the unstamped side of the egg for your leaf placement. Most store-bought eggs have a small ink stamp - place your leaf on the clean side for the best print.
- Don't rush the simmer. A gentle, low simmer for 15 to 20 minutes is all you need before pulling the pot off the heat. The color builds during the long soak, not during the cooking.
- Light beige or nude tights give the cleanest result - the thin fabric lets the dye penetrate evenly. Dark tights will work, but may slightly affect the final color tone.
- Soak leaves longer if they're stiff. Some leaves, especially fresh herbs straight from the fridge, need an extra 10 minutes in warm water to soften up and lay flat.
🥗 Serving Suggestions
- Easter table spread - In Romania, the dyed eggs always get their own plate or wooden basket at the center of the table, surrounded by fresh caş or telemea cheese (similar to feta), cured meats, green onions, radishes, and fresh bread. That's the traditional Easter spread.
- With Romanian Easter boeuf salad - this is the classic Easter pairing. The creamy, hearty salad and the eggs belong together on the same plate.
- With beetroot and horseradish salad, the earthy, sharp bite of horseradish cuts beautifully against the richness of the egg.
- Serve these eggs as a starter before the roast lamb for Easter dinner - that's the traditional Romanian Easter main.
- Use the leftover dyed eggs to make the Romanian stuffed eggs recipe.
- Finish the meal with a slice of Romanian Easter cheesecake recipe - traditional Pasca that belongs on every Easter table.
- These eggs look beautiful next to my Easter brioche bunnies on the holiday table.
❓ Naturally Dyed Easter Eggs FAQs
Yes! Every ingredient in the dye bath is food-safe - onion peels, beetroot, vinegar, and water. Zero synthetic chemicals. Just refrigerate within two hours of cooking and eat within 7 days.
Press a fresh or softened leaf flat against the clean side of the egg, then wrap tightly in a cut piece of nylon tights and tie a knot. The tights hold the leaf in firm contact with the shell throughout the dyeing process. When you remove the tights after soaking, the leaf leaves a clean, detailed print in the original egg color against the dyed background. Flat leaves - parsley, fern, Japanese maple, clover - give the sharpest prints.
Use a combination of red onion peels and beetroot simmered with white vinegar - red onion gives a deep reddish-brown, beetroot pushes it toward rich burgundy-red. Simmer gently for 15 to 20 minutes, never a hard boil. Soak in the fridge for at least 1 to 2 hours, or overnight for the deepest red.
Up to 7 days in an airtight container in the fridge. They're fully hard-boiled during dyeing, so safe to eat straight from the shell. Give them a quick rinse before cracking if you used the smoked ham shine.
You can, but the color won't stick as well. Vinegar is what opens up the eggshell slightly so the natural pigments can absorb properly. Without it, the color will be much lighter and may rub off when dry. If you don't have white vinegar, a small amount of lemon juice works as a substitute - it's acidic enough to do the same job.
More Recipes You'll Love


Tried this recipe? Give it a star rating below! ⭐⭐⭐⭐⭐
HUNGRY FOR MORE? Subscribe to my newsletter and follow along on Facebook, Pinterest, and Instagram for the latest updates.
📖 Recipe
Naturally Dyed Easter Eggs
Ingredients
For the eggs:
- 12 eggs white eggs work best for bold color; brown eggs will give softer, earthier tones
- 12 small leaves of choice - parsley mint, basil, cilantro, fern, Japanese maple or herb flowers
- 1 pair of light beige or nude nylon tights
For the dye bath:
- Onion peels - enough to fill half the pot yellow or red onion both work
- 2 -3 medium beetroots roughly chopped (2 cups / 250g)
- 8 cups / 1.9 liters water
- ¼ cup / 60ml white vinegar
To finish:
- 1 -2 slices smoked ham (or oil) for rubbing onto the dried eggs to create shine
Instructions
- Wash each egg with dish soap under warm water and dry well. Cut your tights into 12 pieces starting from the foot, about 5 to 6 inches each. Soak your leaves in warm water for a few minutes until softened.12 eggs, 1 pair of light beige
- Press a leaf flat against the unstamped side of each egg. Place the egg inside a piece of tights, pull tight, twist at the base, and tie a knot at the top - just like tying a balloon. Repeat for all 12 eggs.12 small leaves of choice - parsley
- Layer half the onion peels in the pot. Add the wrapped eggs leaf-side down, then the chopped beetroot, half the water, the vinegar, the rest of the onion peels, and the remaining water. Bring to a gentle simmer for 15 to 20 minutes - no hard boiling or the eggs can crack.Onion peels - enough to fill half the pot, 2 -3 medium beetroots, 8 cups / 1.9 liters water, ¼ cup / 60ml white vinegar
- Remove from the heat and let cool. Refrigerate for a minimum of 1 to 2 hours for a lighter color, or overnight for the deepest, richest red.
- Cut the knot, remove the tights and leaf, and dry on a paper towel. Once fully dry, rub each egg with a slice of smoked ham for a natural shine.1 -2 slices smoked ham (or oil)
Explore More with AI
Notes
- Use red onion peels for a deeper burgundy-red, yellow onion peels for a warmer brown tone, or mix both for that classic rich color.
- Soak for a minimum of 1 to 2 hours for a lighter result, or overnight up to 20 hours for the deepest color.
- Start the night before Easter for best results.
- Use white eggs for bold, vivid color.
- Use smoked ham - not oil - for the traditional Romanian shine.
- Romanian tradition: The first egg dyed is kept all year as a symbol of good luck. On Easter morning, families tap eggs together - the person whose egg stays uncracked is said to have good health for the year.




Tony Calderone says
OK... Probably a DUMB question, are these hard-boiled eggs? The recipe doesn't say, but I'm guessing, since they're Easter Eggs, you would use hard-boiled eggs.
Carl says
Amazing idea! I love the simplicity of the look and the lack of any chemicals or smelly stuff.
Claudia-Cristina Ciorteanu says
I’m so glad you like the idea, Carl! There really is something so much more satisfying about using what’s already in the pantry. No chemicals, no strong smells—just beautiful, rustic results!
Claudia says
I love how easy it is to do this, and that natural, rustic look is so pretty!
Claudia-Cristina Ciorteanu says
Thank you so much! So happy you like it!
Lina says
So simple, so natural, with such pretty results! I made these with my grandkids, and will do it again!
Claudia-Cristina Ciorteanu says
That is wonderful to hear, Lina! Making these with grandkids creates the best memories. I hope it becomes a yearly tradition for you all!
Harper says
Such a fun and creative idea! Love how this uses simple, natural ingredients to make those soft, earthy colors instead of artificial dyes. It feels like such a meaningful, and kid-friendly way to celebrate while still getting beautiful results!
Claudia-Cristina Ciorteanu says
Thank you, Harper! I totally agree—there’s a special kind of magic in seeing a simple onion peel turn an egg into something so earthy and pretty. It really makes the holiday feel more grounded.
Jen says
The kids really enjoyed this natural egg dye project. We will go again next year!
Claudia-Cristina Ciorteanu says
I’m so happy the kids enjoyed it, Jen! It’s like a little science experiment in the kitchen, isn't it? See you back here next year for round two!
JJ says
We loved dying our easter eggs naturally, they turned out beautifully!
Claudia-Cristina Ciorteanu says
That’s fantastic! I’m so glad they turned out well for you. There’s always a bit of excitement when you unwrap them to see the final pattern, isn't there?
Lily says
Love all of these ideas for dying easter eggs!
Claudia-Cristina Ciorteanu says
Thank you, Lily! It’s such a fun way to get creative with whatever you have in the kitchen.
Swathi says
These are beautiful and simple, naturally dyed eggs are my favorite too. I make a big bach always.
Claudia-Cristina Ciorteanu says
I’m with you, Swathi! I can’t imagine an Easter table without a big batch of these. They just have a soul that store-bought dyes can't replicate.
Kenny says
These turned out so cool! The natural colors look way more aesthetic than the store-bought kits, and it was actually really fun to see how the different ingredients worked.
Claudia-Cristina Ciorteanu says
"Aesthetic" is the perfect word for it, Kenny! They definitely have that high-end, farmhouse look. Glad you had fun seeing the "science" behind the ingredients!
Nicole says
This was so much fun. I loved being able to play with designs and not have to worry about anything that was toxic.
Claudia-Cristina Ciorteanu says
Exactly, Nicole! Being able to get creative without worrying about the messy (or toxic) stuff is a huge win. So glad you had fun with the designs!
Ben says
Well, this is super cool. Easy to do and a cool, rustic vibe. I dig it.
Claudia-Cristina Ciorteanu says
Glad you liked it, Ben! Simple and rustic is definitely the goal here. Thanks for giving it a try!
Annie says
I really like this idea. The color turned out very pretty! I'll be trying this out for sure next Easter for the kiddos!
Claudia-Cristina Ciorteanu says
Thanks, Annie! I hope the kiddos love it as much as mine do when you try it next year. It’s definitely worth the wait!
Jane says
These turned out so vibrant and unique! It was such a fun, creative project using natural ingredients, and the colors were absolutely stunning.
Claudia-Cristina Ciorteanu says
Thank you, Jane! It’s amazing what a bit of beetroot and onion can do, right? So glad yours turned out vibrant and unique!