
This Spicy Tuna Onigiri combines sticky sushi rice with a creamy, spicy tuna filling and a wrap of crisp nori. Even better, it's ready in under 30 minutes with no cooking required for the filling - just canned tuna, mayo, and Sriracha.
If you love quick Japanese-style bites, try my cooked tuna poke bowl for a fresh, no-raw-fish option, or my baked salmon and prawn sushi cups for a light lunch next!
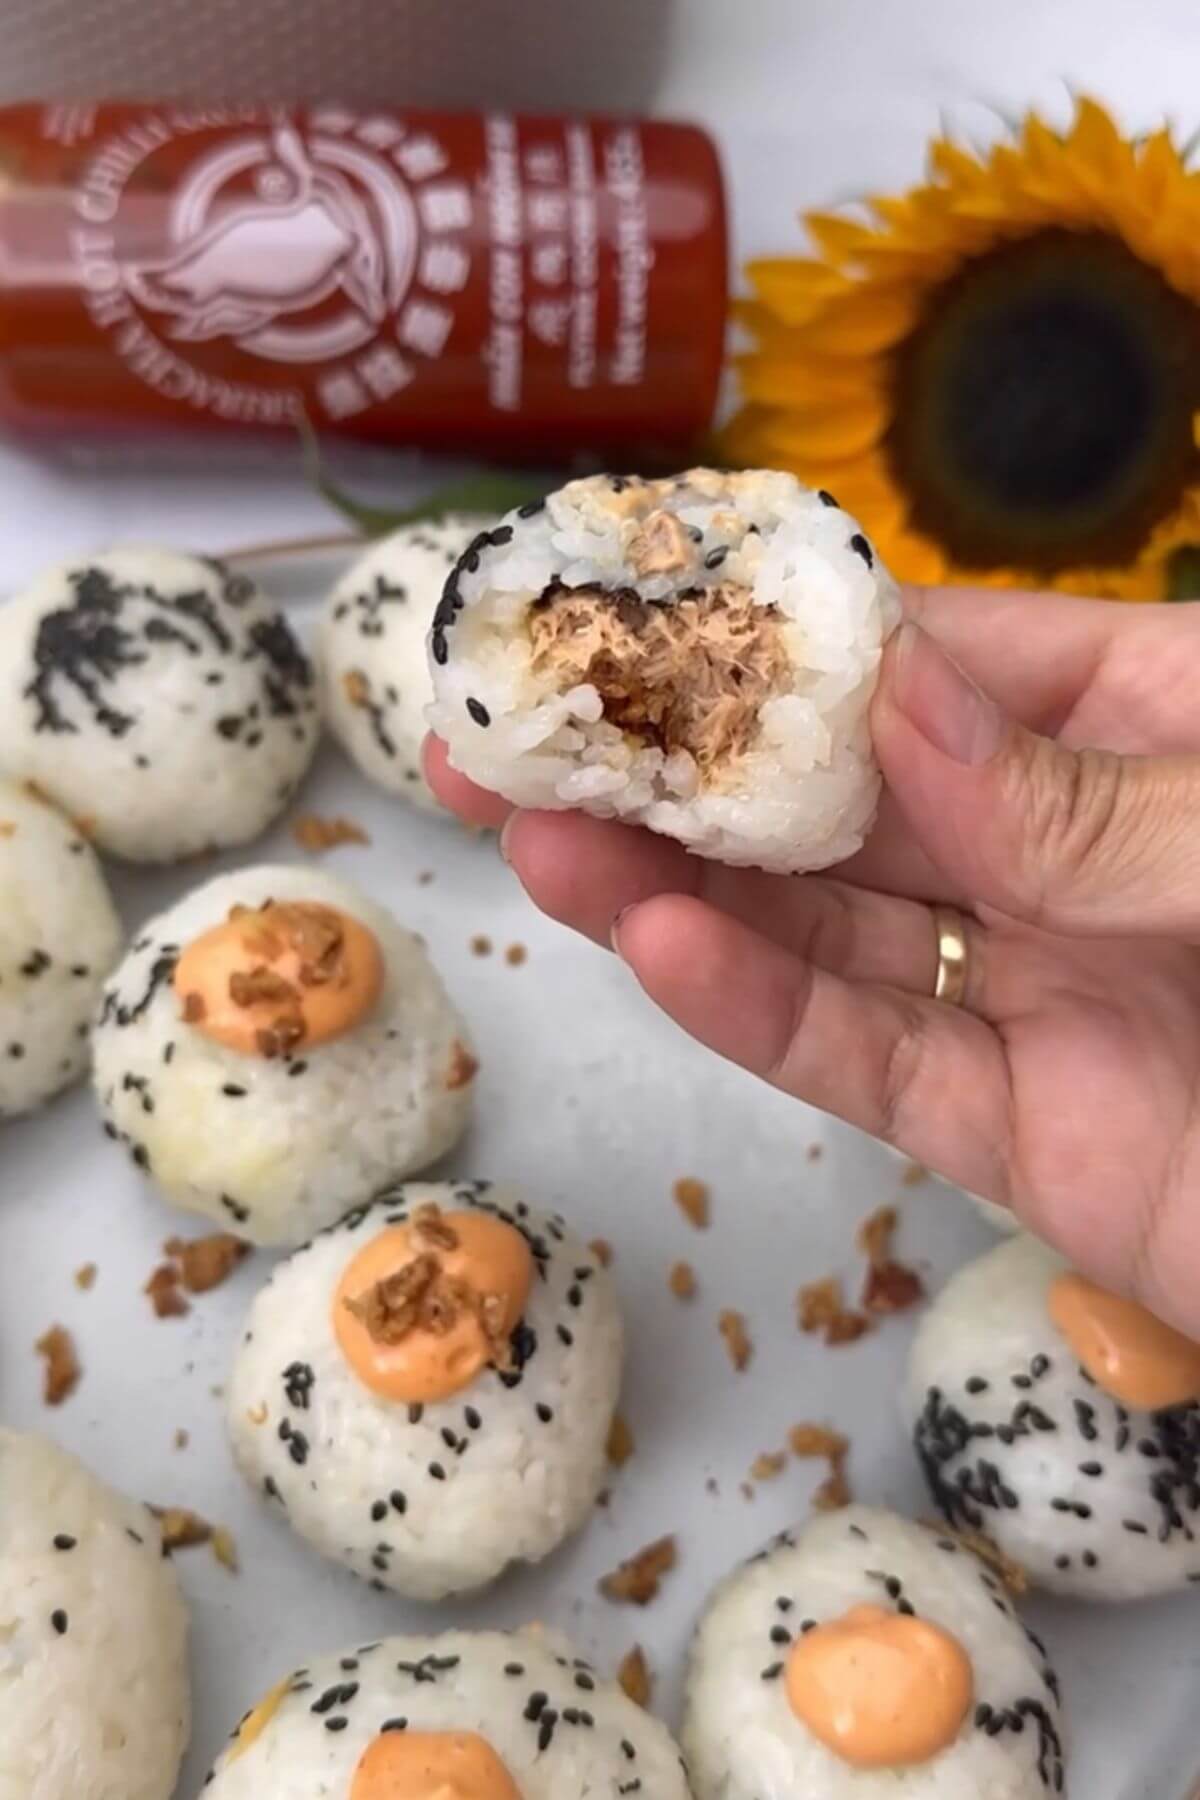
📷 Recipe Snapshot
🍙 Recipe: Easy Japanese Spicy Tuna Onigiri
⏲️ Ready In: 30 min
👥 Serves: 4
🌏 Cuisine: Japanese
💪 Difficulty: Easy
📌 Recipe Type: Snack / Small Bites
🌟 Ingredient Highlights: sushi rice, canned tuna, mayonnaise, Sriracha, nori, sesame seeds
💡 Pro Tip: Use freshly cooked sushi rice while it's still slightly warm. It's stickier and much easier to shape around the spicy tuna filling.
💡 Summarize and save this recipe on
My take on Korean-style Keema is a flavorful option that will impress. Don't miss the viral pork dumpling lasagna from the Asian cuisine collection -they're fluffy and perfect for any burger or sandwich! Each recipe offers a tasty twist for quick lunches or easy dinners.
Jump to:
Krystle says
 I love everything about these. So much cheaper than my local sushi joint too.
Onigiri comes in various shapes and fillings, from the classic salmon or tuna with mayo to the more traditional umeboshi (pickled plum) or kombu (seaweed). You can get creative with fillings like spicy tuna, teriyaki chicken, or even kimchi, giving each rice ball its unique twist.
What's interesting about onigiri is that they're not just a simple snack-they hold a deep cultural significance in Japan. They're often seen in bento boxes, convenient for lunch or picnics, and have been enjoyed for centuries. Whether you shape them into triangles, circles, or logs, they're versatile, easy to customise, and perfect for meals on the go!
💗 Why This Recipe Works
This spicy tuna onigiri comes together with barely any effort - no oven, no cooking the filling, no special tools beyond a bit of cling film. Even better, sushi rice gets sticky enough on its own to hold everything together once it's shaped. Mix the tuna with mayo and Sriracha, pack it into the rice, and let the fridge - or your hands - do the rest.
Like my healthy fried rice with frozen vegetables, it might become a household go-to, bringing joy to every bite with minimal effort.
🥘 Ingredients
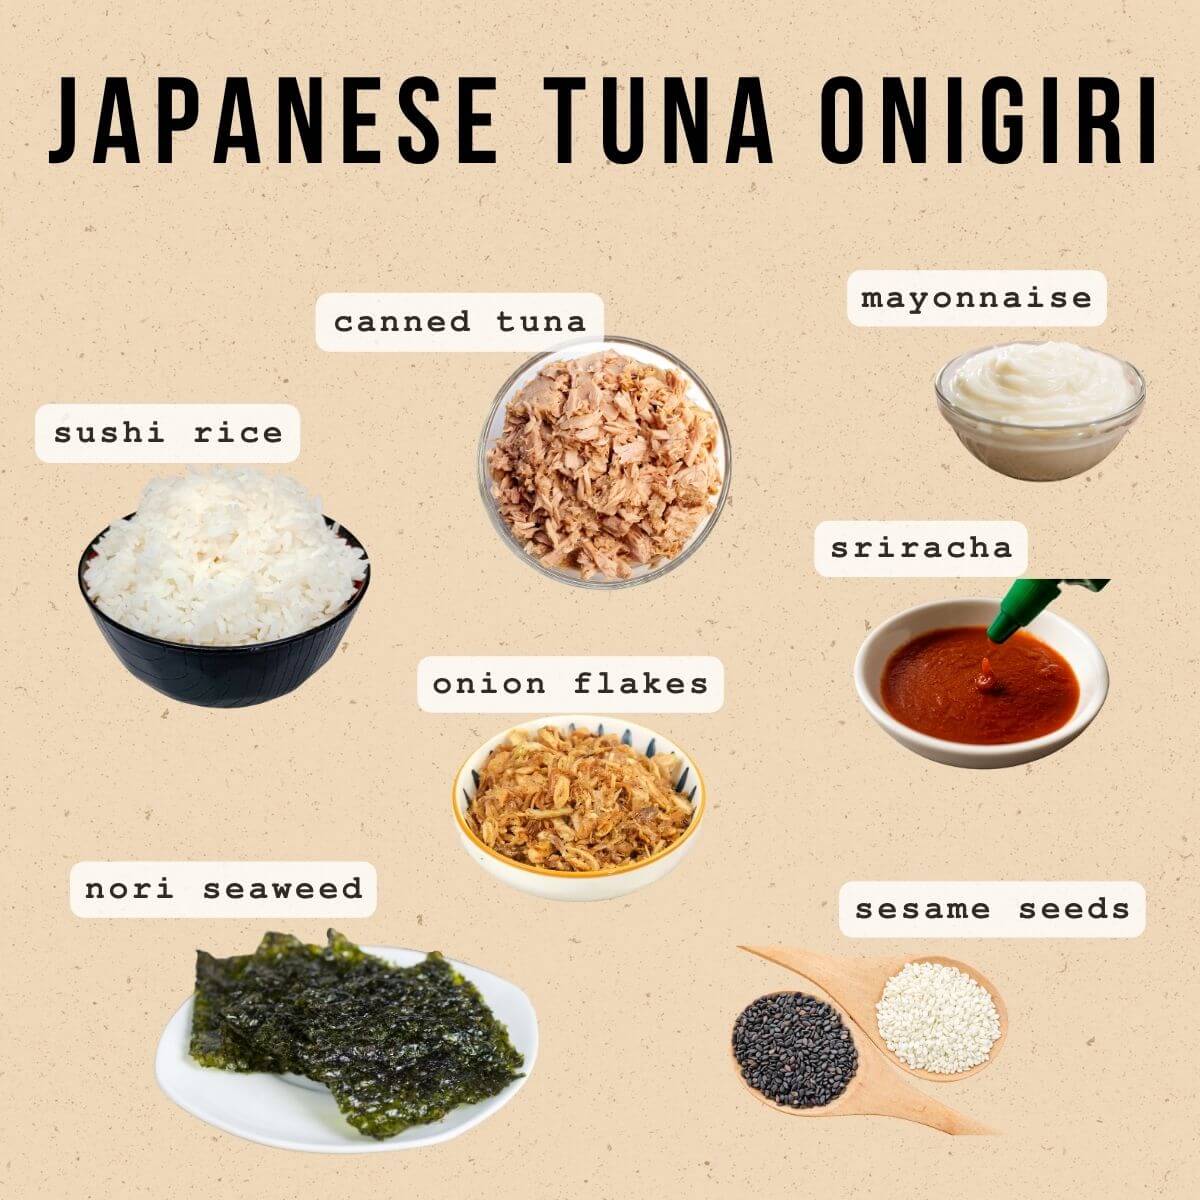
*See the recipe card for full information on ingredients and quantities.
- Sushi rice - This is a short-grain rice variety that becomes sticky when cooked. It's seasoned with a mixture of rice vinegar, sugar, and salt to give it a distinctive taste and texture for sushi and onigiri.
- Canned tuna - Provides a protein-rich filling for the onigiri. It's often flaked and mixed with other ingredients to create a spicy centre. In this recipe, it is best to use canned tuna rather than cooked tuna, as it is more convenient to use.
- Mayonnaise - It adds a creamy texture to the spicy tuna mixture. Make my immersion blender mayo in 3 minutes.
- Sriracha sauce - It is a hot chilli sauce that brings spiciness to the dish.
- Sheets of nori (seaweed) - These are dried seaweed sheets commonly used in Japanese cuisine. They add a subtle oceanic taste and a bit of crispness. You can also use Shredded Seaweed Flakes or Furikake, a great addition to the rice balls.
- Onion flakes - Dried, crushed onion pieces that greatly contribute to the recipe.
- Sesame seeds -Either white or black, they are often toasted to enhance their aroma.
♻️ Substitutes & Variations
- No rice? Quinoa, couscous, or cauliflower rice work great instead.
- Out of tuna? Shredded chicken, flaked salmon, or mashed chickpeas are good swaps.
- No mayo? Greek yoghurt or sour cream do the job.
- Want more spice? Use Tabasco or any hot sauce you have on hand.
- Going vegan? Mashed chickpeas with vegan mayo and lemon is a nice tuna stand-in. Crispy teriyaki tofu is another good one.
👩🍳 How To Make Japanese Tuna Onigiri
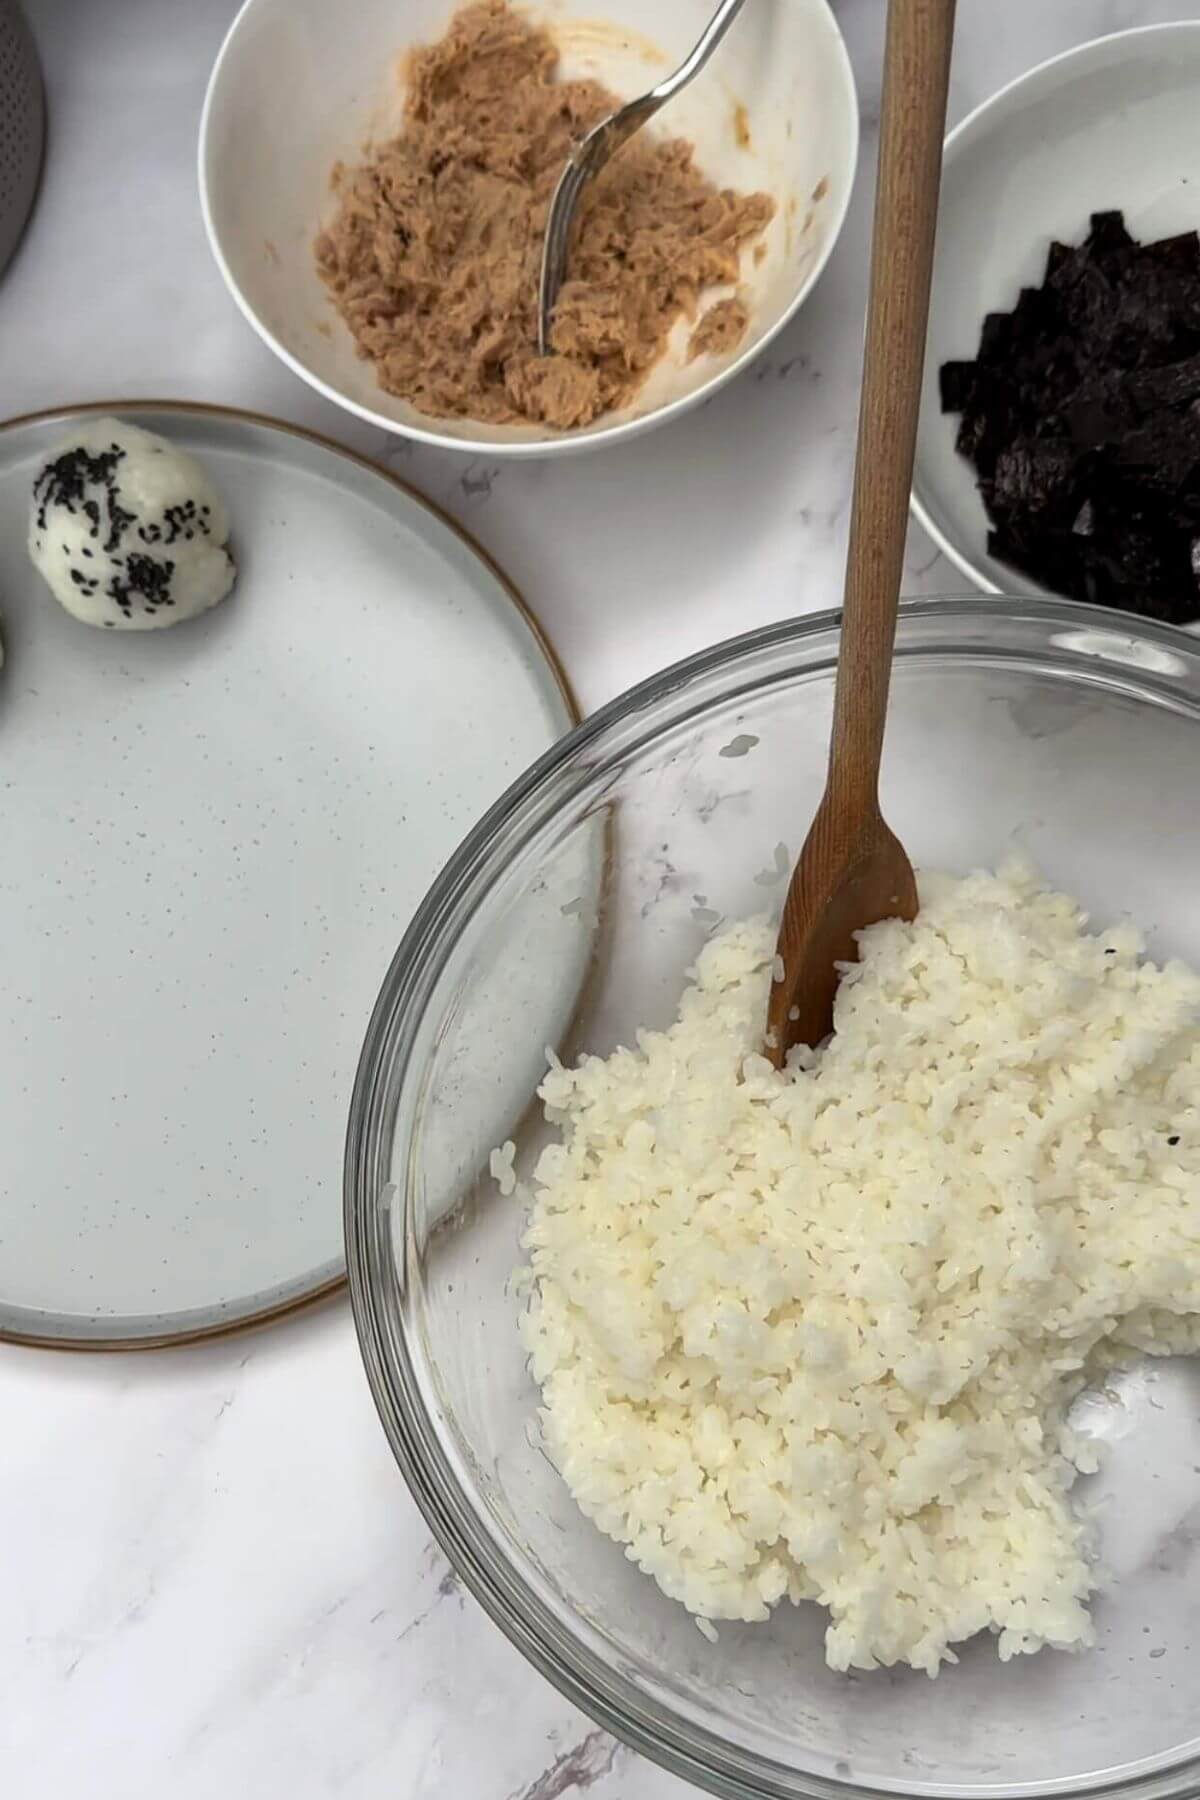
Step 1: Prepare all the ingredients required by the recipe so everything is at hand.
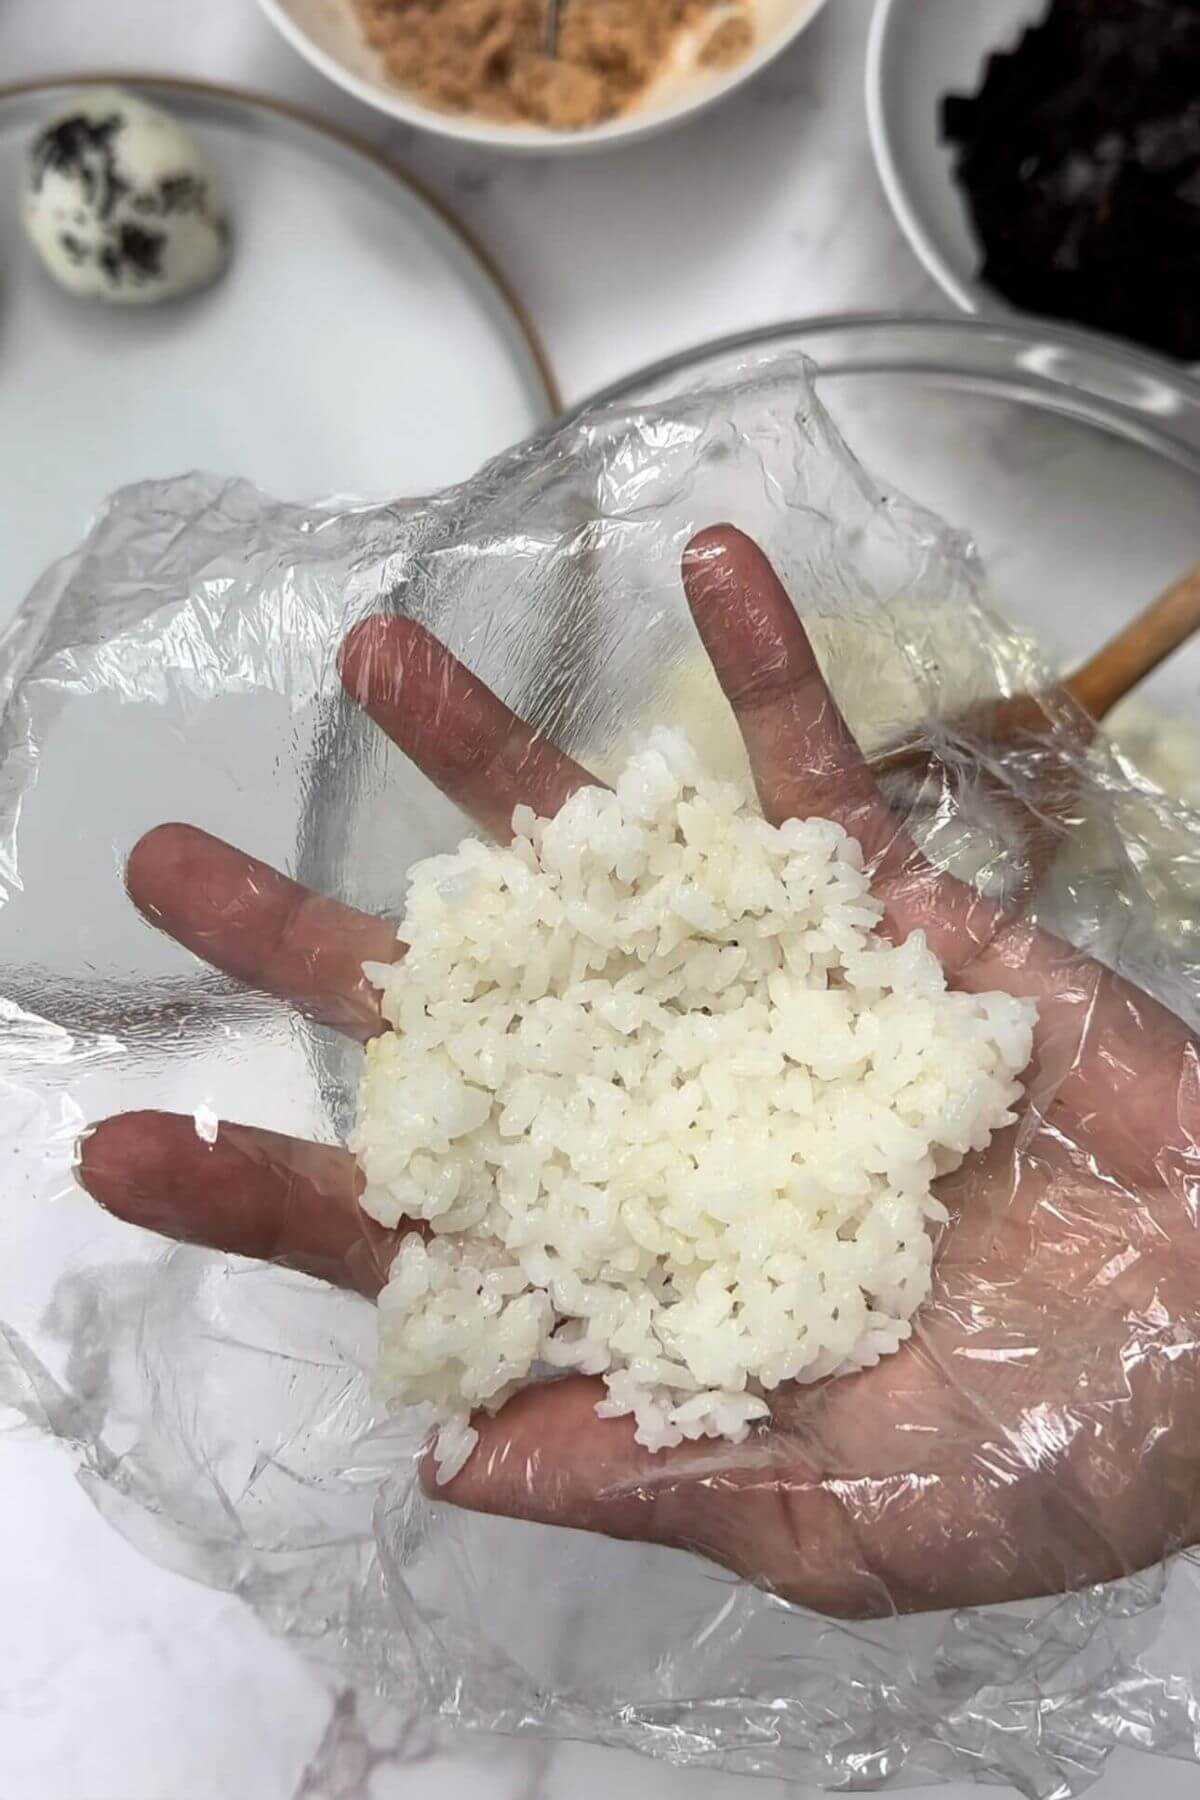
Step 2: Place some cling film in your hand and add sesame seeds. Take a bit of rice and flatten it on your palm over the sesame seeds.
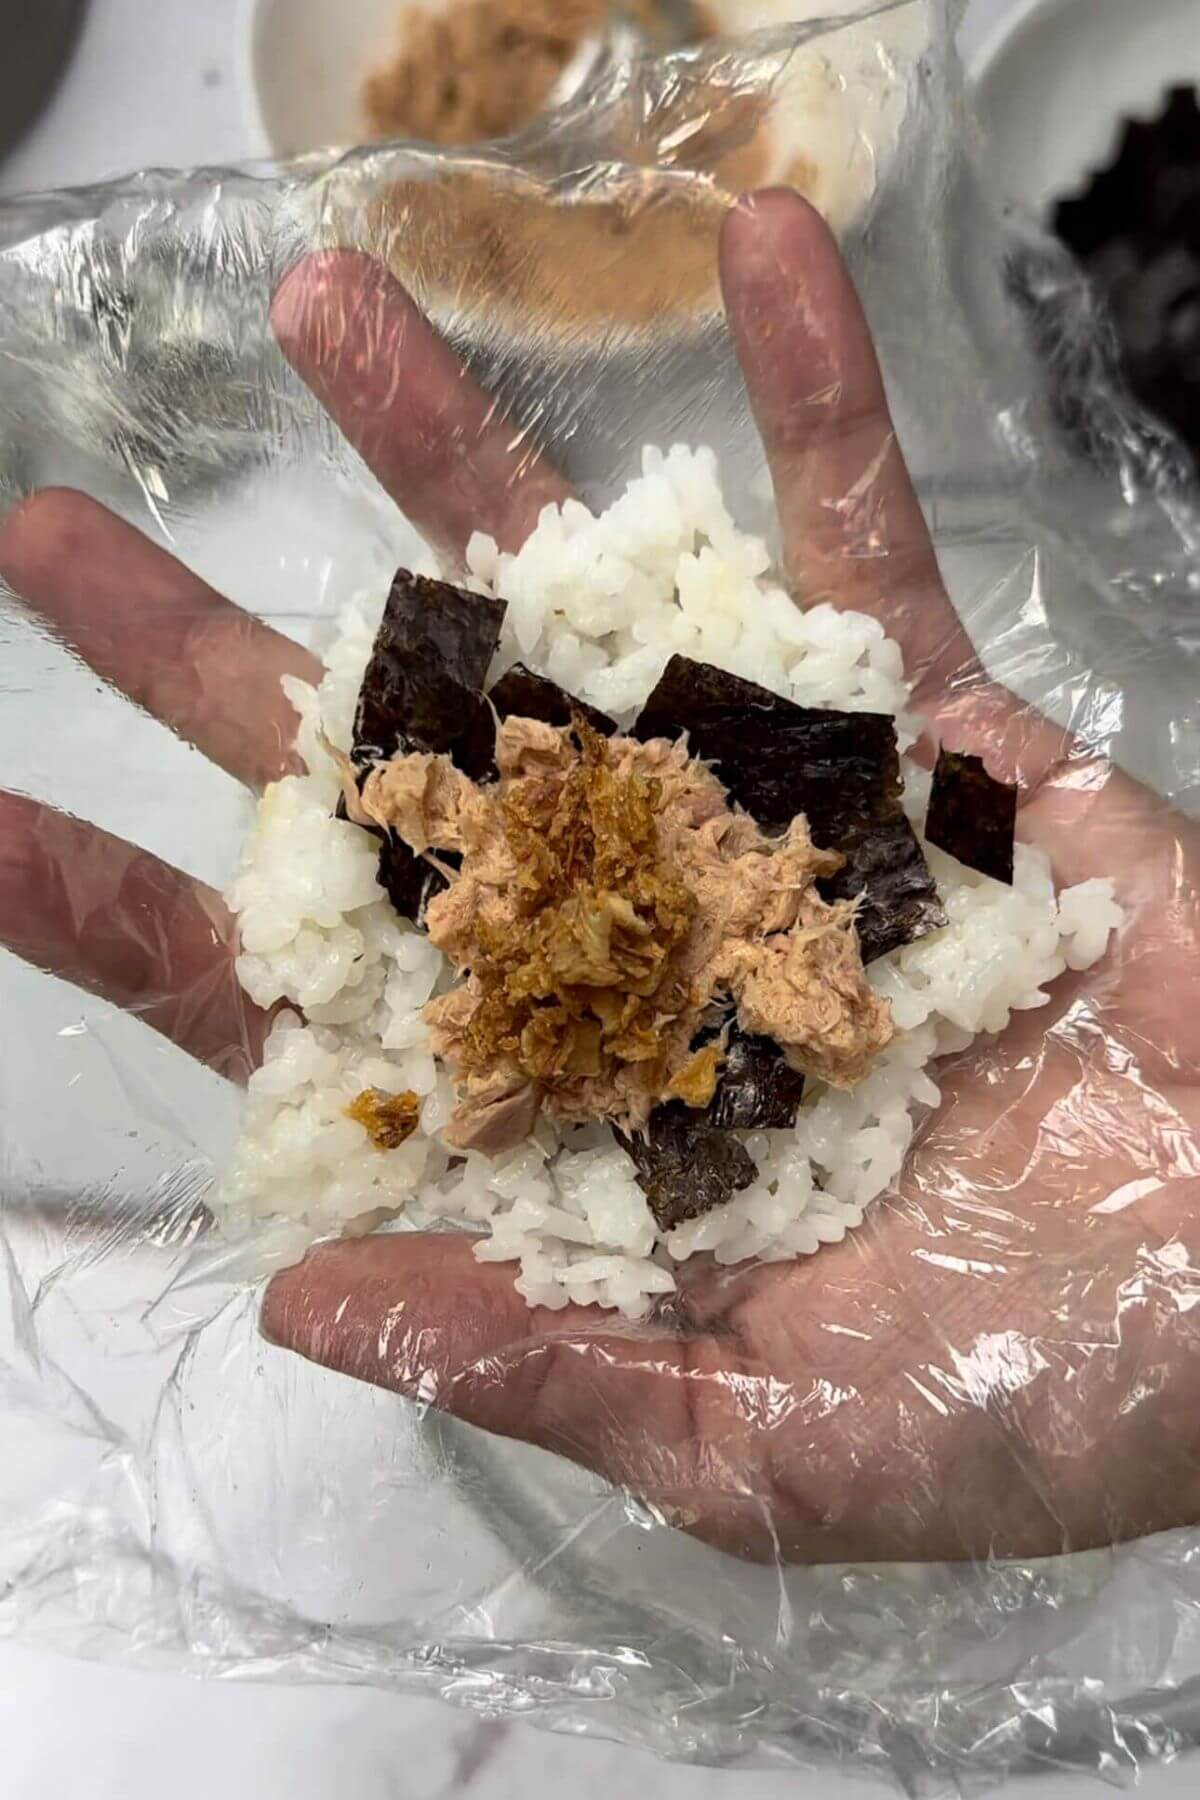
Step 3: Place spicy tuna on rice, add nori strips, and sprinkle with onion flakes.
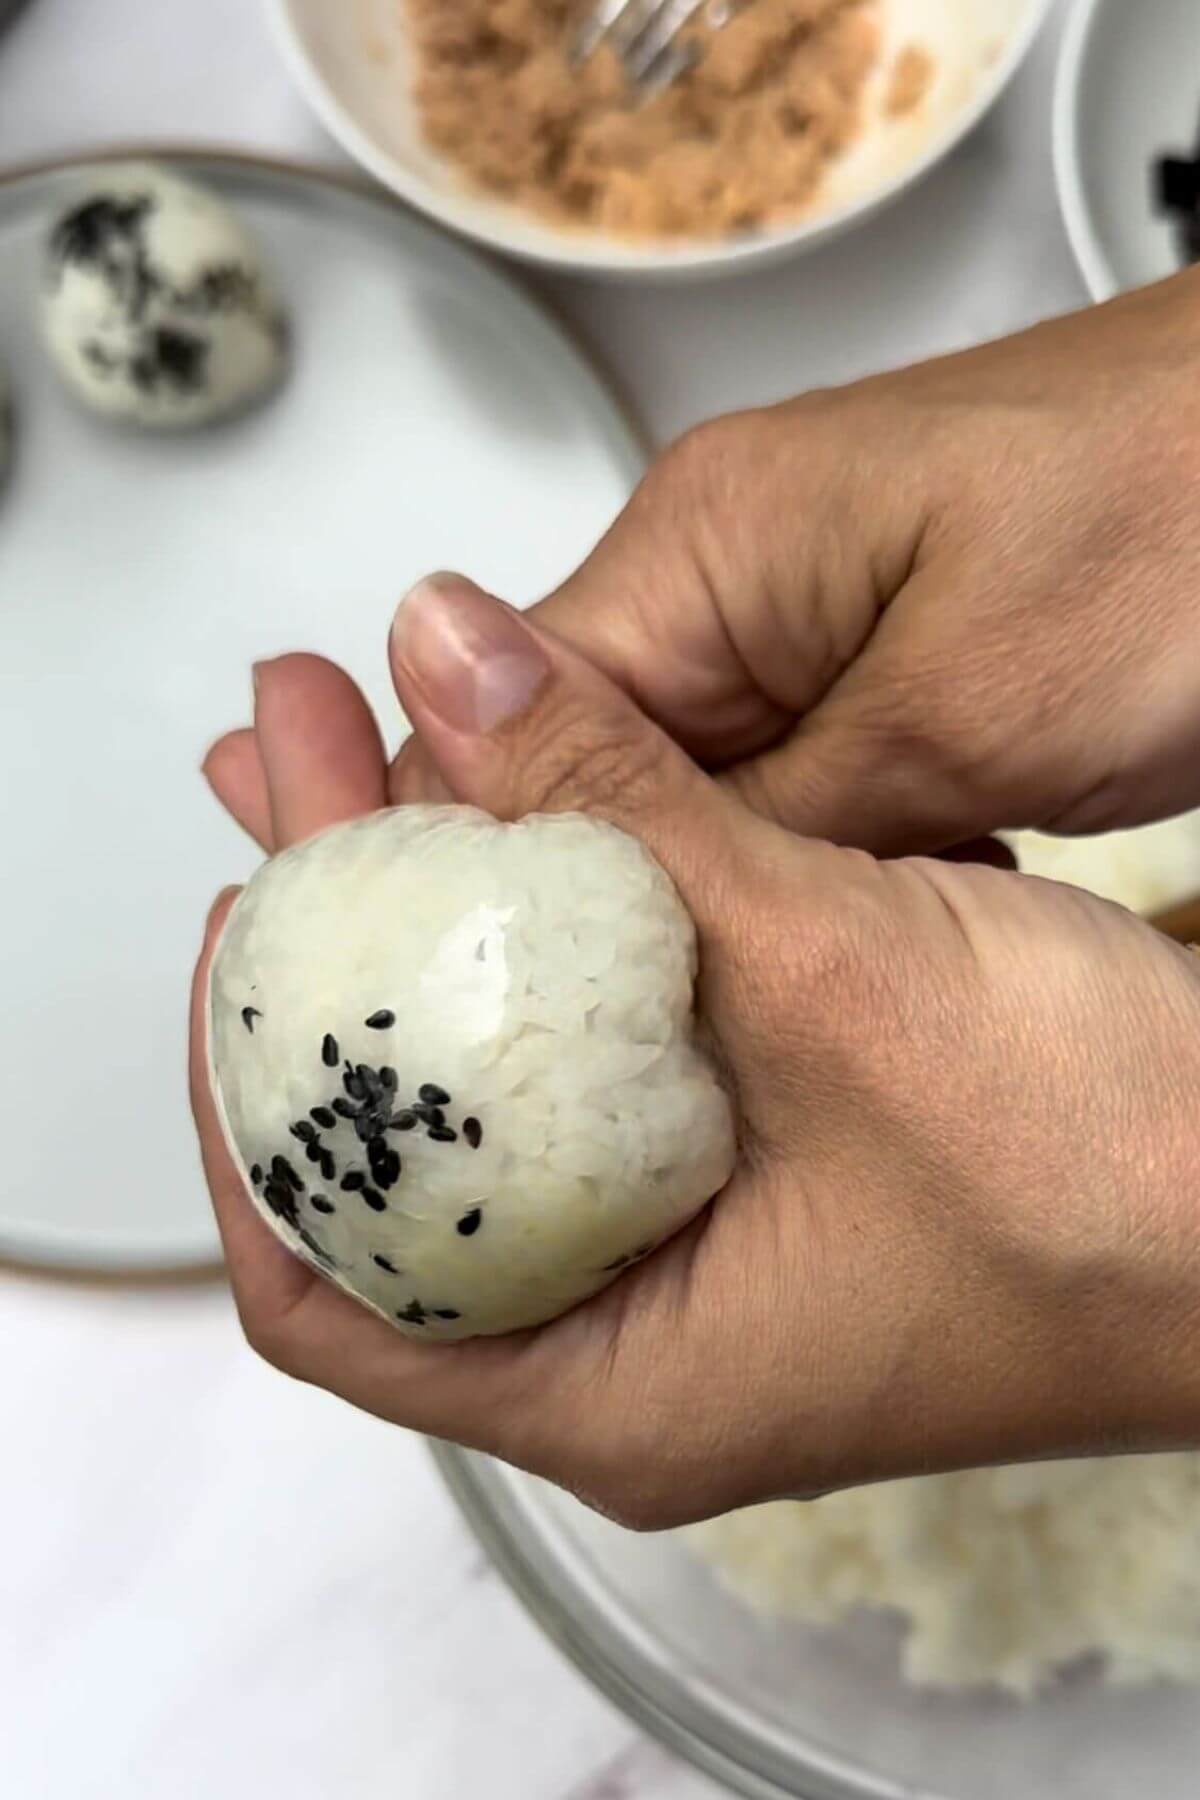
Step 4: Gently bring the rice around the filling, shaping it into a ball.
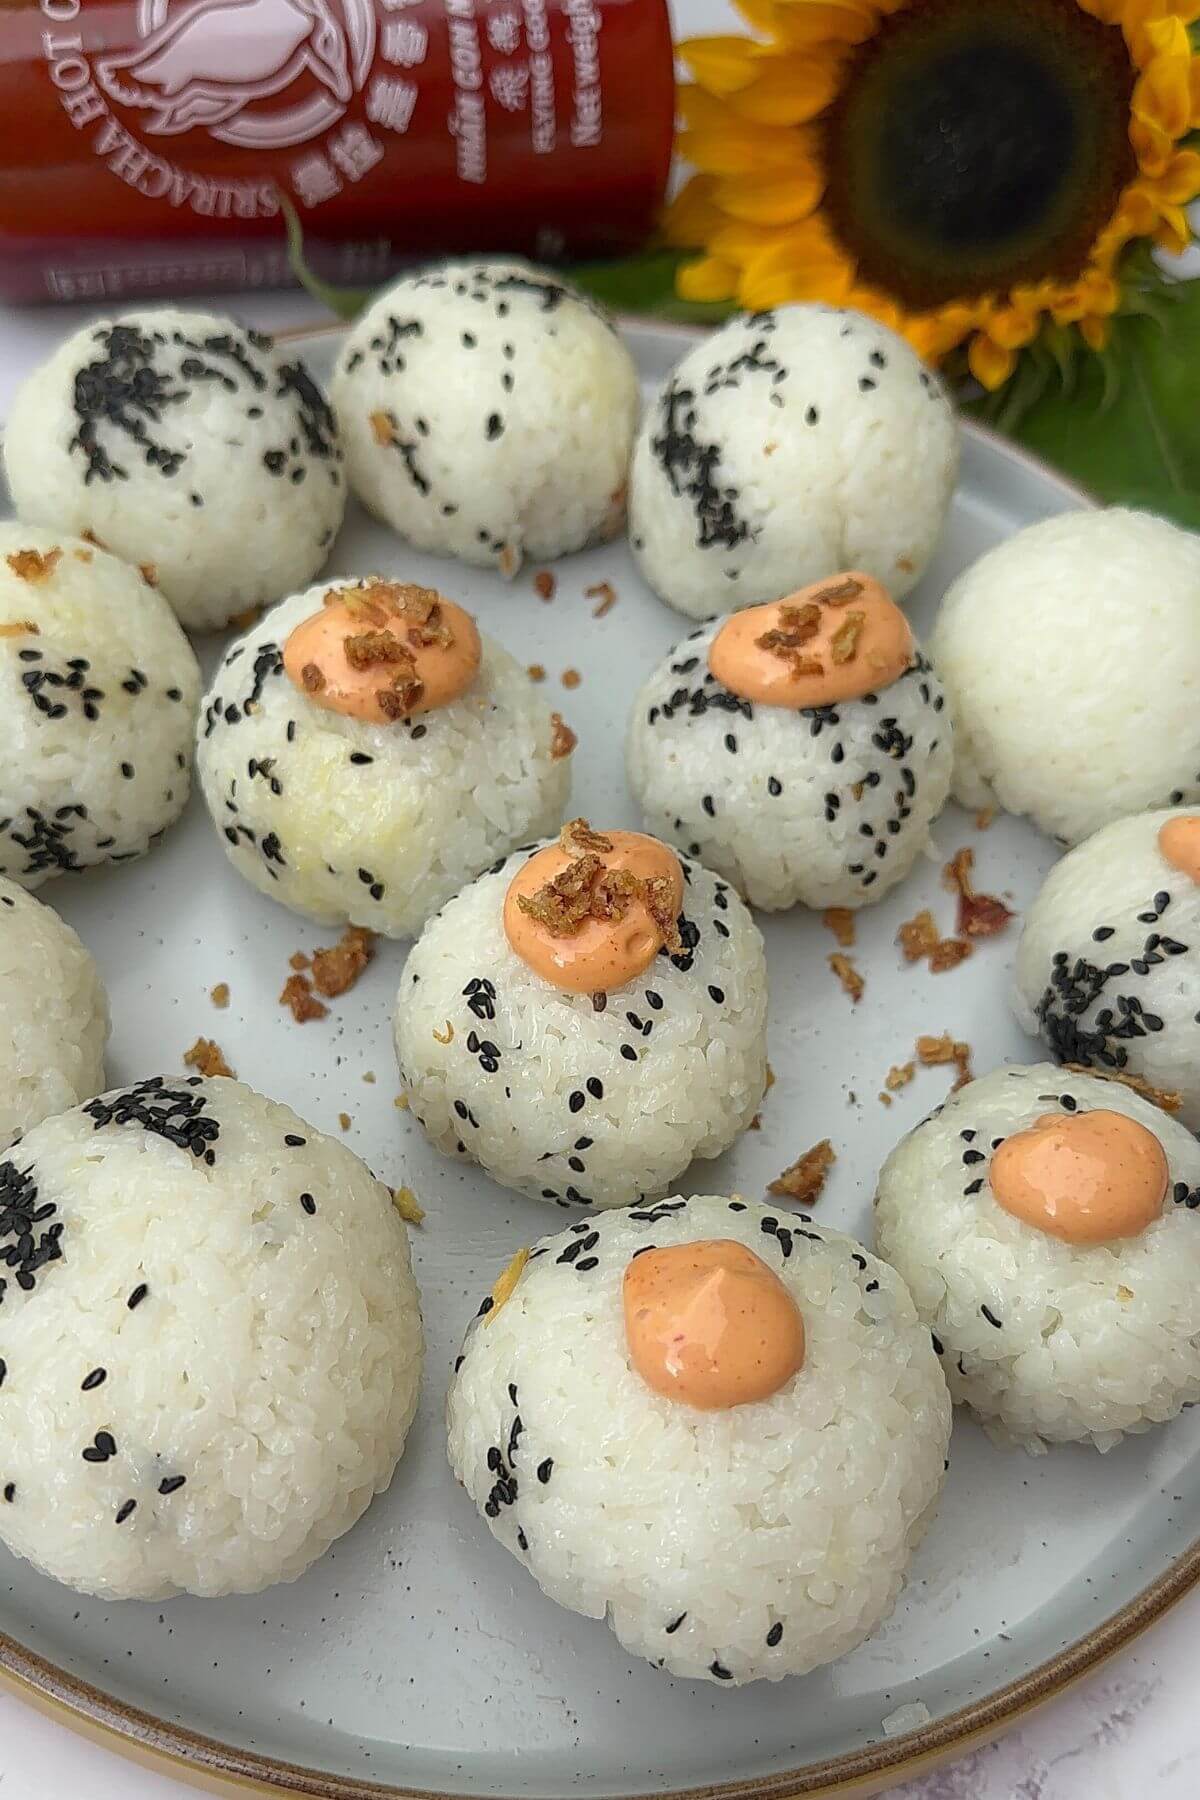
Step 5: Place a dollop of spicy mayo and sprinkle extra onion flakes on each onigiri.
Step 6: Serve these spicy tuna onigiri balls as a delicious snack, lunch, or picnic treat.
*See the recipe card for detailed instructions.
Claudia's top Tips
Wet your hands with a little water before shaping each onigiri, and keep a small bowl of water nearby to dip into between balls. Rice that's slightly warm and your hands slightly damp is the combination that keeps everything from sticking, without making the rice mushy.
Common Mistakes
- Using rice that's too hot or too cold. Hot rice burns your hands and is hard to control; fully cooled rice won't hold together. Aim for warm, not hot.
- Overfilling the center. Too much tuna mixture makes the onigiri fall apart when you try to shape it. A small spoonful goes further than it looks.
- Skipping the wet hands. Dry hands mean the rice sticks to you instead of itself, and you'll end up tearing the ball apart trying to free your fingers.
Leftovers and storage
These rice balls are best consumed when fresh, although if you make too much, you can store them in the refrigerator. Be aware that the rice will dry out if not stored properly.
- Place the onigiri in an airtight container or place them individually in plastic wrap.
- Refrigerate within 2 hours of preparation to maintain freshness.
- If you plan to consume the leftovers within 1-2 days, refrigeration is sufficient to maintain their freshness.
❓Easy Japanese Spicy Tuna Onigiri FAQs
Yes, but they are best eaten the same day. If you need to make them ahead, shape the onigiri, wrap each one individually in cling film, and keep them chilled until you're ready to leave. This helps prevent the rice from drying out and keeps the filling contained.
Wrap each onigiri individually in cling film or place them in an airtight container. Keep them away from direct heat and use an insulated lunch bag with a cold pack if they will be out for several hours. The nori can soften in storage, so you can add the outer nori just before eating if you prefer it firmer.
Onigiri are Japanese rice balls or rice shapes made with rice and usually a filling, while sushi rolls are made with seasoned sushi rice and fillings rolled in nori. Onigiri are generally shaped by hand rather than rolled and cut into individual pieces.
Yes. Canned tuna works particularly well for this recipe because it can be mixed directly with mayonnaise and Sriracha without any extra cooking. Tuna packed in oil or brine both work; drain it well before mixing so the filling isn't too wet.
For a simple lunch, serve them with cucumber slices, edamame, a small Asian-style salad, miso soup, or pickled vegetables. They also work well on their own as a snack or packed lunch.
More Tuna Recipes You May Love


Tried this recipe? Give it a star rating below! ⭐⭐⭐⭐⭐
HUNGRY FOR MORE? Subscribe to my newsletter and follow along on Facebook, Pinterest, and Instagram for the latest updates.
📖 Recipe

Spicy Tuna Onigiri
Video
Equipment
- cling film (plastic wrap)
Ingredients
- 300 g sushi rice cooked (about 1 ½ cups)
- 3 teaspoon rice vinegar
- 2 x 80 g cans tuna in oil or brine (2x2.8 oz cans)
- 1 tablespoon mayonnaise
- 1 teaspoon Sriracha sauce adjust to your spice preference
- 3 sheets of nori seaweed cut into small strips
- Onion flakes optional
- Sesame seeds optional
Instructions
- Cook the rice. Rinse 1 ½ cups sushi rice under cold water until it runs mostly clear. Cook according to package instructions (or in a rice cooker) using the recommended water ratio, then let it steam, covered, for 10 minutes off the heat.300 g sushi rice
- Season the rice. While the rice is still warm, gently fold in the rice vinegar until evenly distributed. Set aside to cool slightly - it should be warm, not hot, when you shape it.3 tsp rice vinegar
- In a bowl, mix the tuna, mayonnaise, and Sriracha sauce until well combined.2 x 80 g cans tuna in oil or brine, 1 tbsp mayonnaise
- Prepare a small piece of cling film and place it in your hand. Spread some sesame seeds out on the cling foil.Sesame seeds
- Grab a small amount of rice and flatten it on the palm of your hand over the sesame seeds.Onion flakes
- Spoon a little bit of the spicy tuna mixture onto the center of the rice.
- Add some strips of nori sheet and sprinkle some onion flakes on top of the tuna mixture.3 sheets of nori seaweed, 1 tsp Sriracha sauce
- Gently fold the rice around the filling, shaping it into a rectangle or ball.
- If desired, wrap a strip of nori around the onigiri for extra flavor and to make it easier to hold.
- Repeat the process with the remaining rice and tuna mixture to make more onigiri
- Add a small amount of spicy mayo on top of each onigiri and sprinkle with extra onion flakes.


Jordyn says
These spicy tuna onigiri turned out so tasty! The creamy tuna filling with that little kick is such a great combination, and the rice holds everything together perfectly. So easy and satisfying!
Laura says
This was surprisingly easy to make and so so good. Thank you for another fantastic recipe!
Swathi says
This japanese spicy tuna onigiri is so good. Great snack or even as lunch perfect.