
If you love Jellycat plushies, this fluffy Jellycat birthday cake is such a fun one to make at home. It has two layers of soft vanilla sponge filled with strawberry jam and whipped cream, brushed with a simple orange syrup to keep the cake moist.
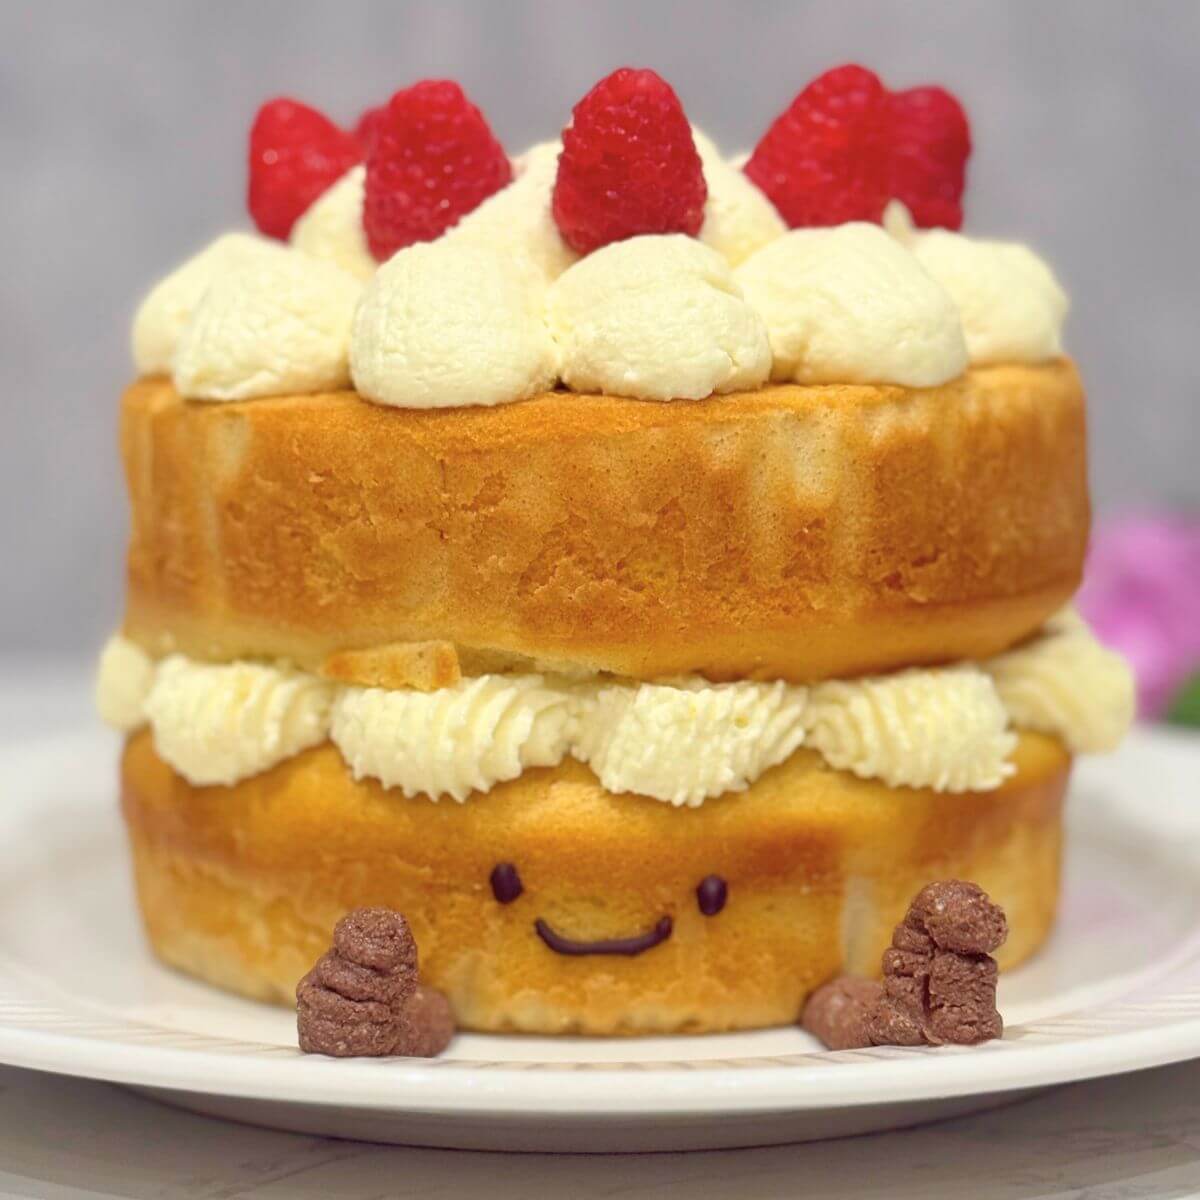
The decoration is easier than it looks. A little melted chocolate creates the Jellycat face, while chocolate whipped cream makes the tiny feet. Add a few fresh berries and a candle, and you have a homemade Jellycat cake that's perfect for a birthday celebration.

📷 Recipe Snapshot
📌 Recipe: Jellycat Birthday Cake
⏲️ Total Time: 2 hours 20 minutes
👥 Serves: 10
🌏 Cuisine: American
📝 Quick Summary: Two soft vanilla sponge layers filled with strawberry jam and whipped cream, brushed with homemade citrus syrup, then decorated with raspberries and a simple chocolate Jellycat face.
🌟 Main Ingredients: All-purpose flour, eggs, sugar, butter, milk, heavy cream, strawberry jam, raspberries, dark chocolate, and orange.
💡 Pro Tip: Chill the assembled cake for at least 30 minutes before serving. This helps the whipped cream firm up and makes the cake easier to slice.
💡 Summarize and save this recipe on
My 11-year-old daughter asked me to make this Jellycat birthday cake for her sister's birthday. They're both big plushie fans, so I knew this would be a fun surprise.
I made it as a homemade version of the Jellycat birthday cake plush, using a simple vanilla sponge rather than a complicated decorated cake. You don't need advanced cake-decorating skills for this one. The face is made with melted chocolate, and the little feet are piped with chocolate whipped cream.
Seeing their faces when I brought the finished cake to the table was easily my favourite part.
Jump to:
- 📷 Recipe Snapshot
- 💡 Summarize and save this recipe on
- 💗 What Makes This Jellycat Cake Special
- 🎂 Jellycat Birthday Cake Ingredients
- ♻️ Substitutes & Variations
- 👩🍳How To Make Jellycat Birthday Cake
- Claudia's top Tips
- Common Mistakes
- 🥗 Serving Suggestions
- ❓Jellycat Birthday Cake FAQs
- More Cake Recipes to Try
- 📖 Recipe
- 💬 Comments
Ashley says:
 "This cake turned out so cute and was so moist and delicious. My friends loved it!"
This adorable Jellycat birthday cake takes inspiration from Jellycat's famously soft plush toys, turning their signature cuddly style into a delicious homemade treat! The London-based brand has been creating lovable stuffed animals since 1999, and now you can bring that same playful charm to your dessert table with this easy recipe.
If you are a fan of fresh desserts, I am sure you will also enjoy my strawberry tiramisu, no-coffee and kid-friendly.
💗 What Makes This Jellycat Cake Special
- Soft vanilla sponge - Two light, tender layers make a good base for the cream and jam without making the cake feel heavy.
- Strawberry jam and whipped cream - The filling is simple, but the combination works really well with the vanilla sponge.
- Orange syrup - A light orange syrup brushed over the sponge keeps it moist without making it soggy.
- Simple Jellycat decoration - Melted chocolate creates the little face, while chocolate whipped cream makes the feet.
- No fondant or complicated piping - The design is meant to look cute rather than perfect, so you don't need advanced decorating skills.
🎂 Jellycat Birthday Cake Ingredients
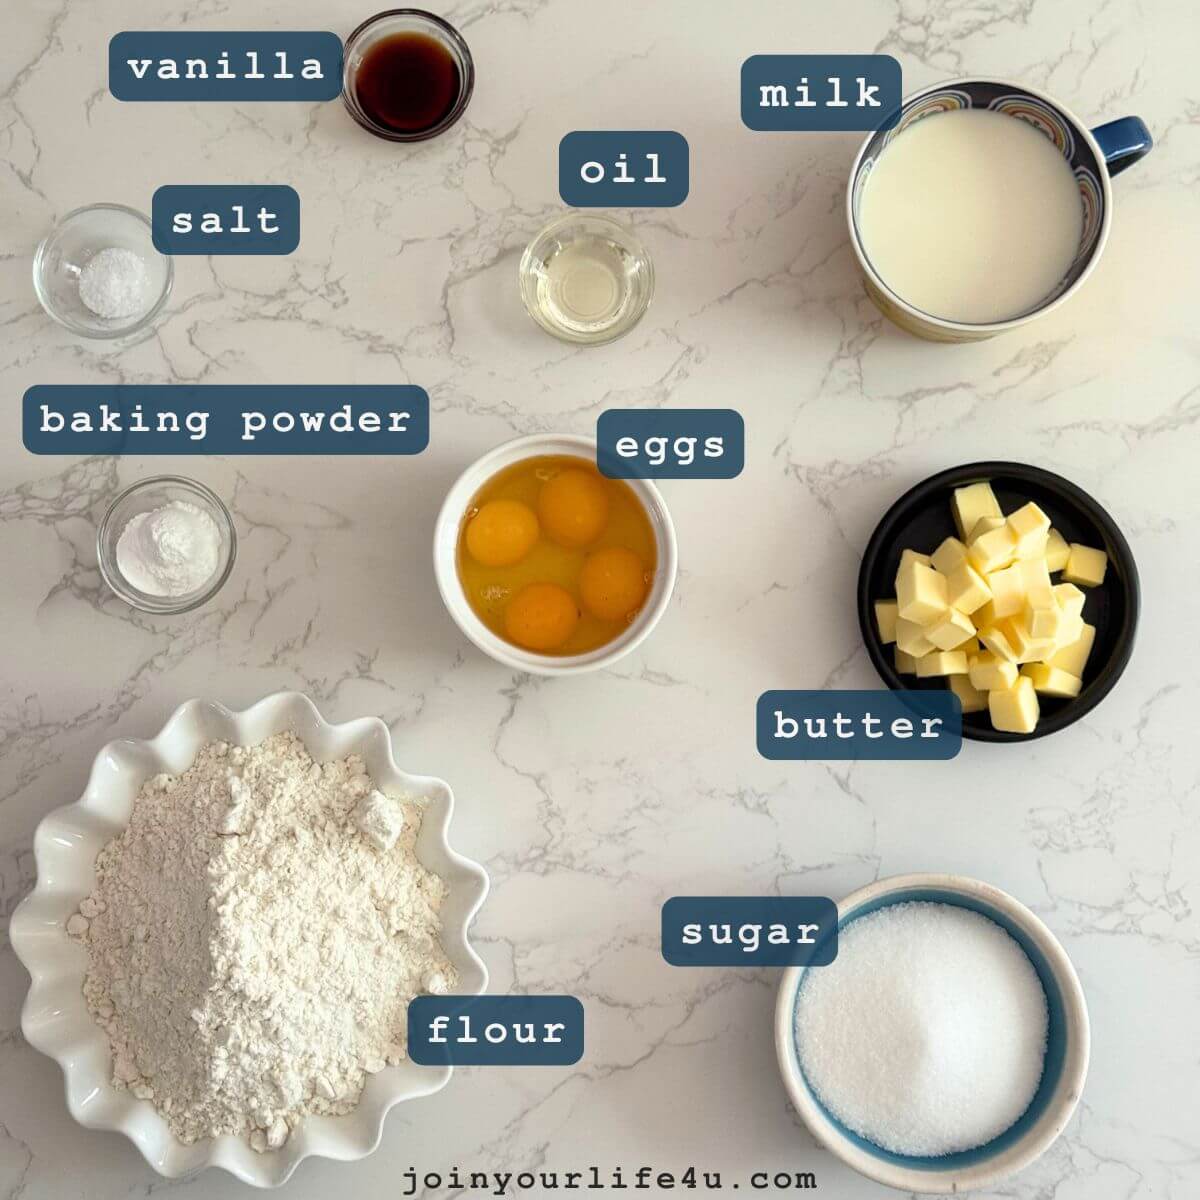
*See the recipe card for full information on ingredients and quantities.
- All-purpose flour - Plain flour works perfectly for this sponge.
- Baking powder - Helps the sponge rise and stay light.
- Room-temperature eggs - They whip up with more volume, which helps give the cake its soft texture. If you've forgotten to take them out, place them in warm water for 5-10 minutes.
- Unsalted butter - Melted with the milk, so there's no need to soften it first.
- Milk - Regular milk works well, but you can use an unsweetened plant-based milk if needed, like almond or oat milk instead of dairy
- Neutral oil - Canola or avocado oil both work well.
- Vanilla extract - Adds a simple vanilla base to the sponge and whipped cream.
- Heavy cream - Keep it well chilled before whipping for the best results.
- Powdered sugar - Sweetens and helps the whipped cream hold its shape.
- Cocoa powder - Gives the small amount of cream used for the feet a brown shade.
- Strawberry jam - Use a thick jam so it stays in place between the layers.
- Dark chocolate - Melted chocolate is used for the Jellycat face.
- Orange - You'll use the peel for the syrup. If your orange isn't unwaxed, scrub the peel well or leave it out.
♻️ Substitutes & Variations
- Use dairy-free cream if needed, or a combination of soft cream cheese or mascarpone with whipping cream. Or you can use the cream cheese frosting from my lemon curd layer cake recipe.
- Swap strawberry jam for raspberry or apricot
- If you don't have piping bags, a small ziplock with the corner snipped works perfectly for both whipped cream and chocolate details.
- Add lemon zest to whipped cream
- Mix crushed cookies into the cream for texture
- Use colourful berries for a bright twist. This is my chocolate berry mousse cake that you might want to try next.
👩🍳How To Make Jellycat Birthday Cake
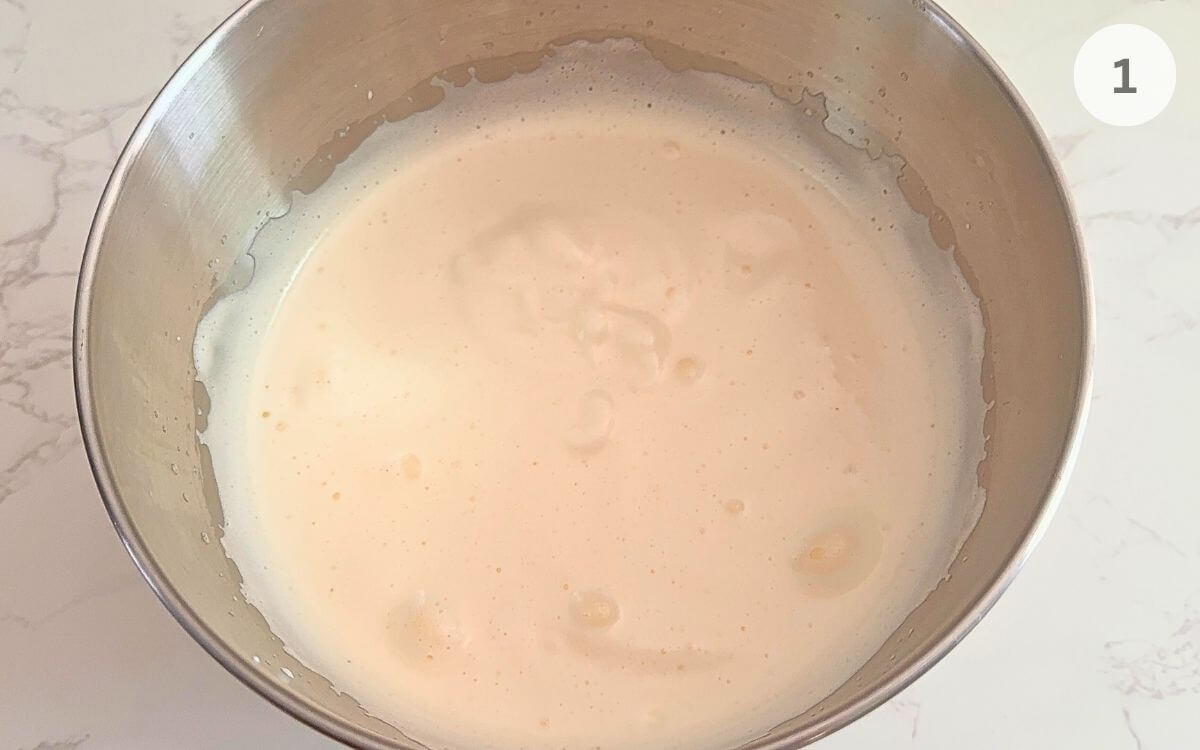
Step 1: In a large bowl, beat the eggs and sugar on high for about 6 minutes until thick, pale, and tripled in volume.
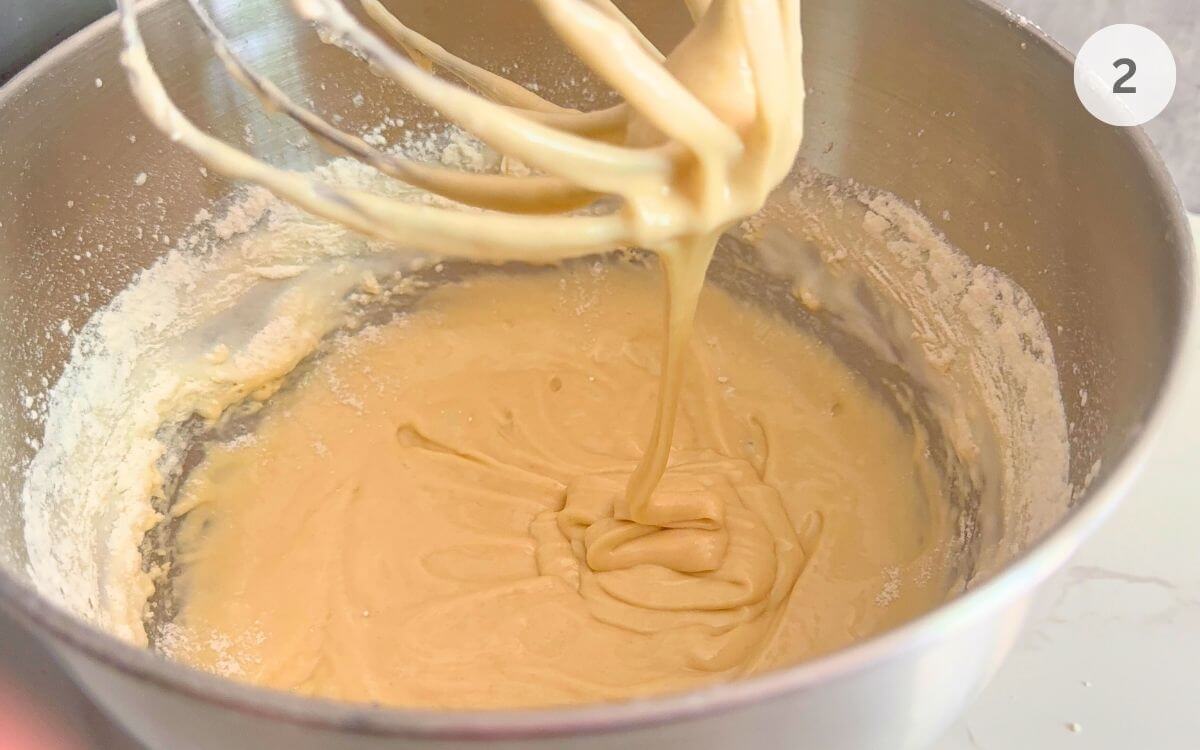
Step 2: Add half the dry mix to the eggs and mix on low. Add the rest and mix briefly.
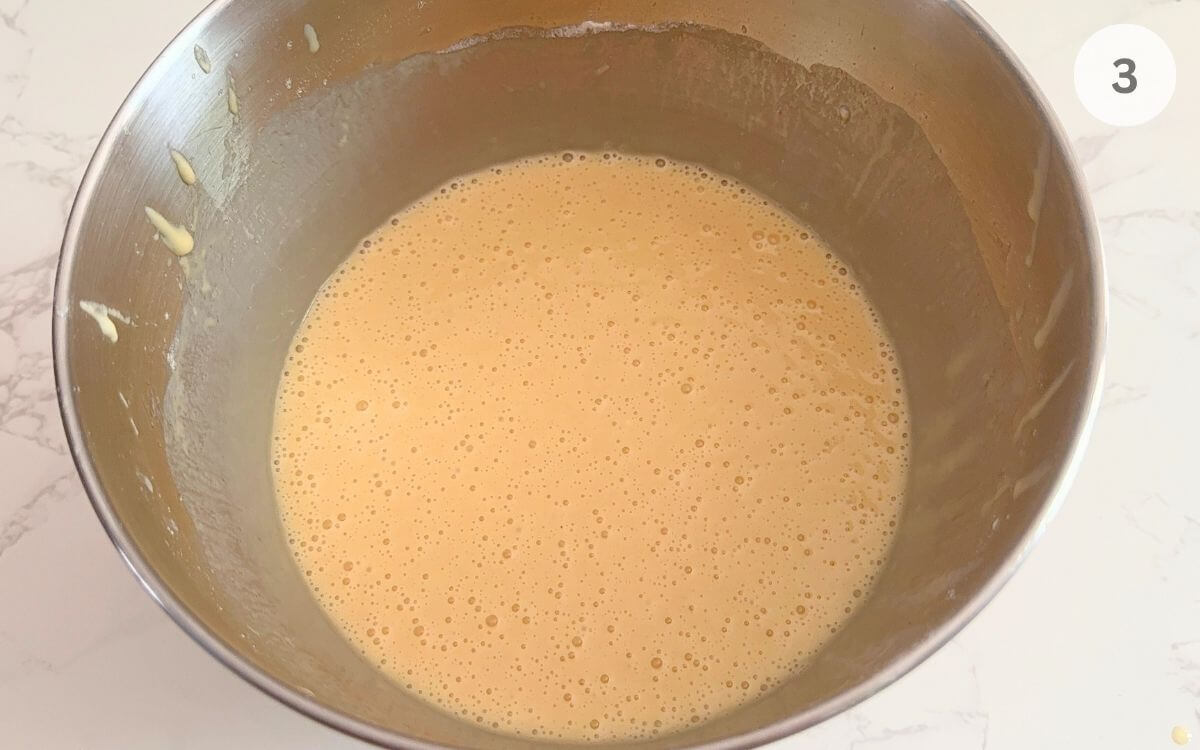
Step 3: Heat the butter, milk, oil, and vanilla until melted, then slowly mix into the batter until smooth.
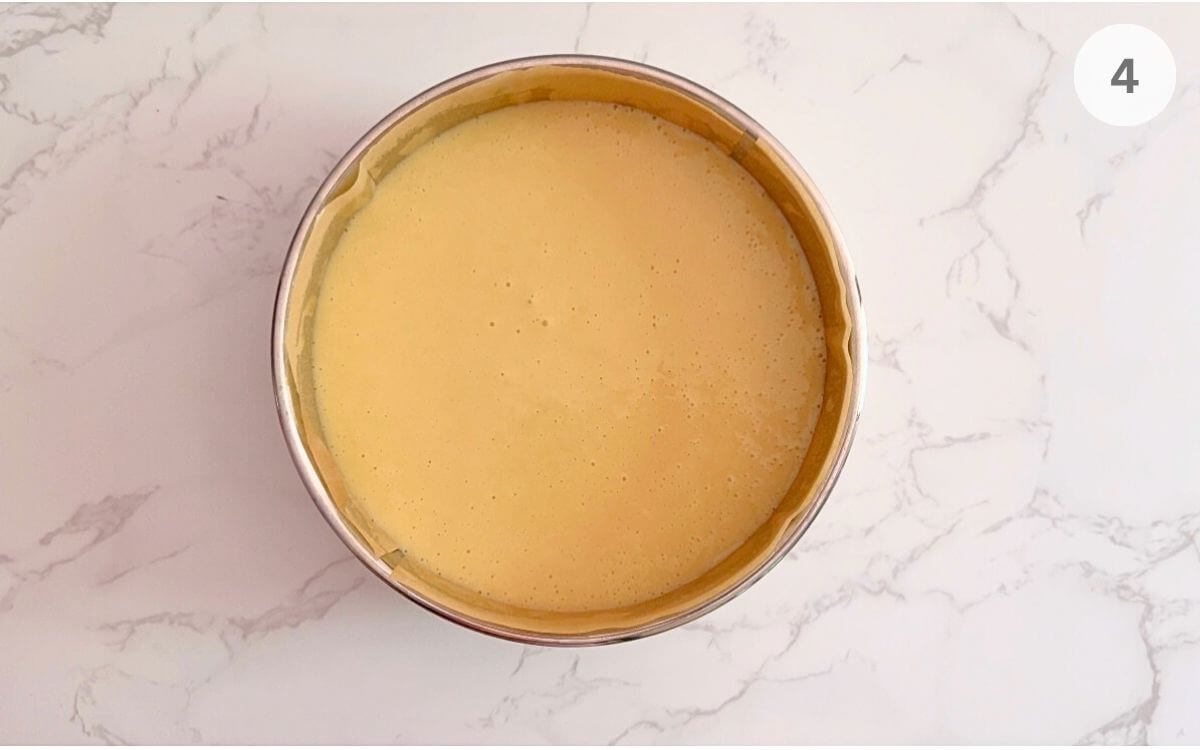
Step 4: Divide the batter between the pans. Bake for 35-40 minutes, or until a toothpick comes out with a few moist crumbs.
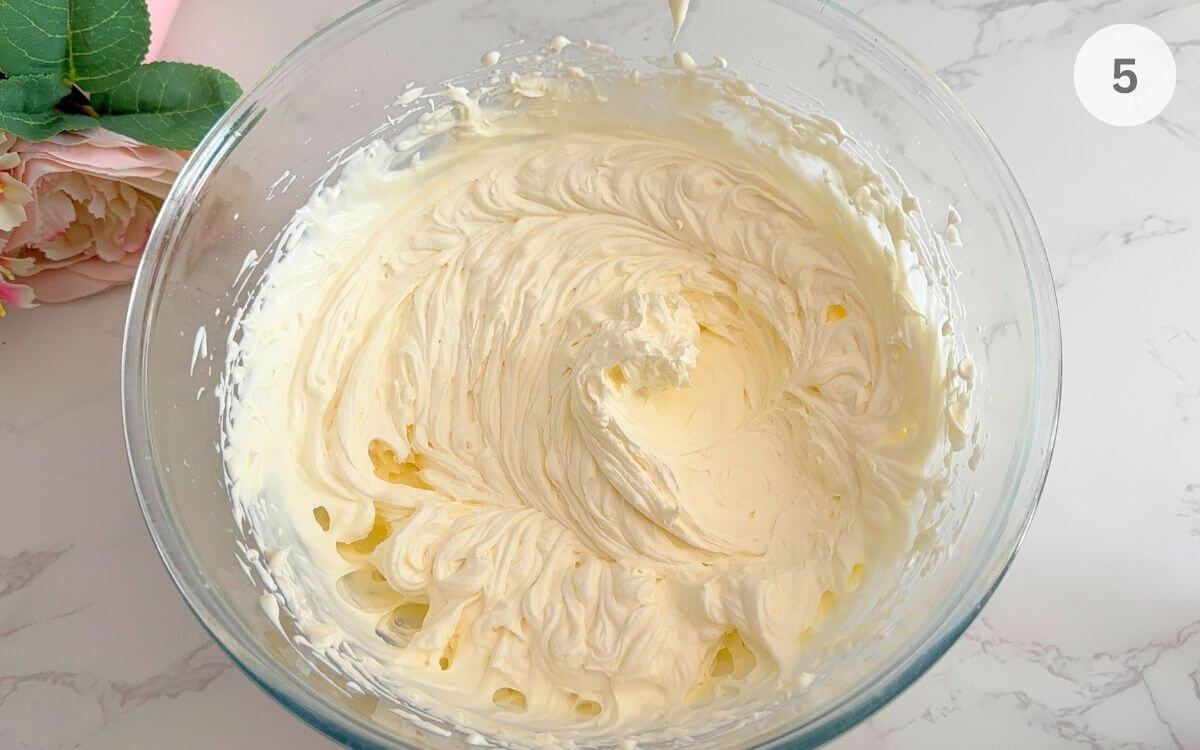
Step 5: Whip the cold cream with powdered sugar and vanilla in a large bowl until soft peaks form.
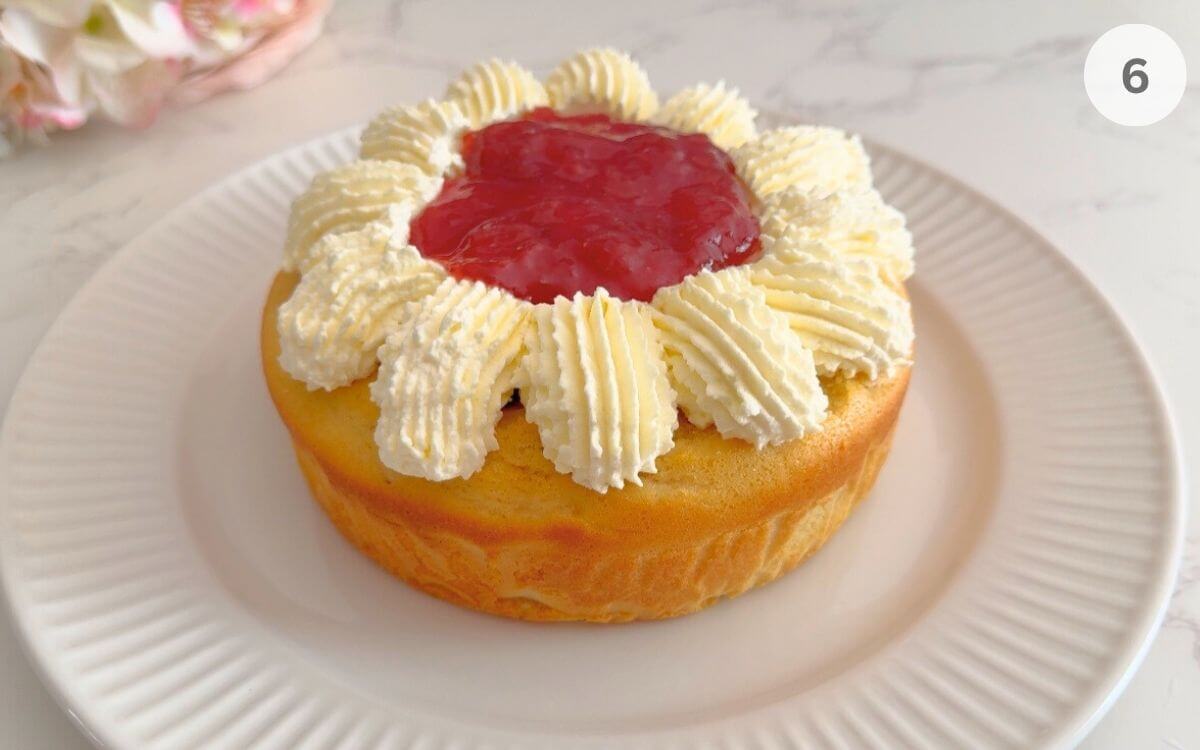
Step 6: Place the first sponge on a plate, brush with syrup, pipe whipped cream around the edge, and fill the centre with jam.
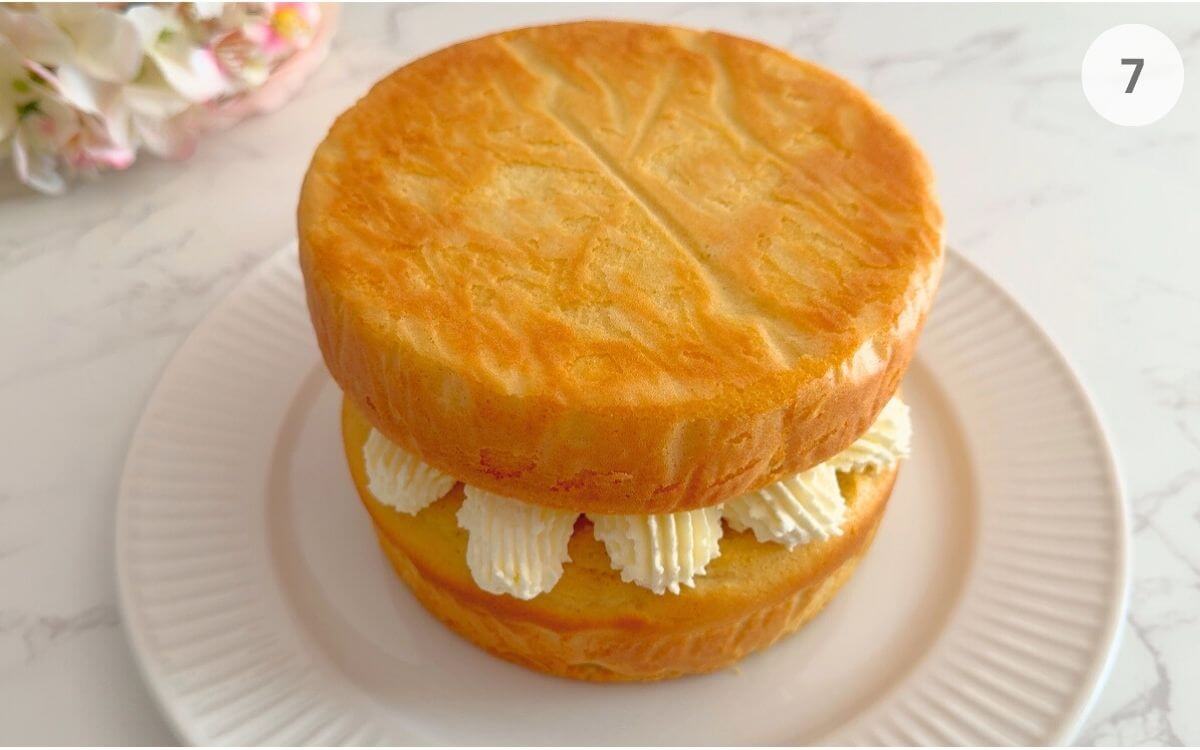
Step 7: Add the second sponge layer on top, then pipe more whipped cream and decorate with halved strawberries.
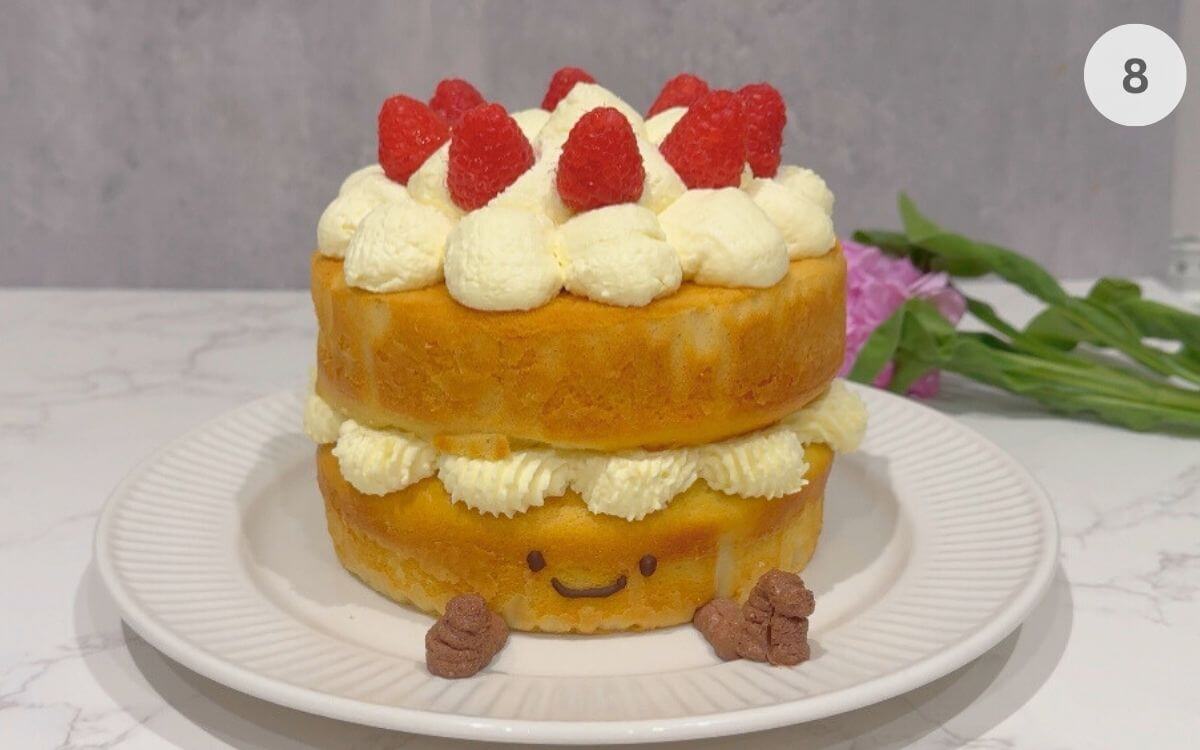
Step 8: Use chocolate whipped cream to pipe little legs at the base, then add eyes and a smile with melted chocolate on the bottom layer.
*See the recipe card for detailed instructions.
Pro tip: Chill the Jellycat birthday cake for 30 minutes before serving to help the whipped cream set and make slicing easier.
Claudia's top Tips
- Brush the syrup lightly. You want the sponge moist, not wet. A pastry brush makes it easier to control the amount.
- Keep the cream cold. Cold cream and a chilled mixing bowl make a noticeable difference when you're piping the decoration.
- Give the assembled cake time to chill. I recommend at least 30 minutes before serving so the cream firms up and the layers are easier to cut.
- Keep the face simple. The eyes and smile only need a small amount of chocolate. Smaller details make the cake look more like the plush version.
- Don't aim for perfect. This cake is supposed to look playful, so a slightly wonky smile or uneven feet only adds to the homemade feel.
Common Mistakes
- The sponge loses volume: Don't overmix after adding the flour. The whipped eggs are what give this cake its light texture.
- The whipped cream is too soft: Make sure the cream is very cold and whip it until it holds firm peaks before piping.
- The cake becomes soggy: Brush the orange syrup lightly over the sponge rather than pouring it on.
- The chocolate face looks too large: Use a very small piping opening and add the eyes and smile gradually.
- The cake is difficult to slice: Chill the assembled cake for at least 30 minutes before cutting.
🥗 Serving Suggestions
- Serve the Jellycat birthday cake with fresh berries
- Pair with a cup of tea or sparkling juice
- Slice small wedges for kid-friendly portions
❓Jellycat Birthday Cake FAQs
The most common problem is losing too much air when combining the whipped eggs with the dry ingredients. Fold gently and avoid overmixing. Also make sure the oven is fully preheated before the cakes go in.
Make sure the cream is very cold and whip it to firm peaks before piping. If you need extra stability, you can add 1 teaspoon of cornstarch or use the mascarpone-and-cream option mentioned in the recipe notes.
The cake may need more chilling time. Refrigerate the assembled cake for at least 30 minutes before serving. Use a sharp knife warmed under hot water and wipe it clean between cuts.
Store the assembled cake in the refrigerator for up to 2 days. Let it sit at room temperature for a few minutes before serving so the sponge and cream aren't too cold.
Keep the cake refrigerated until you're ready to leave, then place it on a flat, secure surface in a cake box. Avoid carrying it loose on a plate, and keep the box level during transport.
If you're travelling a longer distance, chilling the cake well beforehand will help the whipped cream stay firm.
More Cake Recipes to Try


Tried this recipe? Give it a star rating below! ⭐⭐⭐⭐⭐
HUNGRY FOR MORE? Subscribe to my newsletter and follow along on Facebook, Pinterest, and Instagram for the latest updates.
📖 Recipe

Jellycat Birthday Cake
Video
Equipment
- 2 6 inch baking pans
- 1 electric mixer
- 3 piping bags
Ingredients
For the Cake:
- 2 cups all-purpose flour
- 1 ½ teaspoon baking powder
- ½ teaspoon salt
- 3 large eggs room temp!
- 1 cup granulated sugar
- 6 tablespoon melted unsalted butter (cool slightly)
- ¾ cup + 1 tablespoon milk (any kind)
- 2 tablespoon neutral oil (like vegetable or sunflower)
- 1 ½ teaspoon vanilla
For the Filling/Frosting:
- 1 ¼ cups cold heavy cream
- ¼ cup powdered sugar
- 1 teaspoon vanilla
- 1 teaspoon cocoa powder for "feet"
- 4 tablespoon strawberry jam (thicker varieties work best)
For the Syrup:
- 1 ¼ cups water
- Peel of 1 orange (organic/unwaxed)
- 1 teaspoon vanilla extract
- 3 tablespoon granulated sugar
To Decorate:
- 8 raspberries or halved strawberries
- 1 striped candle (classic Jellycat look!)
- ¼ cup chopped dark chocolate (or chocolate chips)
Instructions
- Making the Syrup: Add the water, orange peel, sugar, and vanilla to a saucepan. Bring it to a boil, then reduce the heat and simmer for a few minutes until the sugar fully dissolves. Remove from heat and let the syrup cool completely.
- Making the Sponge Cake: Preheat the oven to 350°F (180°C). Line two 6" round cake pans with parchment paper-place a round piece on the bottom and strips along the sides to help the cakes come out cleanly. Set aside.
- In a small bowl, mix the flour, baking powder, and salt.
- In a small saucepan or microwave-safe bowl, combine the butter, milk, oil, and vanilla. Heat just until the butter melts-don't let it boil. Cover and keep warm.
- In a large mixing bowl, beat the eggs and sugar with a hand mixer fitted with a whisk attachment for 6 minutes until pale, thick, and tripled in volume.
- Add half of the flour mixture and mix on low speed until just combined. Add the rest and mix again briefly-some streaks are fine. With the mixer on low, slowly pour in the warm milk mixture. Mix until smooth and fluid.
- Divide the batter evenly between the two pans. Bake for 35-40 minutes, or until a toothpick comes out with a few moist crumbs.
- Let the cakes cool in the pans for 15 minutes, then run a spatula around the edges and turn them out onto a wire rack. Peel off the parchment and let cool completely.
- Making the Whipped Cream Filling: In a large bowl, whip the cream with powdered sugar and vanilla to soft peaks. Scoop out a small portion into a separate bowl, then continue whipping the rest to firm peaks.
- Add cocoa powder to the smaller portion and stir until combined. Transfer both the plain and chocolate whipped cream to piping bags and snip the tips.
- Assembling and Decorating the Cake: Place one cake layer on a plate or board. Spoon or brush some of the cooled syrup over the cake to moisten it. Pipe whipped cream dollops around the edge, working toward the center. Lightly smooth the dollops toward the middle with a spatula.
- Spoon strawberry jam into the center and spread it into an even layer, staying within the cream border.
- Gently place the second sponge cake layer over the cream and strawberry jam. Lightly moisten it with more syrup, then pipe whipped cream on top and decorate with raspberries. Add a candle if you like.
- Using the chocolate whipped cream, pipe small legs extending from the base of the cake onto the plate.
- Melt the dark chocolate and transfer it to a small piping bag. Pipe eyes and a smile on the bottom layer between the legs.
Notes
- Storage - Store the cake in the fridge for up to 2 days (whipped cream softens over time). Cover loosely with plastic wrap or a cake dome to prevent drying.
- Make Ahead - Bake the sponges a day ahead, wrap tightly in plastic, and store at room temperature. Assemble the cake the day of serving for the freshest taste.
- Room-Temperature Eggs - Cold eggs won't whip as well. To quickly warm them, submerge in warm water for 5-10 minutes before using.
- Syrup Tip - Brush syrup lightly to avoid soggy layers. Leftover syrup can be refrigerated for 1 week (great for cocktails or iced tea!).
- Whipped Cream Stability - For a sturdier cream, add 1 teaspoon cornstarch while whipping, or use ½ mascarpone + ½ cream.
- Decorating Shortcut - Use store-bought jam and pre-made whipped cream if pressed for time.
-
Allergy Swaps -
- Gluten-free: Substitute flour with a 1:1 gluten-free blend.
- Dairy-free: Use plant-based butter, milk, and coconut cream.
- Serving - For clean slices, dip your knife in hot water and wipe between cuts.
- Freezing - Freeze unfrosted sponge layers (wrapped tightly) for up to 1 month. Thaw at room temperature before assembling.
- Kids' Help - Let little ones decorate with extra berries or chocolate chips!
Lora says
This Jelly Cat Birthday Cake was absolutely delicious! The sponge was so light, and the combination of whipped chocolate cream, strawberry jam, and fresh raspberries made it the perfect celebratory treat.
Tisha says
This turned out adorable and the directions were simple to follow!
Jet says
What a charming concept to turn a plushie into an edible cake! The citrus syrup sounds like it keeps the sponge perfectly moist.
Ashley says
This cake turned out so cute and was so moist and delicious. My friends loved it!
Swathi says
This Jelly cat birthday cake is so delicious I made it for your my son. He enjoyed it and asked me to make it again.
Andrea says
Loved how moist the layers were with that citrus syrup—really makes a difference.
Jaleah says
This jelly cat birthday cake is adorable!!
amy liu dong says
Oh my gosh, this cake recipe is so cute and looks delicious. I am sure whoever receives this cake will love it!
Jordan says
This cake turned out so cute! And I love how tasty and fluffy it is.
Elizabeth says
My toddler and I love Jellycats! This recipe was so fun to make with her and tasted amazing. Bookmarking this recipe to our favorites folder!
Lora says
Made the jelly cat for a special birthday, and everyone was thrilled!
Ashley says
How adorable is this cake!! And delicious too--thanks for the great recipe!
Paula says
My daughter was so impressed with this jellycat birthday cake! It turned out so cute and tasted great!
Claudia Ciorteanu says
My family loved this!