
This raspberry heart-shaped cake is perfect for special occasions. Light sponge, tangy raspberry filling, and smooth buttercream make it a crowd favourite. You might also find it interesting to make this Jellycat Birthday Cake.
As a mom making cakes for my kids for over 14 years, I love the fun challenge of creating something special every year.
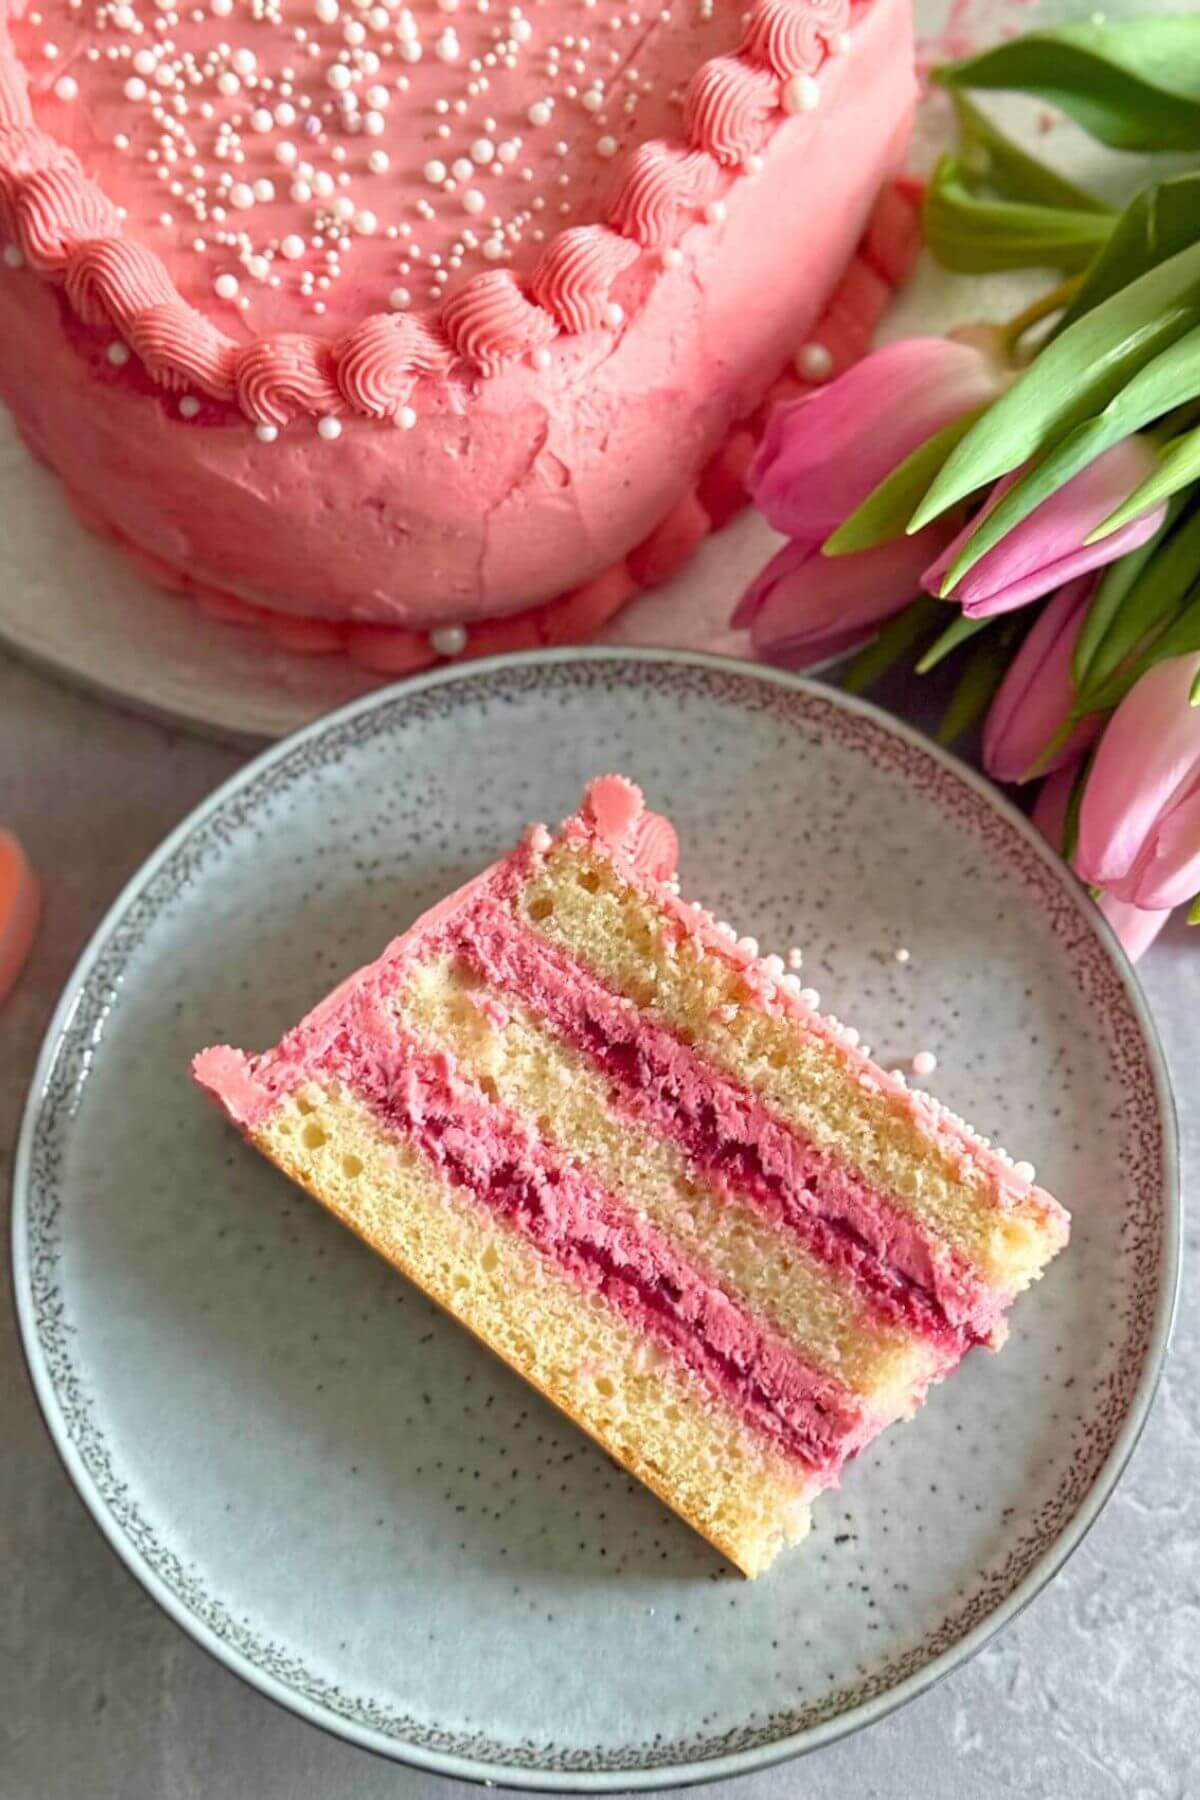
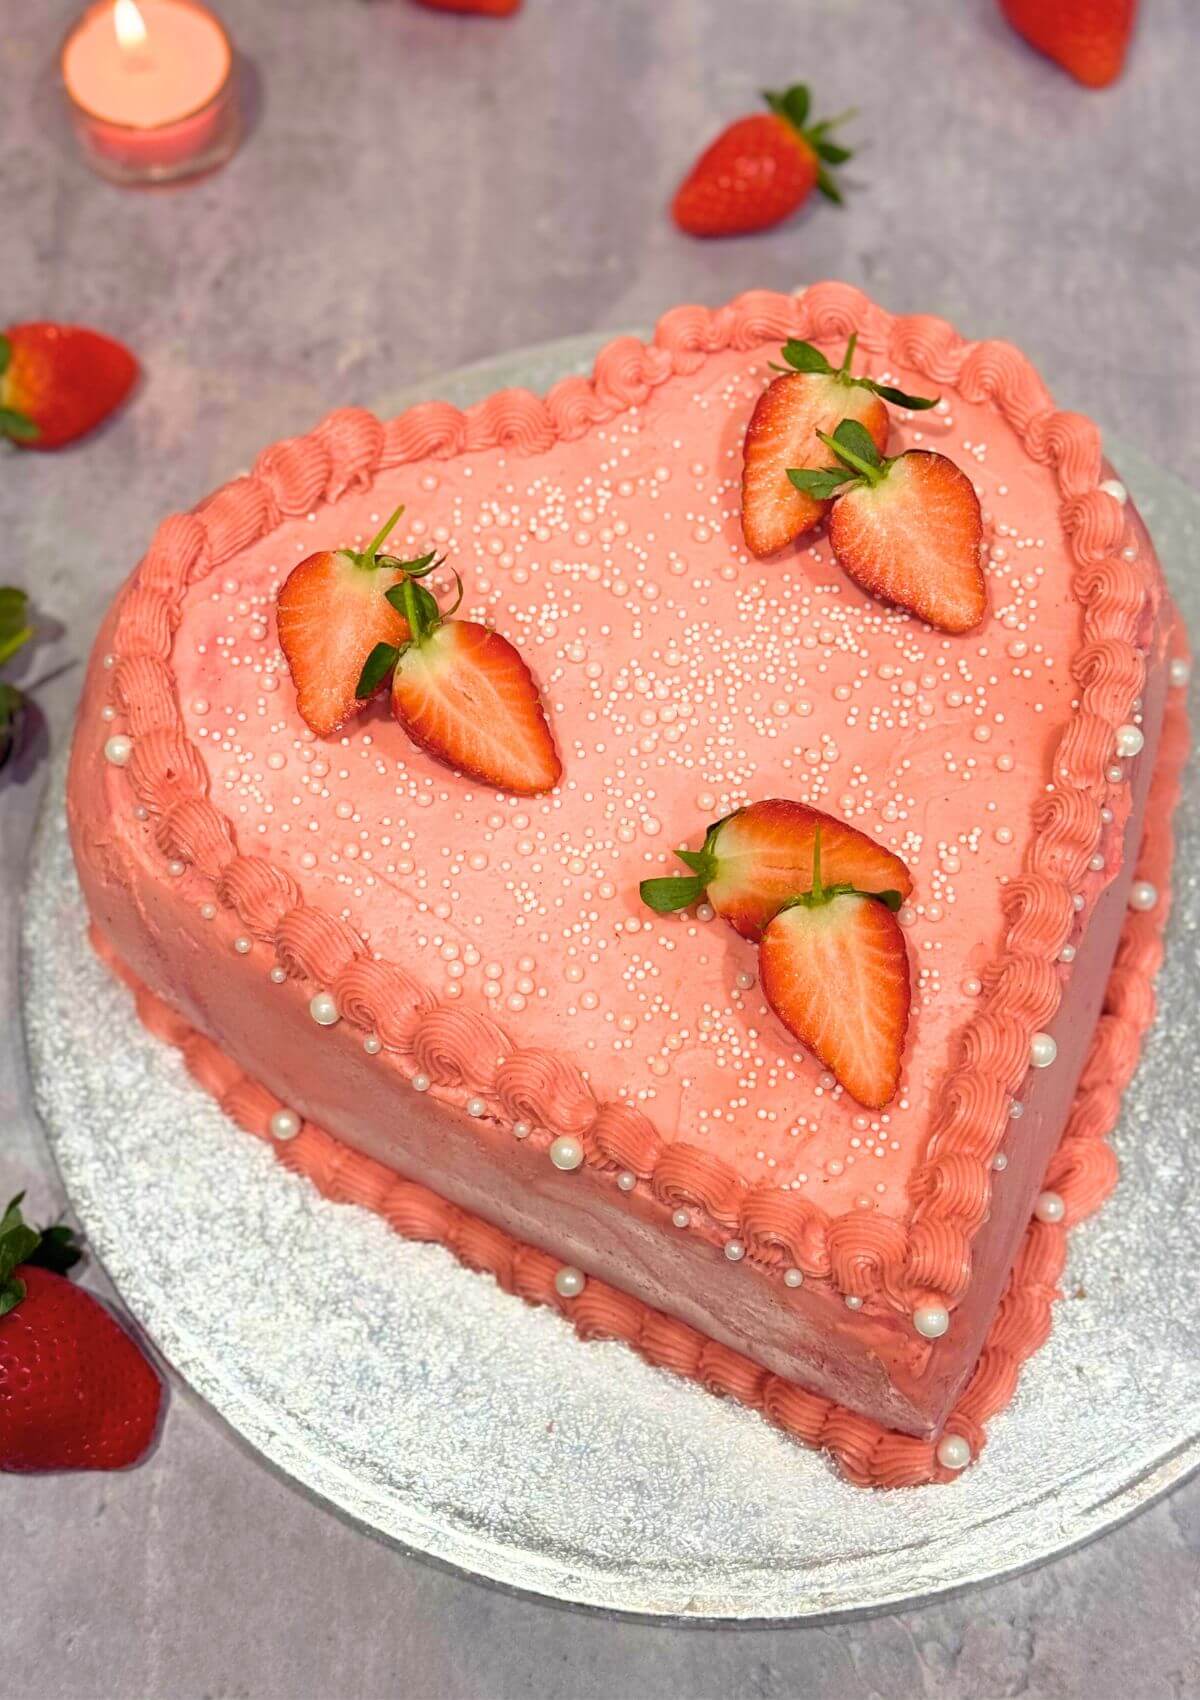
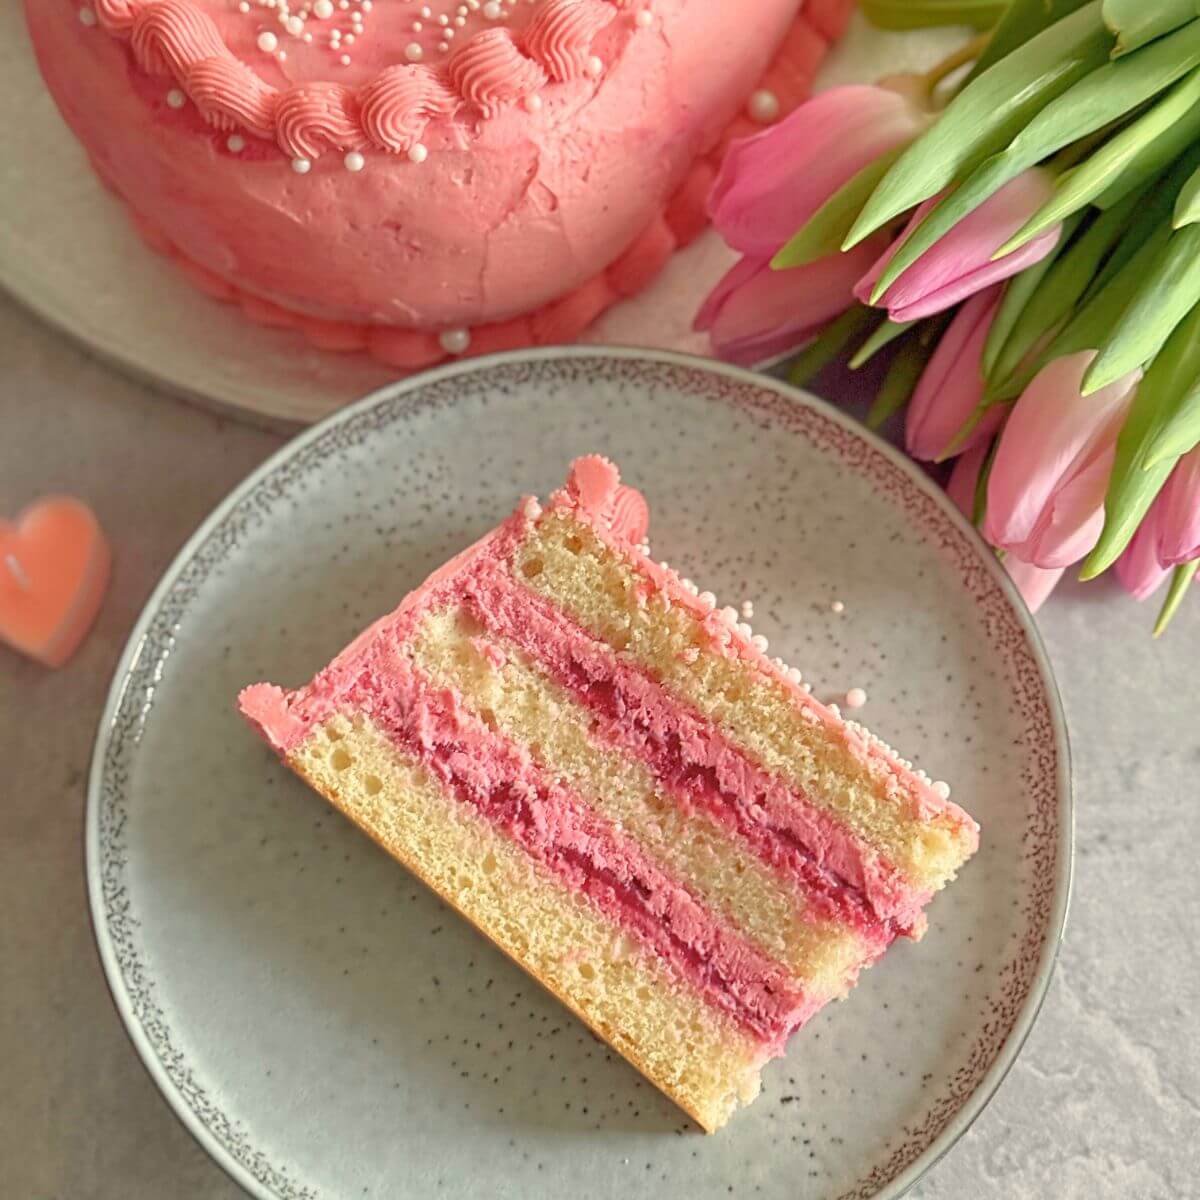
A heart-shaped cake is always a great idea! Perfect for Valentine's Day, anniversaries, or simply because, this Raspberry Heart-Shaped Cake is both simple and beautiful. With a fluffy sponge, tangy raspberry filling, and creamy buttercream, it's easy to make and looks amazing. Adding fresh strawberries and sugar pearls makes it extra special without much effort.
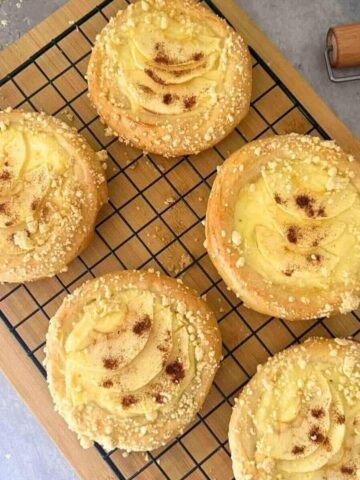
If you're looking for something simple yet impressive, try one of my reader favourites: my apple cake, packed with more apples than dough for a truly fruity bite. For a savoury appetiser, my baked gorgonzola pears pair wonderfully with a glass of wine, perfect for a cosy night in.
Jump to:
If fruity desserts are your style, my moist cherry cake is a must-try. For a lighter option, my quick yogurt cake recipe is ideal and won't weigh you down.
Finally, if you need a quick treat for your morning coffee, my easy one-egg lemon pound cake is both simple and delicious-it's a personal favourite for busy mornings!
💕Why You'll Love This Recipe
- Perfect for special occasions or as a thoughtful gift.
- The sponge cake is light and airy, making it a great base for the tangy raspberry filling.
- Simple ingredients and no complicated techniques.
- Customizable with your favourite decorations.
🥘 Ingredients
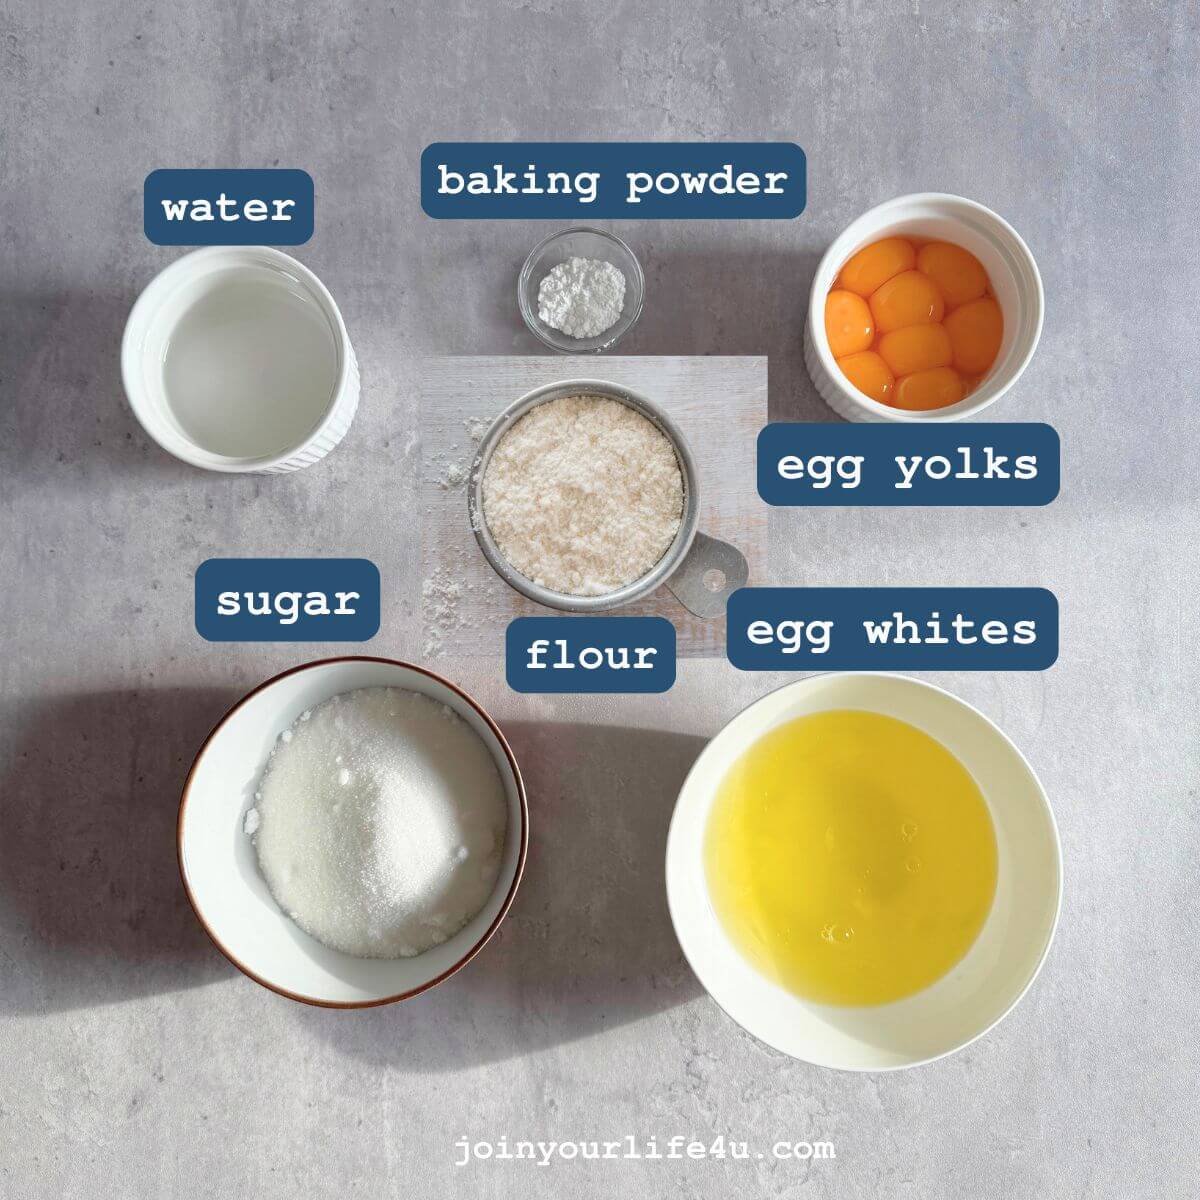
- For the Sponge Batter: Ensure all ingredients are at room temperature for optimal results. I've been making this sponge cake for over 10 years, and it has never let me down-light, airy, and so simple to prepare!
Raspberry Puree Ingredients
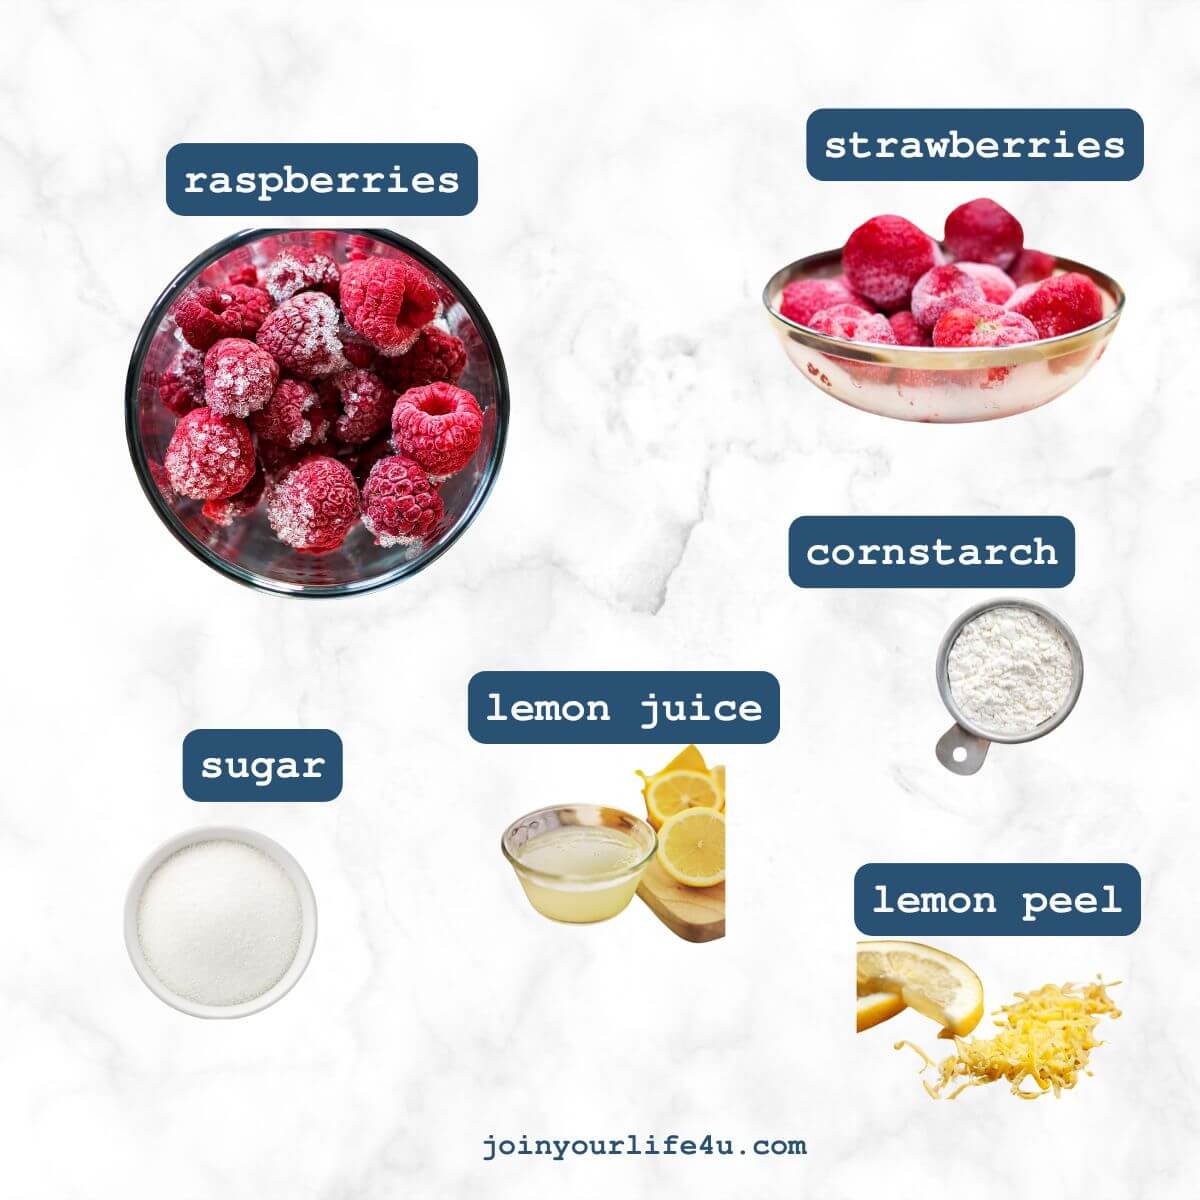
- You can use fresh or frozen fruits, and the results are just as good. This berry sauce is a go-to for me-I use it on pancakes, mille crêpe cake, and layered cakes. It's super refreshing, and I love that it's naturally sweet. Sometimes, I only add 1-3 tablespoons of sugar-talk about a low-sugar win!
Raspberry Buttercream Ingredients
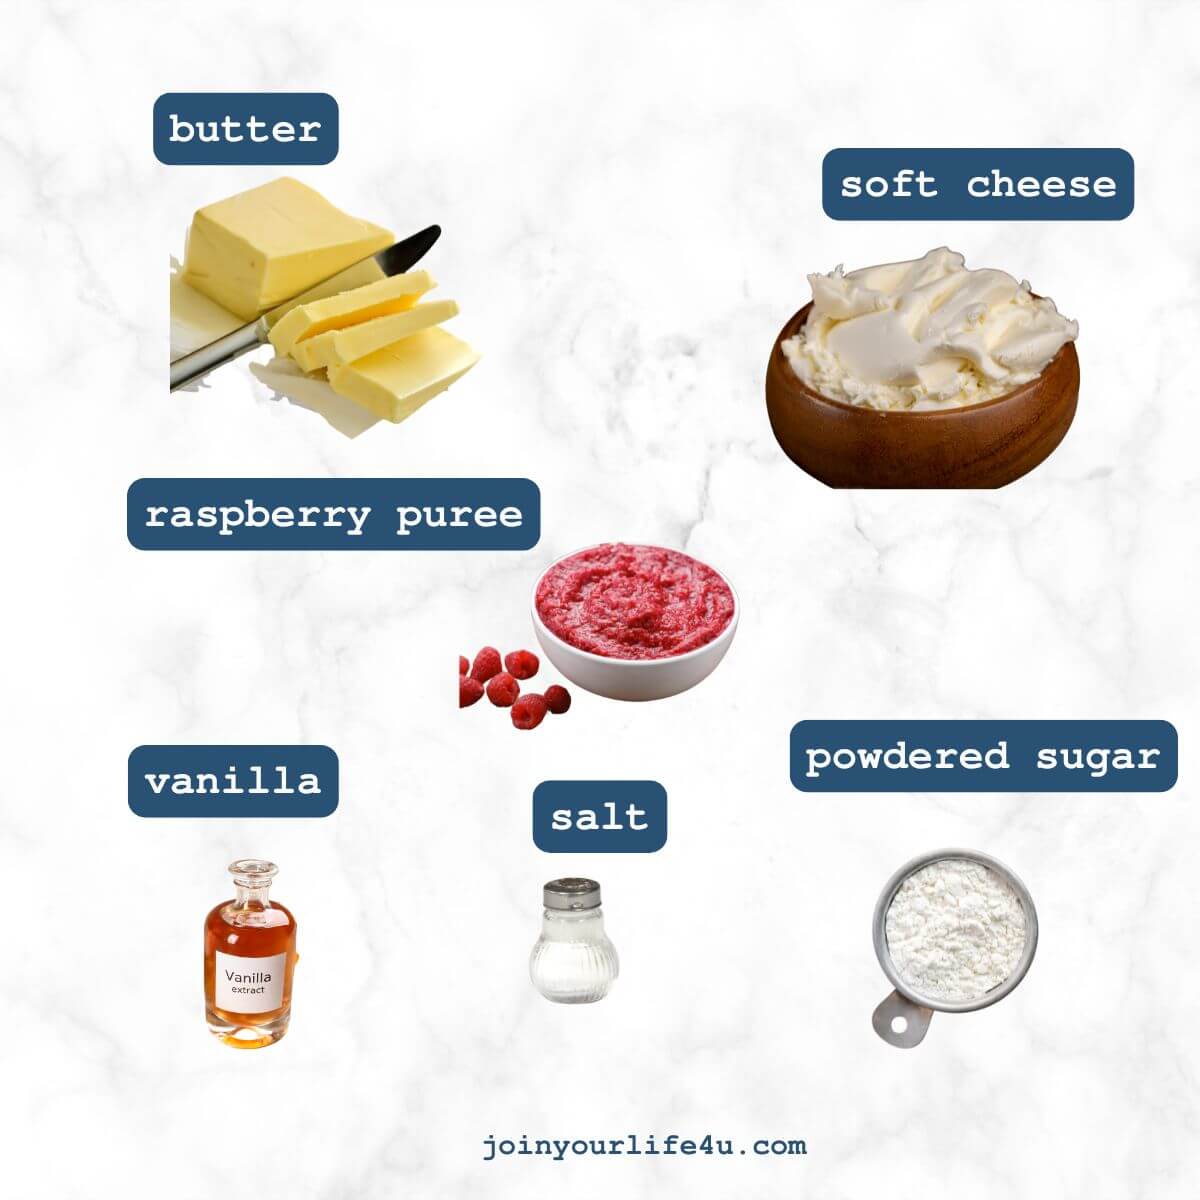
- I like my buttercream with a touch of cream cheese-it balances everything perfectly. I also avoid food colouring and stick to natural options. This time, it turned out amazing, both in colour and taste-just like in my layered lemon cake with lemon curd!
Syrup Ingredients
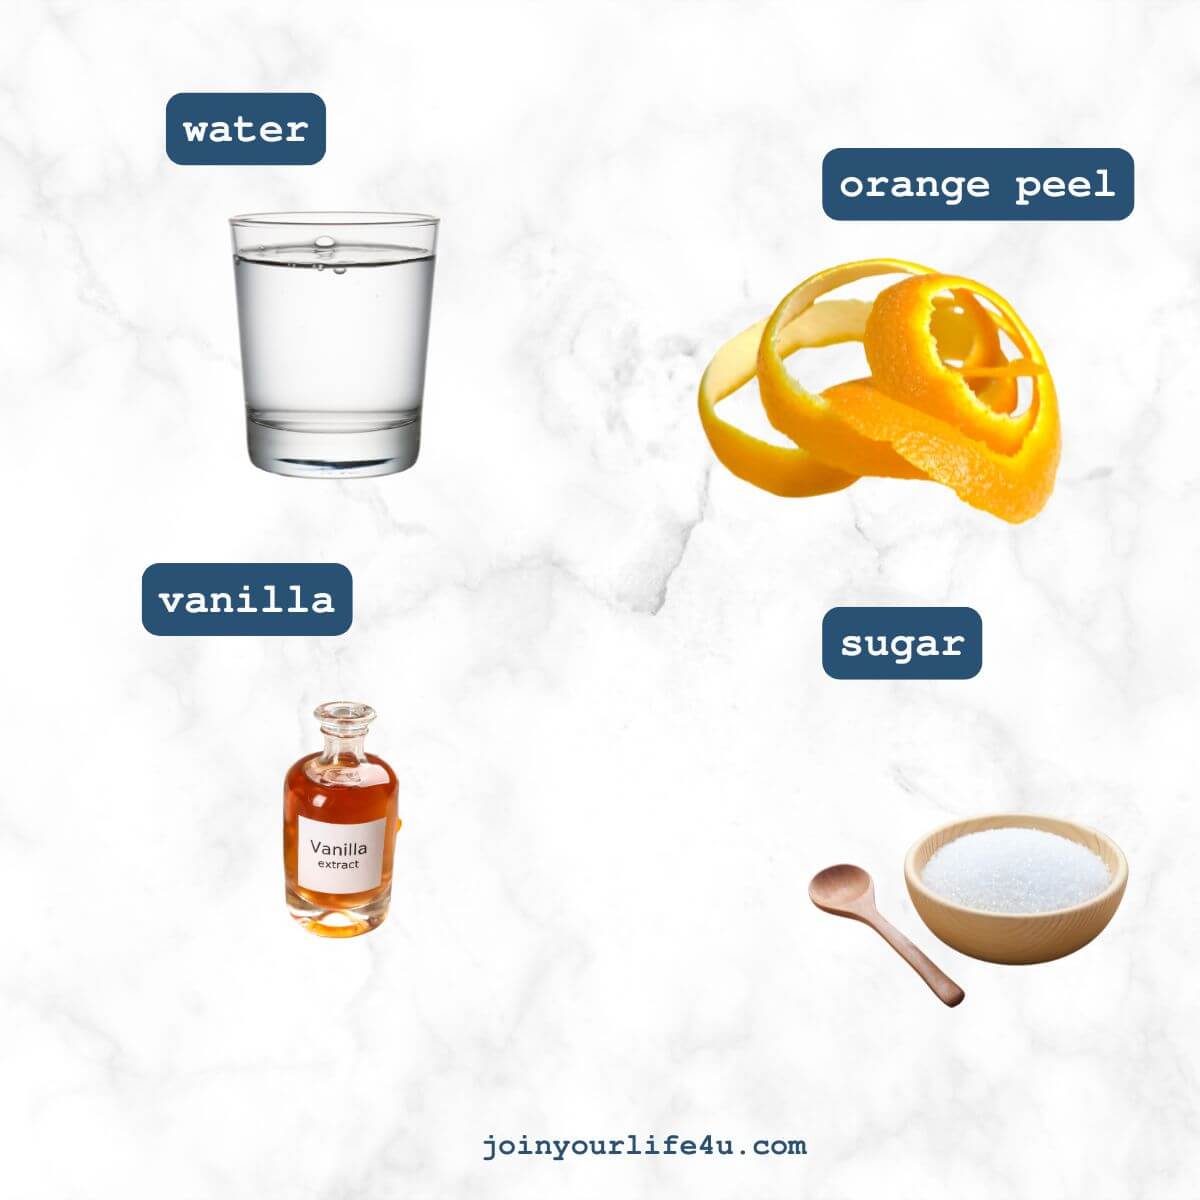
- I'm a big fan of moist cakes, so I always add syrup to keep them soft. I use just a little sugar for sweetness, with a hint of citrus-lemon, orange, or even clementines or tangerines-for that perfect fresh touch.
*See the recipe card for full information on ingredients and quantities.
♻️Substitutions
- Swap frozen raspberries and strawberries with fresh ones when in season.
- Use mascarpone cheese instead of cream cheese for a richer, more luxurious buttercream.
- Substitute orange peel with lemon peel in the syrup for a citrusy twist.
💡 Have a specific food allergy?
Click the buttons below to ask AI how to alter it for your diet!
📖Variations
- Skip the red food colouring if you prefer a natural pink tone.
- Add a layer of whipped cream between the cake layers for extra lightness.
- Use white chocolate shavings as decoration for a different look.
- Skip the buttercream and try this high-protein cream cheese topping instead. This healthier version needs no butter-just cream cheese and Greek yogurt!
👩🍳 How to Make Raspberry Heart-Shaped Cake
Start by prepping all your ingredients for the cake. Separate the eggs, measure the sugar, and sift the flour with the baking powder. Prepare your tools, such as the stand mixer and cake pan.
Having everything ready before you start makes the process smooth and stress-free. A little prep goes a long way in ensuring a successful cake! You may like to have a look at these recipes too: Valentine's Day dessert recipes from scratch.
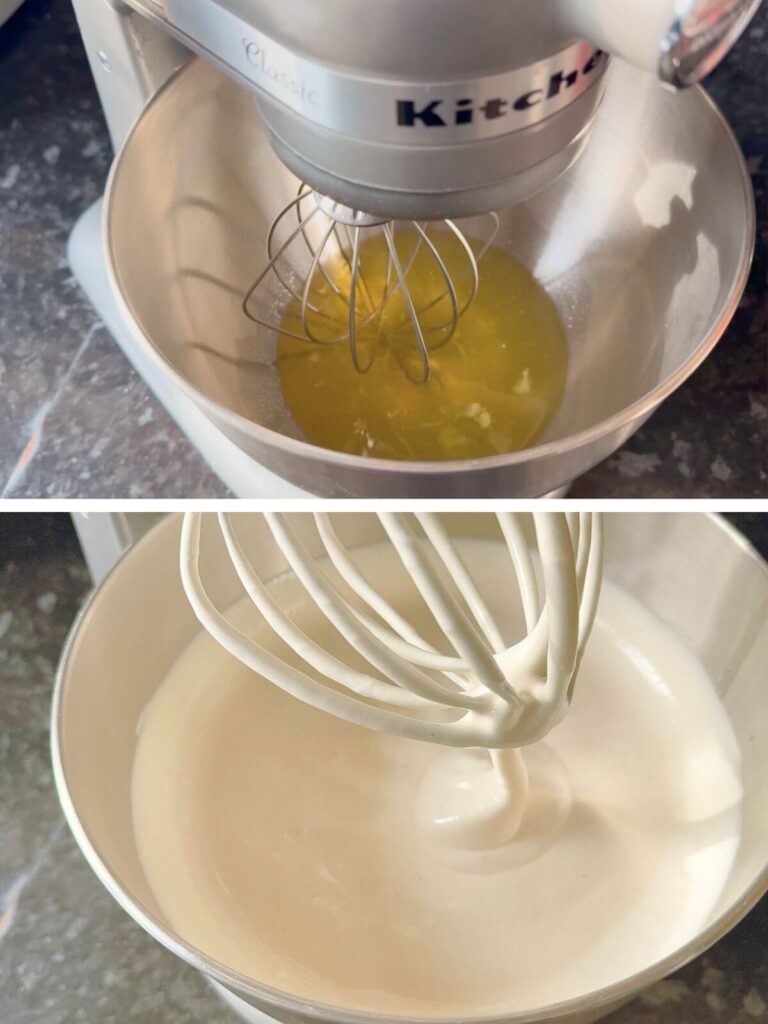
Step 1: Whip the egg whites to soft peaks using a stand mixer, gradually adding sugar until they are glossy.

Step 2: Add egg yolks one by one, gently fold in the dry ingredients, and keep the batter airy.
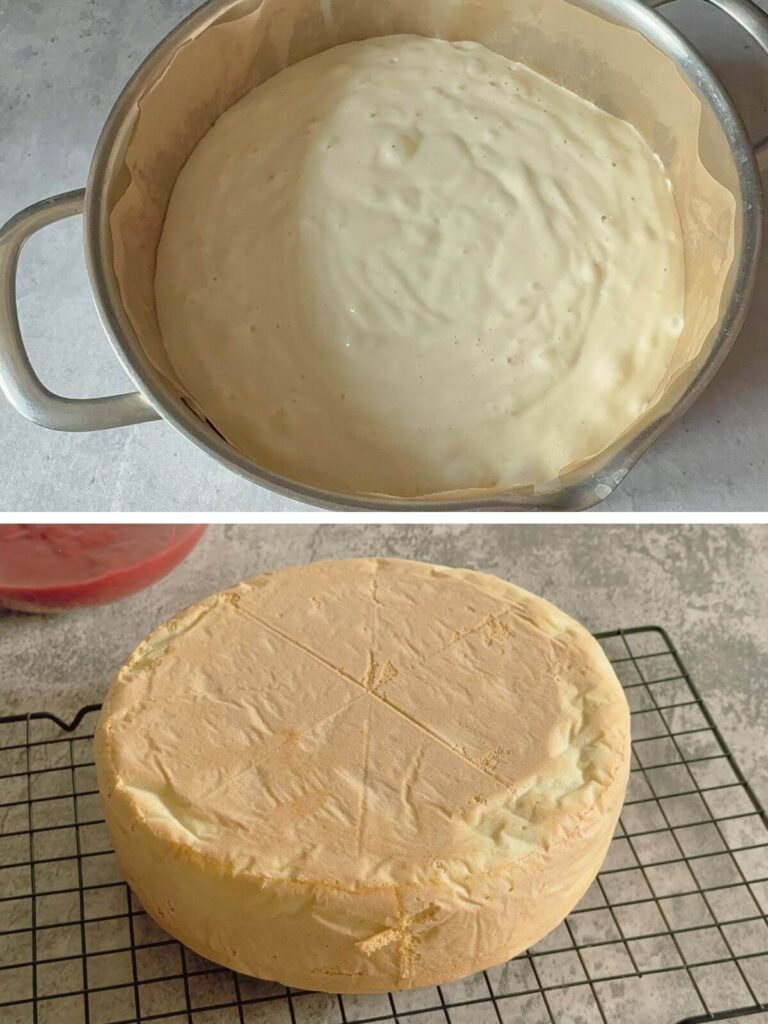
Step 3: Pour the batter into a prepared pan, bake until golden, and cool the sponge on a rack.
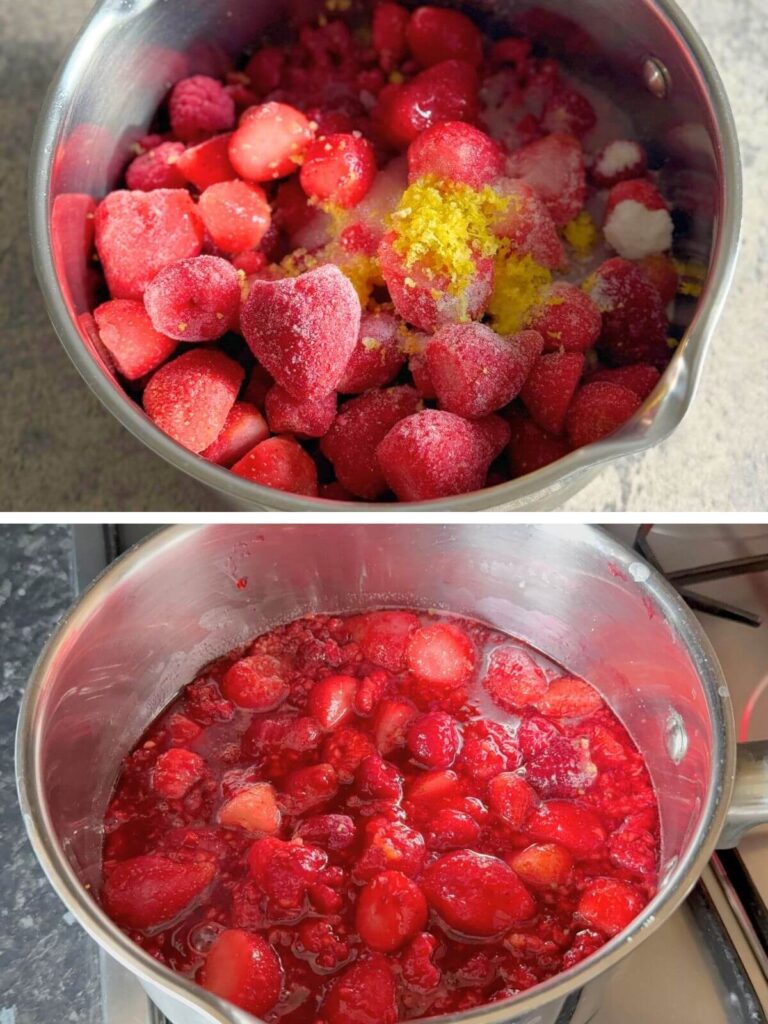
Step 4: Cook the berry puree ingredients in a saucepan, stir until thickened, and let it cool.
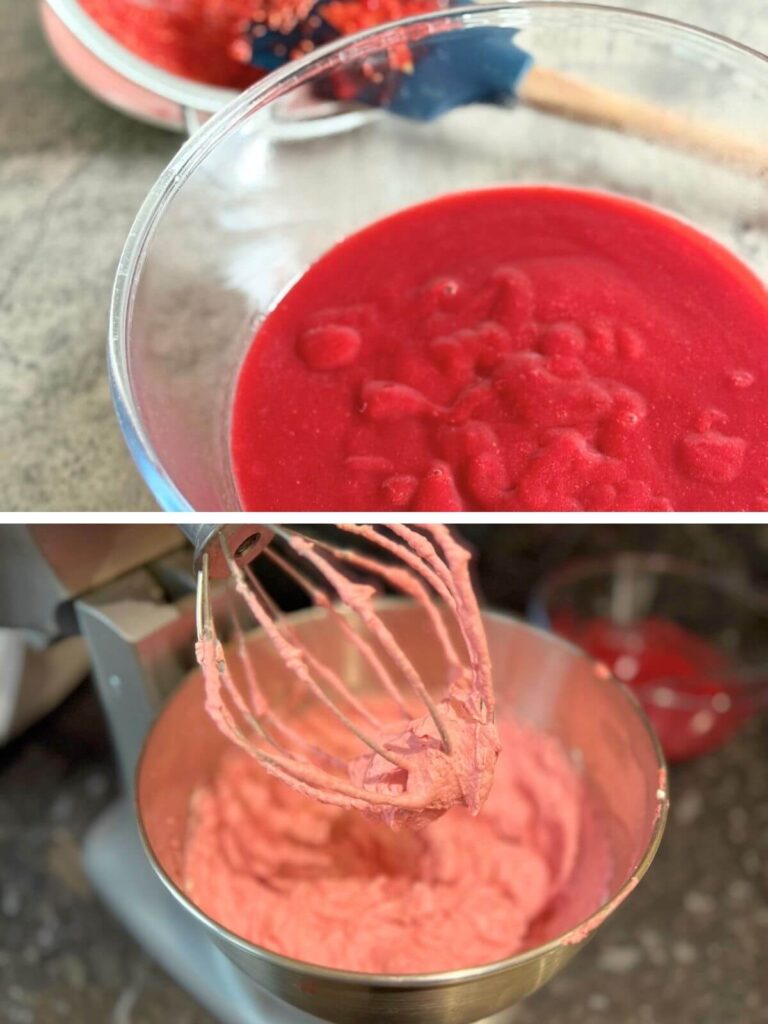
Step 5: Strain the puree to remove seeds for a smooth texture, then prepare the buttercream.
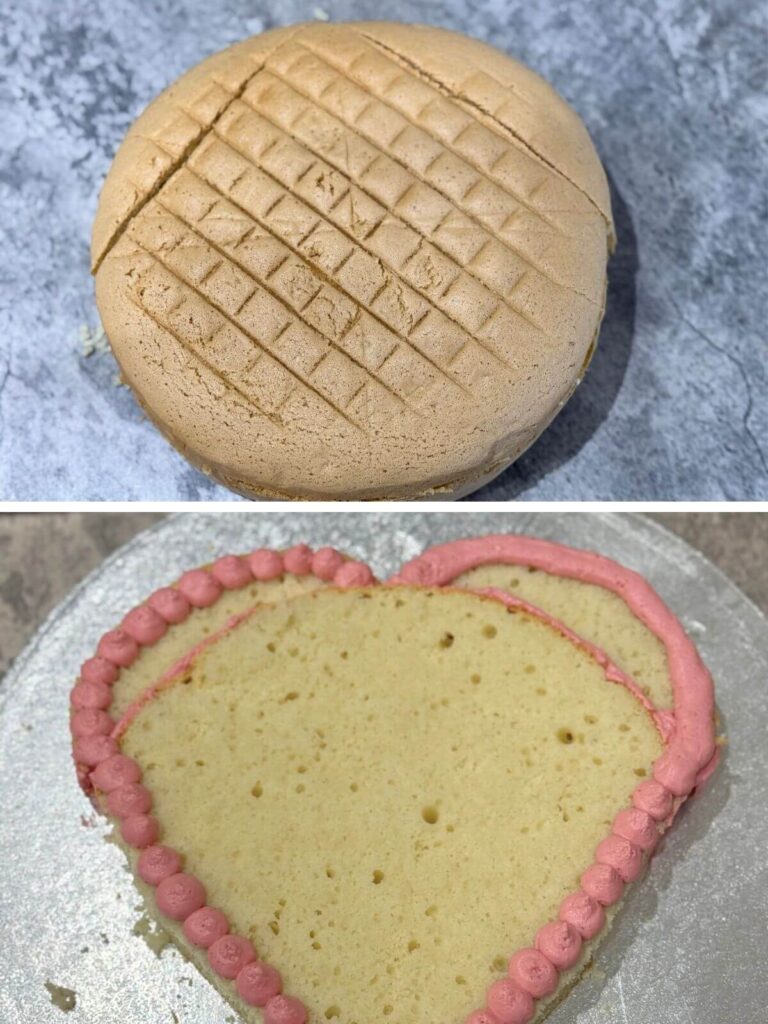
Step 6: Cut the sponge into a heart shape by trimming and attaching pieces with buttercream.
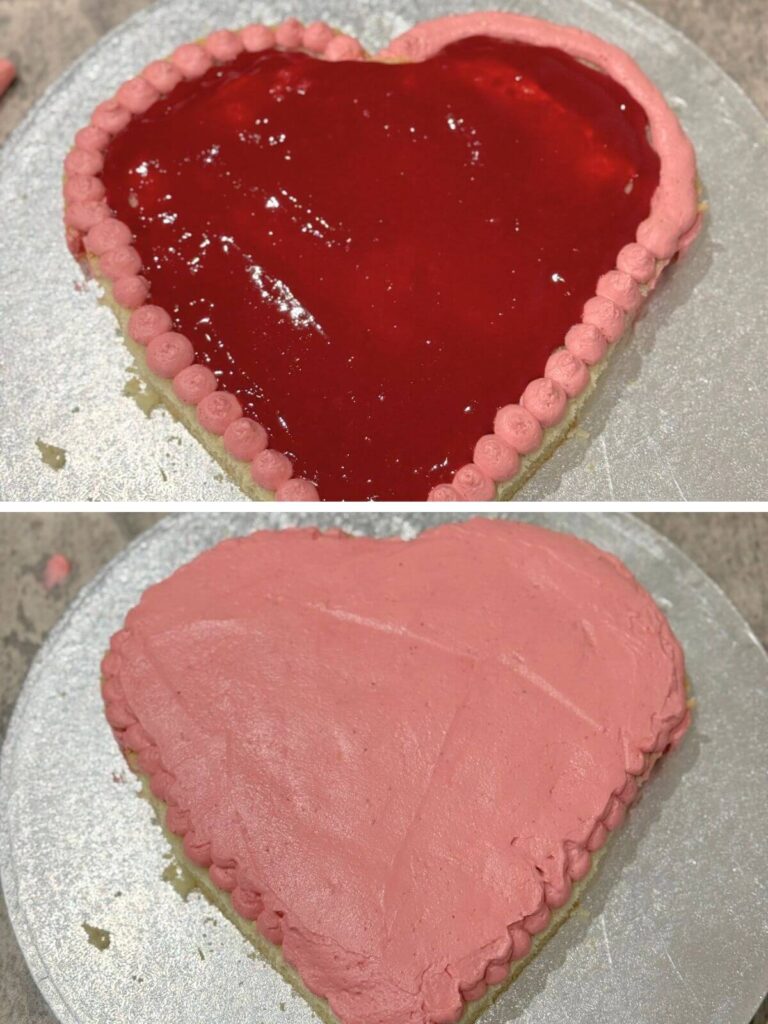
Step 7: Spread berry puree and buttercream on the first sponge layer evenly for flavour and stability.
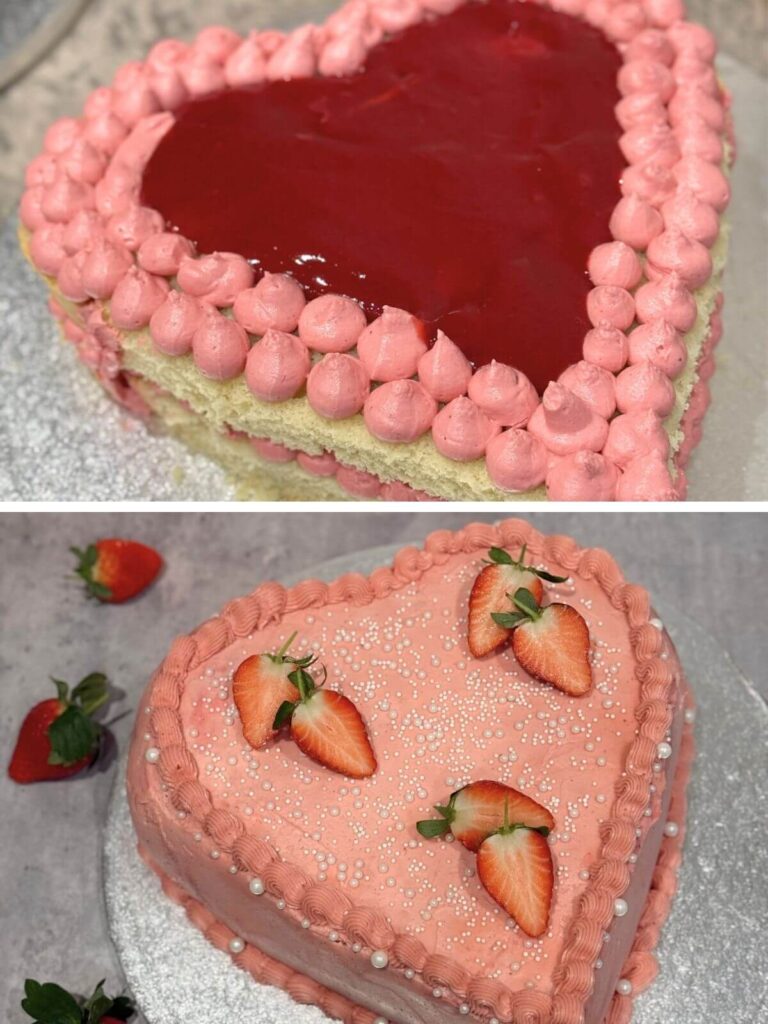
Step 8: Add the second layer, repeat the process, finish with buttercream, and decorate beautifully.
*A full list of ingredients and instructions can be found in the recipe card below.
💭Expert Tip
Use room-temperature ingredients for the sponge and buttercream to ensure smooth mixing and a light texture.
🧺Storage Tips
- Store the cake in an airtight container in the refrigerator for up to 3 days.
- Leftover slices can be frozen for up to 2 months. Wrap each slice in plastic wrap and place in a freezer-safe bag.
If you're planning a full Valentine's at home, pair your dessert with a treat from 30 Date Night Dinner Ideas for easy, romantic meals.
For a memorable morning after, 20+ Valentine's Day Breakfast Recipes has plenty of sweet and savory options to kickstart the day.
❓Raspberry Heart-Shaped Cake FAQs
Once the sponge cake has completely cooled, use a serrated knife or cake leveller to slice it into three even layers. To ensure the top of the cake is perfectly flat, trim off any excess cake for an even surface. To create the heart shape, start by cutting two triangular sections from the bottom of each round cake layer. These will form the pointed bottom of the heart. Next, take the curved sections you removed and reposition them at the top of the cake to create the rounded edges of the heart. Use a small amount of buttercream to stick the curved pieces securely in place, ensuring the heart shape holds together
Yes, fresh raspberries can be used in place of frozen ones for the puree. However, frozen raspberries are often more consistent in flavour and are available year-round. If using fresh raspberries, ensure they are ripe and sweet for the best results. Keep in mind that the moisture content may vary, so you might need to adjust the cooking time slightly when preparing the puree.
To prevent sogginess, it's important to apply a thin layer of buttercream around the edge of each cake layer before adding the raspberry puree. This creates a barrier that keeps the moisture from the puree from seeping into the cake. Additionally, ensure the puree is thickened properly during cooking and has cooled completely before spreading it on the cake layers.
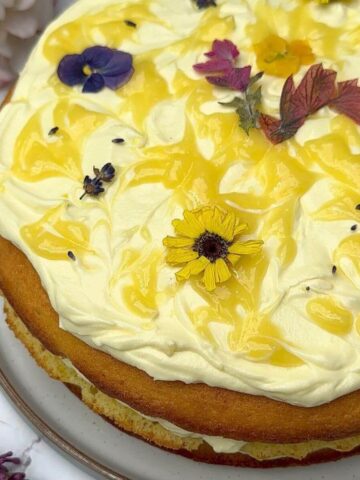
You can decorate it with fresh fruits like strawberries, raspberries, or maraschino cherries. For additional flair, try edible flowers, chocolate curls, white sugar pearls, or a dusting of powdered sugar. Customise the decorations to match the theme or occasion for a personal touch.
Related Recipes
Tried this recipe? Give it a star rating below! ⭐⭐⭐⭐⭐
HUNGRY FOR MORE? Subscribe to my newsletter and follow along on Facebook, Pinterest, and Instagram for the latest updates.
📖 Recipe

Raspberry Heart Shaped Cake
Video
Equipment
- Large star tip, no 32
Ingredients
For the Sponge Cake:
- 8 large eggs separated
- 1 cup granulated sugar
- 8 tablespoons cold water
- 2 ¾ cups all-purpose flour
- 1 teaspoon baking powder
- ½ teaspoon salt
For the Raspberry Puree:
- 12 oz frozen raspberries
- 12 oz frozen strawberries
- ⅓ cup granulated sugar
- 1 tablespoon lemon juice
- 2 tablespoons lemon zest
- ¼ cup water
- 3 tablespoons cornstarch dissolved in 3 tablespoons cold water
For the Raspberry Buttercream:
- 2 cups unsalted butter, softened
- 2 cups cream cheese, softened
- 2 tablespoons vanilla extract
- ½ teaspoon salt
- 1 cup powdered sugar
- ¾ cup raspberry puree
For the Syrup:
- 1 ¼ cups water
- Peel of an unwaxed orange
- 1 teaspoon vanilla extract
- 3 tablespoons granulated sugar
To Decorate:
- 3 fresh strawberries
- White sugar pearls
Instructions
- Prepare the Sponge Cake: Preheat your oven to 350°F (175°C) and prepare a 10-inch round cake pan by greasing it with butter or oil. Line the base with parchment paper to ensure the cake releases easily after baking.
- Separate 8 large eggs into whites and yolks. In a large mixing bowl, add the egg whites and ½ teaspoon of salt, then beat them with a stand mixer, using the whisk attachment, on medium speed until soft peaks form. Gradually add 1 cup (200 g) of granulated sugar, a tablespoon at a time, while beating continuously. Continue until stiff peaks form, meaning the egg whites are glossy and hold their shape firmly.
- Switch to the yolks and add them one by one to the whipped egg whites, mixing on low speed until fully incorporated. Next, mix in 8 tablespoons of cold water, one tablespoon at a time, ensuring the batter stays light and airy.
- Sift together 2 ¾ cups (330 g) of all-purpose flour and 1 teaspoon (5 g) of baking powder in a separate bowl. Gently fold the dry ingredients into the egg mixture in three batches using a balloon whisk. Be careful not to overmix, as this can deflate the batter and affect the cake's texture.
- Pour the batter into the prepared pan, smoothing the surface with a spatula. Bake for approximately 50 minutes, or until the top turns golden brown and a toothpick inserted in the center comes out clean. Allow the cake to cool completely in the pan before carefully removing it to prevent any cracks or breaks.
- Make the Syrup: In a small saucepan, combine 1 ¼ cups (300 ml) of water, the peel of 1 unwaxed orange, 1 teaspoon of vanilla extract, and 3 tablespoons of granulated sugar. Place the pan over medium heat and stir occasionally until the sugar dissolves.
- Once the mixture begins to simmer, reduce the heat slightly and let it cook for 5-10 minutes. This allows the flavors to infuse and the syrup to thicken slightly. Remove the pan from heat and set it aside to cool completely before using it to brush the cake layers.
- Prepare the Raspberry Puree: In a medium-sized saucepan, combine 12 oz (350 g) of frozen raspberries, 12 oz (350 g) of frozen strawberries, ⅓ cup (80 g) of granulated sugar, 1 tablespoon (12 g) of lemon juice, 2 tablespoons (5 g) of lemon zest, and ¼ cup (60 ml) of water. Heat the mixture over medium heat, bringing it to a gentle boil.
- Once boiling, reduce the heat to a simmer and cook for about 10 minutes, stirring occasionally to prevent sticking.
- To thicken the puree, dissolve 3 tablespoons (22 g) of cornstarch in 3 tablespoons of cold water, then stir it into the simmering fruit mixture. Continue cooking for a few minutes until the mixture thickens to a jam-like consistency.
- Use an immersion blender to puree the mixture until smooth. If you don't have one, just strain the puree through a fine mesh sieve to remove seeds, leaving you with a smooth, velvety sauce. Let the puree cool completely before using.
- Make the Raspberry Buttercream: In a stand mixer fitted with the whisk attachment, beat 2 cups (500 g) of unsalted butter and 2 cups (500 g) of cream cheese until smooth and creamy. Ensurethe butter is softened to room temperature for the best results.
- Add 2 tablespoons of vanilla extract and ½ teaspoon of salt, then gradually mix in 1 cup (100 g) of powdered sugar. Start on low speed to avoid a mess, then increase the speed to medium-high and whip the mixture until it becomes light and fluffy.
- Finally, add ¾ cup (200 ml) of raspberry jam to the buttercream and mix until fully incorporated. If you want a deeper pink color, add a drop or two of red food coloring and mix again until evenly distributed.
- Assemble the Cake: Once the sponge cake has cooled completely, use a serrated knife or a cake cutter leveller to carefully slice it into three even layers. To ensure the top of the cake is perfectly leveled, trim any excess cake for an even surface.To create a heart shape, cut two pointed sections at the bottom of each round layer. Take the curved pieces you removed and reposition them at the top to form the heart's rounded edges. Use a small amount of buttercream to adhere these pieces securely to the layers. (Check out the post for a step-by-step photo guide on cutting the cake into a perfect heart shape.)
- Generously brush each layer with the cooled syrup, ensuring the cake stays moist and flavorful.
- Fill a piping bag with the buttercream and pipe a ½-inch border around the edge of the bottom cake layer. Spread an even layer of the raspberry puree inside the buttercream border, followed by a thin layer of buttercream. Use a spatula to smooth out the buttercream, sealing in the puree.
- Place the second cake layer on top and repeat the process: brush with syrup, pipe the buttercream border, spread the puree, and seal with a thin layer of buttercream.
- Add the final layer of sponge on top. Brush it with syrup and apply a thin crumb coat of buttercream over the entire cake. This thin layer locks in any loose crumbs and creates a smooth surface for decorating. Refrigerate the cake for at least 1 hour to allow the crumb coat to set.
- Once chilled, take the remaining buttercream, which should be at room temperature, and apply a second, thicker layer to the entire cake. Smooth it with an offset spatula for a clean finish. Fill a piping bag fitted with a large star tip with the leftover buttercream and pipe decorative borders around the top and bottom edges of the cake.
- Decorate: Halve 3 fresh strawberries and arrange them attractively on top of the cake. Add a sprinkle of white sugar pearls for a touch of elegance and texture.
- Chill the assembled cake in the refrigerator for 30 minutes before serving. This step allows everything to set, making it easier to slice and serve.
Claudia Ciorteanu says
My family loved this!
Swathi says
Raspberry Heart shaped cake is so delicious my family asked me to make it again.
Sonja says
Such a pretty cake! Absolutely perfect for Valentines day. The little pearls as decoration really make it extra special. And it's so delicious with the creamy raspberry filling!
Nicole Kendrick says
My family loved this!
Liz says
SO fun, festive and most importantly, delicious!!!
Sonja says
This cake sounds absolutely delightful! With its moist and fluffy sponge layers, vibrant raspberry-strawberry puree, and that luscious buttercream, it’s a perfect balance of fruity and creamy. The heart shape and delicate decorations like sugar pearls and fresh strawberries make it extra special — ideal for a celebration or just to show someone some love. Plus, with clear step-by-step instructions, even beginners can create something that looks and tastes like it came from a professional bakery. Beautiful and delicious!
Juyali says
I made it for my niece’s birthday and she loved it—it was simple to put together and ended up looking like something from a bakery.
Andrea says
The filling was just the right amount of tangy, and layering it with the soft sponge and buttercream made the whole cake feel like something you'd pick up from a bakery.
Liz says
Such a beautiful, delicious cake!! It was SO fun to make and the whole family loved it.
Juyali says
This cake was amazing! The sponge was so light and airy, and the raspberry filling added the perfect tangy balance. Loved how easy it was to shape too!
Claudia says
My family loved this!
Sonja says
WoW! Such a pretty cake! I loved the trick of cutting and attaching pieces to get the heart shape. And the raspberry flavor was incredible!
Nicole says
This cake was absolutely delicious!! It was the perfect treat for my Galentines get together!!