
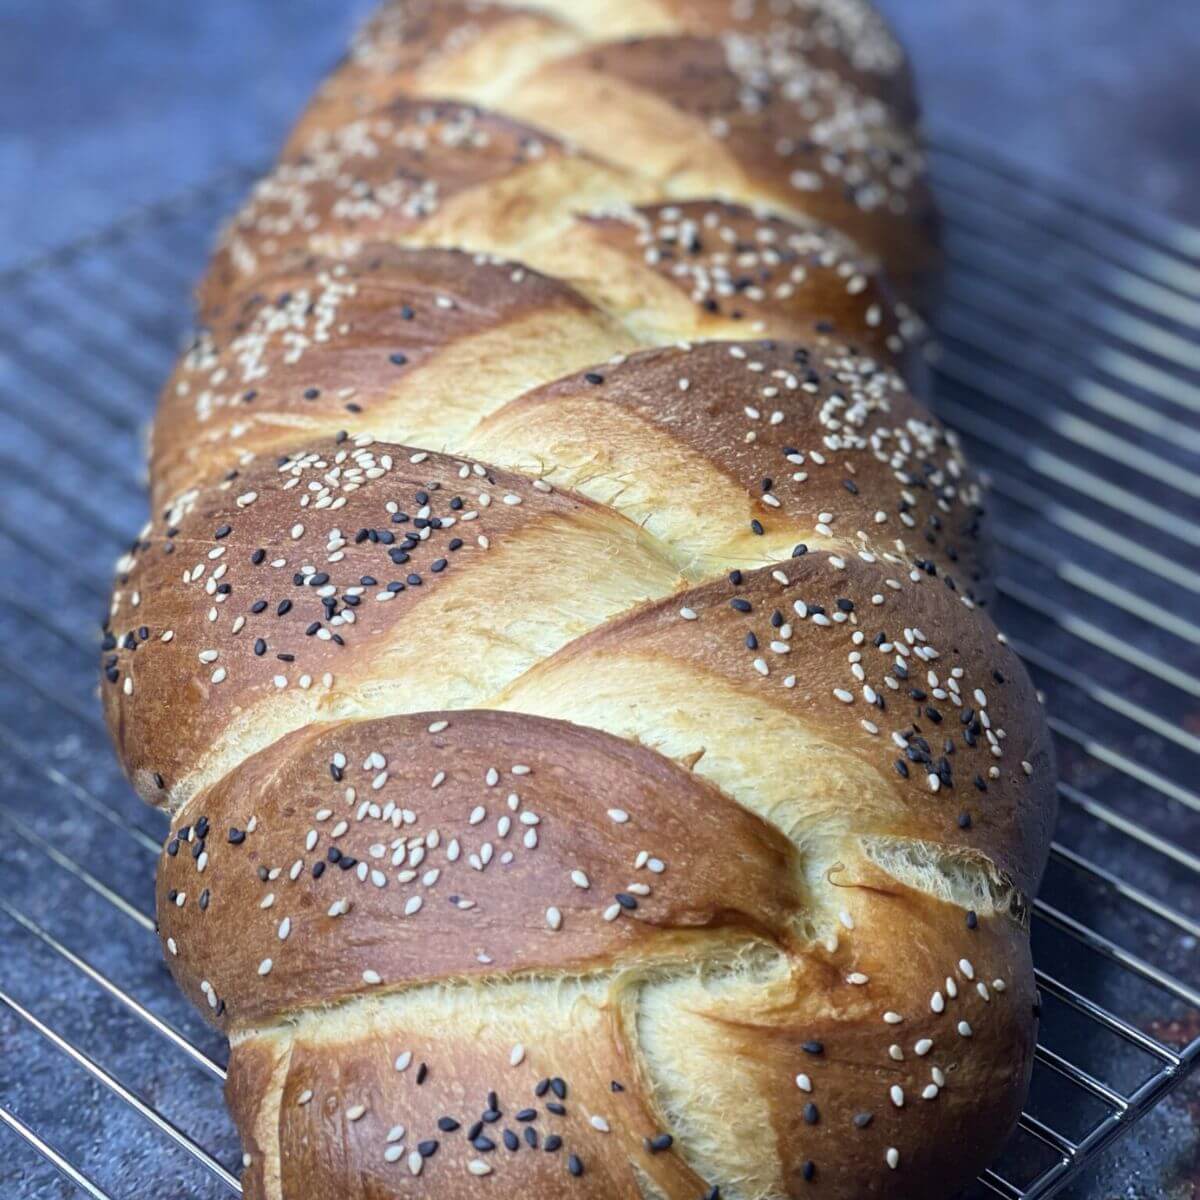
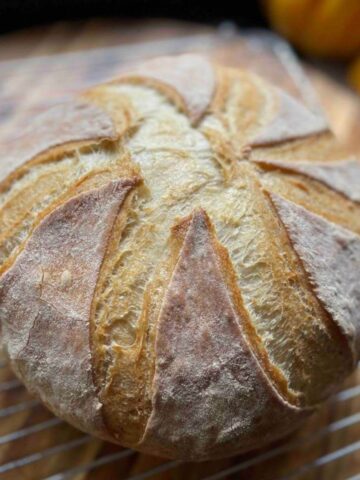
This is it: the easiest no-knead bread recipe you'll ever find! Discover a delicious, crusty loaf that requires only 3 ingredients (including yeast). Skip the traditional kneading process for a hassle-free, homemade delight that's perfect for every baker.

🧑🍳 Serves 8 | 🥖 3-Ingredient | ✨ No-Knead | ⏱ 2 Hrs Total Time
Jump to:
Krystle says:
![]() "I have wasted so many ingredients on homemade bread recipes that failed. This is SO easy and comes out perfect every time."
"I have wasted so many ingredients on homemade bread recipes that failed. This is SO easy and comes out perfect every time."
💗 Why you'll love this recipe
- Simple and convenient no-knead bread recipe with minimal ingredients. Just like this authentic Romanian house bread.
- Perfect for busy days and pairs well with any dish.
- Homemade, giving you control over ingredients for a healthier option.
- Loved by kids and is low in calories, making it a family favourite.
- Great make-ahead option-prepare, store, and reheat when ready!
🍞 Ingredients

*See the recipe card for full information on ingredients and quantities.
- All-purpose flour: You can choose bread flour as well for a stronger gluten structure and better rise, especially for chewy artisan loaves.
- Salt: Use kosher or sea salt for optimal taste.
- Dry yeast: Instant yeast is convenient and requires no proofing, while active dry yeast can be activated in warm water before being added to the loaf mixture.
- Warm water: Aids in activating the yeast, around 100°F or 38°C. Use a kitchen thermometer to ensure the water is at the correct temperature for yeast activation.
📋 Variations
- Whole Wheat: Use 250g whole wheat flour and 250g all-purpose flour for a balanced loaf. Increase water slightly (about 10-15ml) as whole wheat absorbs more moisture.
- Multigrain: Add 50g of a mix of rolled oats, flaxseeds, and sunflower seeds. Reduce the all-purpose flour to 450g to maintain the right consistency.
- Cheese and Herb: Mix in 100g grated cheese (cheddar, Parmesan, or Gruyere) and 2 tablespoon chopped fresh herbs (rosemary, thyme, or basil).
- Olive and Rosemary: Fold in 80g chopped Kalamata olives and 1 tablespoon fresh rosemary leaves.
- Cinnamon Raisin: Add 2 teaspoon ground cinnamon and 75g raisins to the dough. Optionally, sprinkle 1 tablespoon of the cinnamon-sugar mixture on top before baking.
- Garlic and Onion: Sauté 3 minced garlic cloves and 1 small diced onion until golden brown. Mix into the loaf mixture after cooling.
- Seeded: Incorporate 50g mixed seeds (sesame, flax, pumpkin, etc.) into the dough. Use an additional 1-2 tablespoon as a topping before baking.
- Sundried Tomato and Basil: Mix in 70g chopped sundried tomatoes and 2 tablespoon chopped fresh basil.
- Spiced: Mix 1 teaspoon each of cinnamon and nutmeg, or ½ teaspoon each of cardamom and ginger, into the mixture for a warm spice loaf.
👩🍳 How To Make 3-Ingredient No-Knead Bread
Start by prepping your ingredients for this no-knead bread recipe. Measure out the flour, salt, yeast, and lukewarm water. Having everything ready makes the process so much smoother and ensures your bread turns out perfectly!
A little prep goes a long way when it comes to baking a loaf! Serve it with my 30-minute chicken soup for the perfect meal combo.

Step 1: Mix the Dough: In a large bowl, create a well with bread flour. Add lukewarm water and sprinkle dry yeast over it. Gently mix and let it rest.
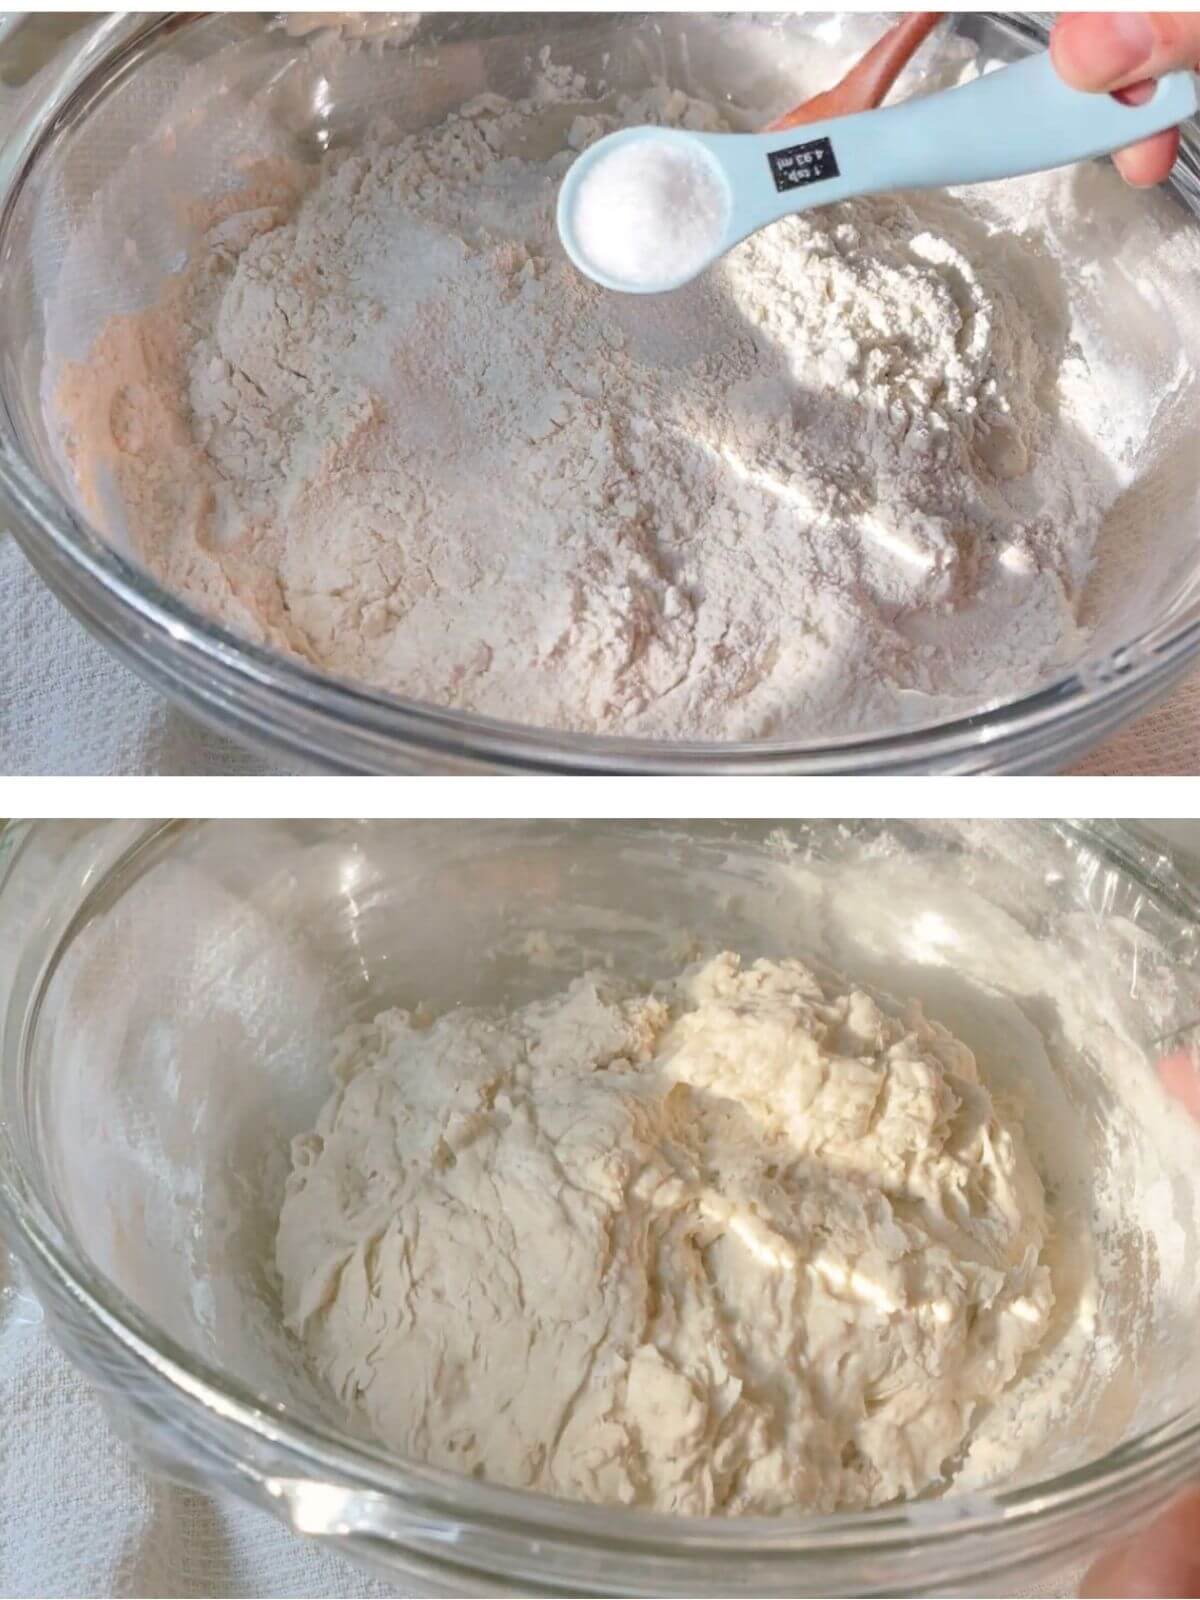
Step 2: Combine Ingredients: After resting, mix in the remaining flour, salt, and lukewarm water. Stir until a sticky, shaggy dough forms.
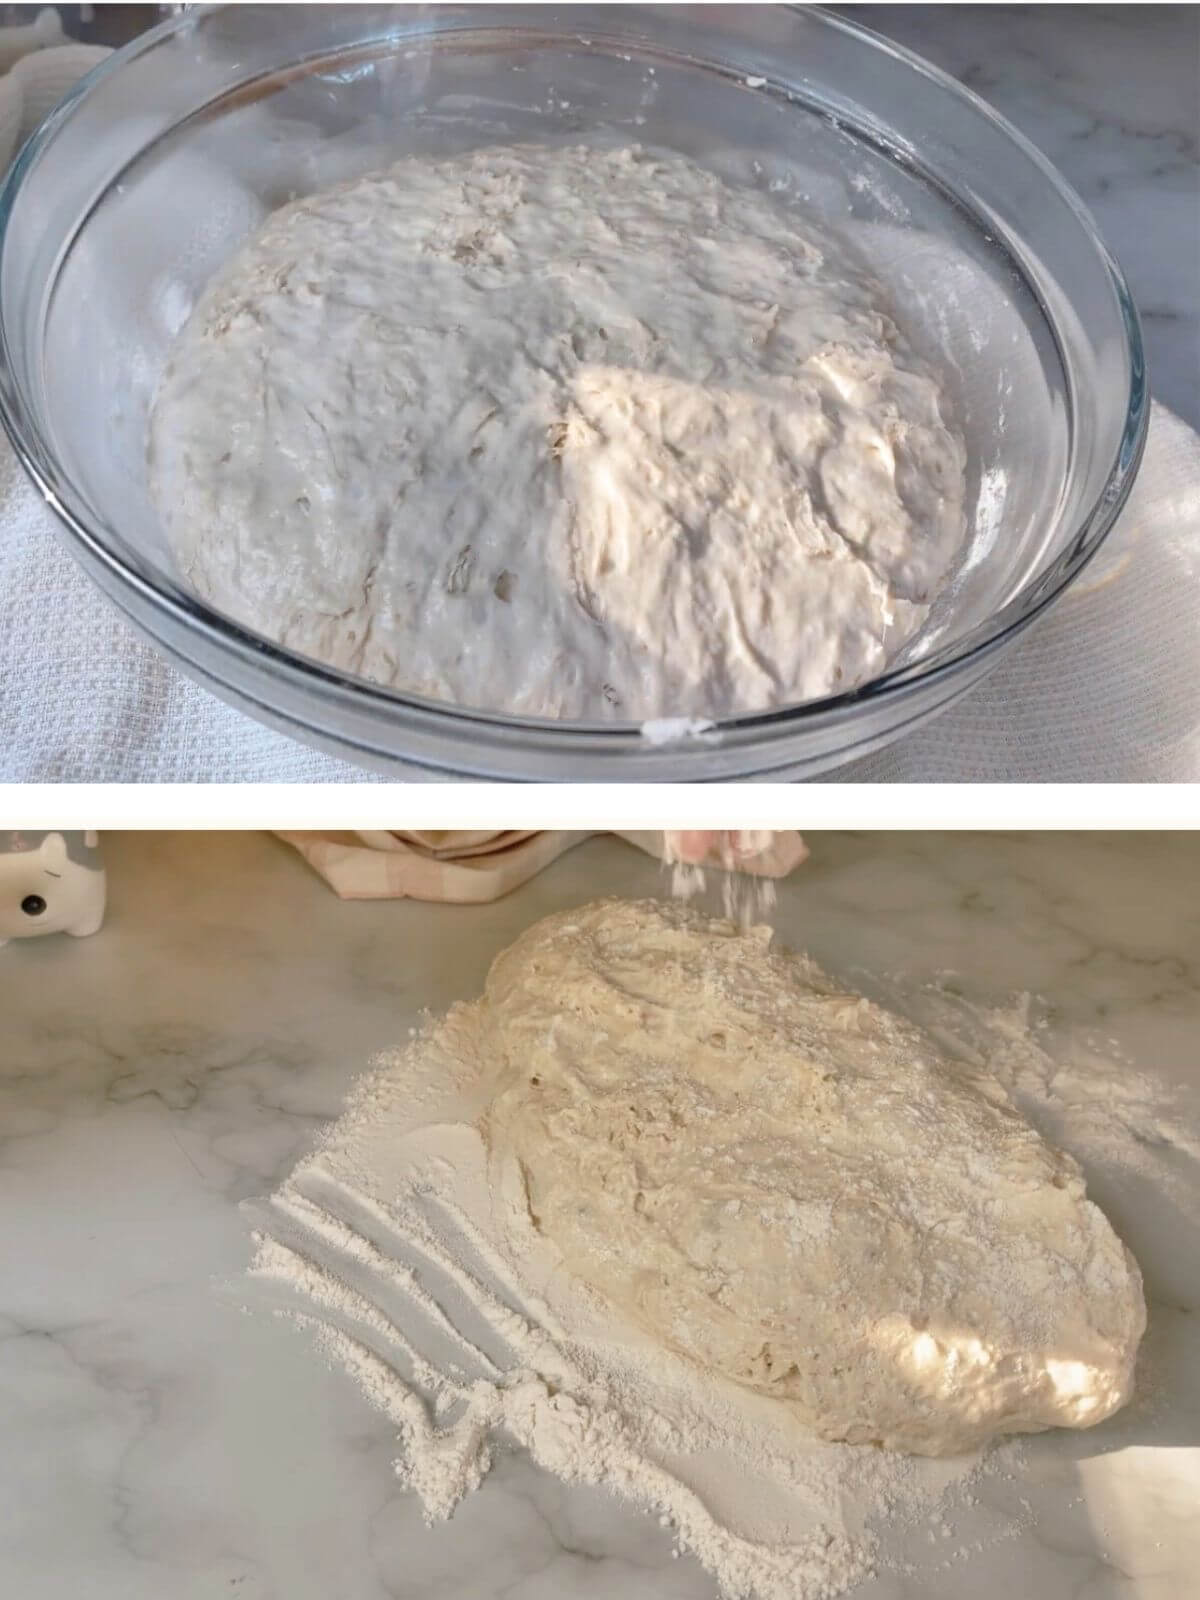
Step 3: Let It Rise: Cover the bowl with a towel and let the dough rise in a warm place until it puffs up and develops flavour.
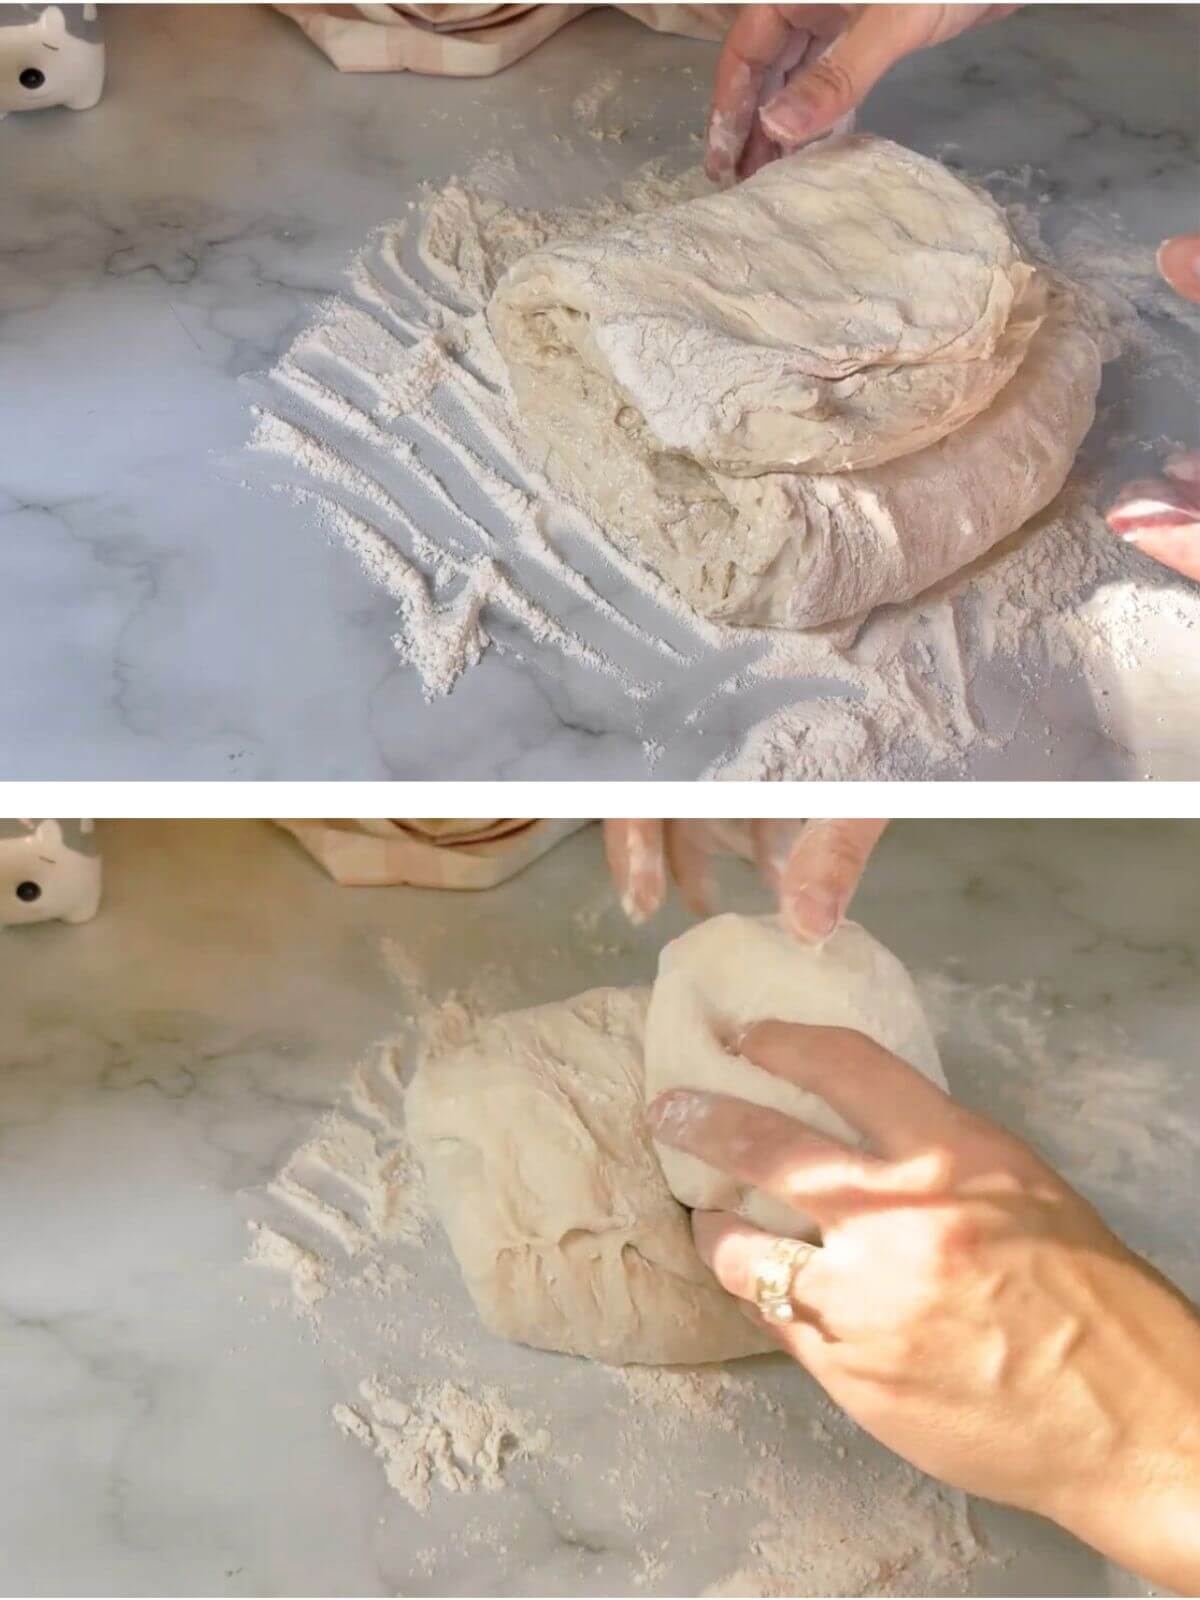
Step 4: Shape the Dough: Flour a surface and transfer the dough. Shape it into a loaf, folding the edges in for tension.

Step 5: Second Rise: Let it rise in a covered pot until it doubles in size. In the last 5 minutes, preheat your oven.

Step 6: Bake: Score the dough, then bake with the lid on. After 20 minutes, uncover and continue baking until golden. Let it cool before slicing.
*See the recipe card for detailed instructions.
💭 Expert Tips
- Patience Pays Off: Let the dough rest for an extended period, ideally overnight, to allow the gluten to develop naturally, resulting in a softer texture and better flavour.
- Achieving that Crust: For a perfectly crusty bread exterior, ensure you preheat your Dutch oven (or baking vessel) for at least 30 minutes to trap steam.
- Embrace the No-Knead Method: Resist the urge to knead the dough! Minimal handling preserves the airy texture and prevents the bread from becoming tough.
- Yeast Water Temp: Use lukewarm water (around 100°F or 38°C) to ensure proper yeast activation and a successful rise.

Storage: How to keep your no-knead bread fresh
When it comes to storing this no-knead bread, it's important to preserve its texture and freshness as much as possible. So, I thought to mention a few options:
- Bread Box: Use a bread box with a tight lid to keep the bread from drying out. Store it at room temperature for a few days.
- Plastic Bag: Place cooled bread in a resealable bag to avoid condensation. Squeeze out air, seal, and store at room temperature.
- Bread Bin: A bread bin with ventilation helps control moisture and keeps the bread fresh at room temperature.
- Freezing: Slice the cooled bread first and place it in a freezer bag. Freeze for up to 3 months. This makes it easy to grab individual slices whenever you need them. You can even toast slices straight from the freezer, so you'll always have fresh bread on hand.
Regardless of how you store it, the loaf tastes best within a few days of baking.
Pair this freshly baked 3-ingredient no-knead bread with a variety of meals for breakfast, lunch, or dinner:
- Breakfast: Enjoy it with a low-calorie cabbage frittata packed with veggies for a healthy start to your day.
- Lunch: It's perfect alongside an eggplant salad or my Romanian bean dip.
- Dinner: Serve it with an eggplant recipe for a unique combination. It also goes wonderfully with spinach and pepper chicken for a satisfying meal.
I love keeping things simple with ingredients that create delicious meals. Sharing homemade food with my family always makes the best memories.
❓ 3-Ingredient No-Knead Bread FAQs
This simple method uses a long, slow rise (autolysis) to develop the gluten and flavour without requiring any traditional kneading. It truly is the easiest way to make 3-ingredient no-knead bread!
The dough for a 3-ingredient no-knead bread recipe typically requires 12 to 18 hours of rising at room temperature. This long fermentation process enhances the bread's flavour and texture.
Yes! This no-knead bread recipe works well with both all-purpose and bread flour. You can also successfully substitute a portion of the all-purpose flour with whole wheat flour.
Common issues with a no-knead bread recipe include:
- Expired or inactive yeast.
- Water that is too hot kills the yeast.
- Cooler room temperatures slow fermentation.
- Incorrect flour measurements lead to a dense dough.
While a Dutch oven helps produce the best crust for this no-knead bread, you can use a shallow, oven-safe pot with a tight-fitting lid, or place a pan of water on the rack below the dough to create steam.
More Recipes You'll Love


Tried this recipe? Give it a star rating below! ⭐⭐⭐⭐⭐
HUNGRY FOR MORE? Subscribe to my newsletter and follow along on Facebook, Pinterest, and Instagram for the latest updates.
📖 Recipe

Easy 3-Ingredient No-Knead Bread
Video
Equipment
- Dutch oven with lid: Ideal for baking to achieve a crisp crust.
- Alternative: If you don't have a Dutch oven, use a shallow pot with a lid. For best results, the pot should be at least 9 inches wide and 4 inches high to allow the bread to expand properly.
- Kitchen scale (optional)
Ingredients
- 4 cups bread flour
- 2 teaspoons fine salt
- 1 teaspoon dry yeast
- 1 ⅔ cups lukewarm water around 100°F
Instructions
- In a large mixing bowl, add the flour and create a well in the center. Pour 100ml of lukewarm water into the well and sprinkle the yeast over the water. Gently mix the yeast and water, incorporating some flour from the edges. Let it rest for 10 minutes to allow the yeast to activate.4 cups bread flour, 1 teaspoon dry yeast, 1 ⅔ cups lukewarm water
- After 10 minutes, mix the remaining flour from the edges of the bowl, along with the salt and the remaining 300ml of lukewarm water. Mix well until a homogeneous dough forms. You can use a wooden spoon or your hands for this step. The dough will be sticky and shaggy.2 teaspoons fine salt
- Cover the bowl with a clean kitchen towel or plastic wrap and let the dough rest for about one hour in a warm place. During this time, the dough will rise and develop flavor.
- Once the dough has risen, lightly flour a surface and transfer the dough onto it. Gently shape the dough into your desired form, such as a round loaf or an oblong shape. You can fold the edges of the dough towards the center to create tension and a nice shape.
- Line a pot or Dutch oven with parchment paper and place the shaped dough into it. Cover the pot and let the dough rest for another 60 minutes. This second rise will help the dough further develop its structure.
- Preheat your oven to 250℃/480F.
- Once the dough has finished its second rise, use a sharp knife or a razor blade to score the surface. This will allow the bread to expand and form a beautiful crust during baking.
- Carefully transfer the pot with the scored dough into the preheated oven. Bake for 30 minutes with the lid on to create steam, which will help the bread rise and develop a crispy crust.
- After 30 minutes, remove the lid from the pot and reduce the oven temperature to 220℃/420F. Continue baking for an additional 20 minutes to allow the bread to develop a rich golden color.
- Once the baking is complete, remove the no-knead bread from the oven and carefully transfer it to a cooling rack. Allow it to cool for a few minutes before slicing and enjoying your freshly baked no-knead bread.


Bev says
When I saw that this was a "no knead" bread I knew I definitely had to try this bread! And let me tell you, it did not disappoint! The flavor and texture were perfect! Will definitely be making this again...and often!
Swathi says
This no-knead bread is so easy to put together. I was looking for a bread recipe for our dinner, and this one turned out to be really good.
Krystle Smith says
I love how little effort it took, no kneading, just mix, wait, and bake. And the aroma filling the house while it was rising was impossible to resist.
Liz says
The easiest ever bread recipe! I can't wait to try some of the variations.
Claudia Ciorteanu says
My family loved this!
Juyali says
Indeed this recipe is perfect for beginners! Easy to follow and our bread turned out so so good. Thanks for another great recipe!
Liz says
This was the easiest bread I've ever made AND it was delicious!!! I'll be making it again soon!
Agnieszka says
I had no idea bread can be this easy! No kneading, no fuss. It made my house smell amazing, too.
Krystle says
I have wasted so many ingredients on homemade bread recipes that failed. This is SO easy and come out perfect every time.
Alexandra says
Homemade bread is one of my favourite things, and this is a delicious, simple recipe that produces the most perfect bread. I will make it again - thank you!
Nora says
This bread is awesome! So easy to make and really quick (for bread) 😀 ! I'll try it out this weekend! Thank you!
Andréa says
I love no knead bread, just because it's so easy to prepare. The crust with the airy inside are just perfect. Thank you for sharing!